background image

14

QUICKCAT

MOWERS

®

PRE-OPERATION CHECK LIST

(OWNER’S RESPONSIBILITY)

___   Review and follow all safety rules and safety


decal instructions.

___   Check that all safety decals are installed and in 

good condition.  Replace if damaged.

___   Check to make sure all shields and guards 

are properly installed and in good condition.  

Be sure that either the discharge shield or 

complete vacuum attachment is installed.

___   Check that all hardware is properly installed.


and secured.

___   Check that equipment is properly and securely 

attached to power unit.

___   Check to be sure engine is free of dirt and


debris.  Pay particular attention to the cooling


fins, governor parts and muffler.  Clean air 

intake screen.  Check air cleaner; service if 

necessary.

___  Never allow riders.

___   Inspect area and remove stones, branches or


other hard objects that might be thrown, 

causing injury or damage.

___   Clean area around oil fill dipstick.  Remove 

dipstick and check to be sure oil is in operating 

range (between marks on dipstick).  Add oil if 

necessary but 

Do Not Overfill

.  Install dipstick 

assembly firmly until cap bottoms out on tube.  

Dipstick assembly must always be secured into 

fill tube when engine is running.

___   Check all lubrication points and grease as


instructed in manual.

___   Check hydrostatic fluid level.  Check to be sure 

cooling fins on hydrostat are clean.

___   Perform a functional check of the safety 

interlock system each time you operate the 

unit.

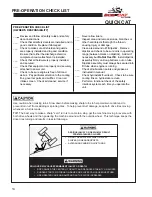
PRE-OPERATION CHECK LIST

SERIOUS INJURY OR DEATH MAY RESULT 

FROM MACHINE ROLLOVER

  • 

DO NOT OPERATE MACHINE ON STEEP 

SLOPES OR NEAR DROPOFFS

  • 

AVOID SHARP AND/OR QUICK TURNS


ROLLOVER MAY CAUSE PERMANENT INJURY OR DEATH.

  • 

ROPS RAISES THE CENTER OF GRAVITY AND REDUCES STABILITY ON SLOPES.

  • 

SUDDEN STARTS OR TURNS ON RAMPS OR SLOPES CAN CAUSE OVERTURN.

  • 

USE GREATER CARE ON RAMPS AND AS THE SLOPE INCREASES.


Use caution when making turns.


Slow down before making sharp turns to help maintain control and to 

prevent torn turf from skidding or spinning tires.  To help prevent turf damage, keep both drive tires moving 

whenever a turn is made.

TIP:  

The best way to make a sharp "zero" turn is to come to a stop, get the machine moving in reverse with 

both drive wheels and then powering the machine around with the outside wheel.  This technique keeps the 

drive tires turning and results in less turf damage. 

Summary of Contents for BOB-CAT QUICKCAT 912480

Page 1: ...OPERATOR S MANUAL PARTS MANUAL 4171262 www bobcatturf com MAN 4171263 Rev A 09 2014 912480 BC QUICKCAT FX651V KAW 48 SD 912520 BC QUICKCAT FX691V KAW 52 SD MOWERS ...

Page 2: ...tado de California hace saber que los gases de escape de los motores diesel y algunos de sus componentes producen cáncer defectos de nacimiento y otros daños en el proceso de reproducción humana L émission du moteur de ce matériel con tient des produits chimiques que l Etat de Californie considère être cancérigènes provoquer des défauts congénitaux et d autres dangers en matière de reproduc tion E...

Page 3: ...Follow all instructions and warnings completely Do not remove or defeat any safety features Make sure those who operate this machine are as well informed and careful in its use as you are See a Schiller Grounds Care Inc dealer for any service or parts needed Schiller Grounds Care Inc service ensures that you continue to receive the best results possible from Schiller Grounds Care Inc products You ...

Page 4: ...tions and or accessories should personal injury and or property damage result MODEL NUMBER This number appears on sales literature technical manuals and price lists SERIAL NUMBER This number appears only on your mower It contains the model number fol lowed consecutively by the serial number Use this number when ordering parts or seeking warranty information Located behind rider pad on frame of uni...

Page 5: ...rcentage of riding mower related injuries Those operators should evaluate their ability to operate the riding mower safely enough to protect themselves and others from injury Do not carry passengers especially small chil dren They may fall off and be seriously injured Keep warning labels and this operator s manual legible and intact Replacement labels and manuals are available from the factory Do ...

Page 6: ... Keep all fasteners such as nuts bolts and pins well secured Visually inspect blades blade bolts and the cutter assembly for wear or damage Replace worn or damaged blades and bolts to preserve balance Verify that machine and attachments if any are in good operating condition Do not engage blades until ready to mow Starting Start only according to instructions in this manual or on the machine Befor...

Page 7: ...severe injury or death All slopes require extra caution Do not mow on slopes if uneasy or uncertain Ultimate reponsibility for safe operation on slopes rests with the operator Do not mow excessively steep slopes With ride on machines including articulated steering machines mow up and down slopes not across except for zero turn machines Zero turn machines should mow across slopes With walk behind m...

Page 8: ... blades are sharp and can cut Use extra caution when handling Remove obstructions with care Wrap the blade s or wear gloves Be aware that rotating one blade on multiblade mowers can cause other blades to rotate Only replace blades Never straighten or weld them Keep other persons away from blades WARNING FUEL Gasoline and diesel fuels are flammable gasoline vapors are explosive Use extra care when ...

Page 9: ...ve mechanical lock is used Do not store the machine or fuel container near heating appliances with an open flame such as a water heater or an appliance with a pilot light Keep gasoline storage area free of grass leaves and excessive grease to reduce fire hazard Jump starting 1 Be sure the jumper cables are in good condition Turn off the ignition and all electrical accessories on both machines 2 Po...

Page 10: ...uina Mantener los protectores en su lugar y sus tornillos debidamente fijados Antes de limpiar ajustar o reparar este equipo apagar todos los mandos aplicar el freno de estacionamiento y apagar el motor Mantener las manos los pies y la ropa alejados de las piezas en movimiento No conducir como pasajero ni llavar pasajeros en máquinas sin asiento para ello Mantener a las demás personas alejadas dur...

Page 11: ...9 QUICKCAT MOWERS LABELS 4170653 TRANSPORT 4 1 2 1 3 4 2 1 4 3 1 4 3 3 4 23 4 4 1 1 2 2 2 1 2 3 3 1 2 4 1 4 TRANSPORT 4 1 2 4 3 2 3 1 2 2 1 2 1 1 2 1 3 4 2 1 4 2 3 4 3 1 4 3 3 4 4 1 4 4170988 ...

Page 12: ...10 QUICKCAT MOWERS LABELS SPRING LENGTH FOR WHEN INSTALLING NEW BELTS ONLY DO NOT READJUST AFTER USE 4171408 6 3 4 1 8 ...

Page 13: ... operation and provides service alerts Push and release MODE button to toggle between functions Provided service alerts include change engine oil and filter change hydraulic oil and service air filter When the service time is approaching an alert message will flash temporarily interrupting whatever mode the meter is in This will continue until the alert is reset When the service interval reaches 0...

Page 14: ...er points toward the operator The selector should be off when ever the machine is transported or stands unused for any length of time Shutting off the fuel supply avoids the possibility of flooding should any dirt get under the carburetor float needle Leaving the tank selec tor in either tank position can allow severe flooding which may ruin the engine by diluting the oil ON Fuel flows from the ta...

Page 15: ...form To open the bypass valves move the parking brake to any OFF position then lift and pull bypass control rod C through the large opening D until the control rod stop is past the opening Drop rod C into the small opening to lock in place Repeat for the other bypass control rod To close the bypass valves lift bypass control rod C allowing the control rod stop to retract through the large opening ...

Page 16: ...embly firmly until cap bottoms out on tube Dipstick assembly must always be secured into fill tube when engine is running ___ Check all lubrication points and grease as instructed in manual ___ Check hydrostatic fluid level Check to be sure cooling fins on hydrostat are clean ___ Perform a functional check of the safety interlock system each time you operate the unit PRE OPERATION CHECK LIST SERIO...

Page 17: ...E ENGINE 1 Turn the key to operate the electric starter to start the engine Release the key when the engine starts 2 If the engine does not start immediately do not crank for more than 10 seconds at a time Allow 60 seconds for the starter motor to cool down between starting attempts to prevent the starter motor from burning out 3 If the choke is ON when the engine starts gradu ally back it off unt...

Page 18: ...d a TRANSPORT speed Cut speed is limited to a maximum recommended speed to obtain a good quality cut Transport speed is limited to the maximum speed of the machine Decrease speed when traveling forward pulling the traction levers rearward slows the machine Stopping The machine will stop when the levers reach the neutral position Reverse movement To move the machine straight back pull both traction...

Page 19: ... or three rounds mow in the opposite direction left hand turns until finished If grass is extremely tall it should be mowed twice the first cut relatively high the second cut to the desired height Use the left side of the mower for trimming Choose cutting directions so that clippings are thrown onto areas that already have been cut This method results in the most even distribution of clippings and...

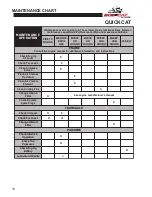
Page 20: ... l a n o i t i d d a r o f l a u n a m e n i g n e e h t t l u s n o C p U p o T k c e h C l e v e L l i O X s k a e L r o F k c e h C X e k a t n I r i A n a e l C n e e r c S X r e n a e l C r i A n a e l C r e n a e l c e r P X r e n a e l C r i A n a e l C t n e m e l E X s n i F g n i l o o C n a e l C X d n A l i O e g n a h C r e t l i F al u n a m s r e r u t c a f u n a m e n i g n e e e ...

Page 21: ..._____ ________________________________________________ ________________________________________________ L A R E N E G E T A D S R H E T A D S R H E T A D S R H E T A D S R H E T A D S R H E T A D S R H s e r u s s e r P e r i T k c e h C s t n i o P l l A e t a c i r b u L s t l o B s t u N k c e h C E N I G N E l e v e L l i O k c e h C l i O e g n a h C n a e l C t n e m e l E r e n a e l C r i ...

Page 22: ... nuts and bolts found loose Replace any broken or missing cotter pins Repair any other problems before operating Tire pressure Rear Tires should be kept inflated at 12 lbs in2 84kg cm2 Improper tire inflation can cause rapid tire wear and poor traction Uneven inflation can cause uneven cutting Front tires should be 15p s i 1 05 kg cm BATTERY AGM TYPE BATTERY SUPPLIED Battery acid is caustic and fu...

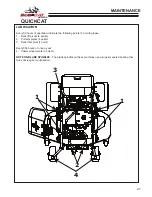
Page 23: ...nts 1 3 with grease 1 Deck lift pivots 4 points 2 Pull arm pivots 4 points 3 Deck idler pivot 1 point Every 500 hours or once a year 4 Caster wheel pivots 2 points NOTE ON BLADE SPINDLES The blade spindles on these machines use a superior sealed bearing that does not require re lubrication 1 1 2 3 4 ...

Page 24: ...rements 2 Wipe the filter base surface off and apply a film of new oil to the gasket of the new replacement filter Install the new filter by hand turn 3 4 to one full turn after the filter gasket contacts the filter base surface 3 Re install the filter guard and torque the three screws to 65 in lbs each 4 Remove cap C fill the transaxles through the expansion tank D with approximately 2 quarts of ...

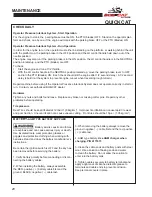
Page 25: ...ns DAILY 1 Check oil level with the dipstick 2 If oil is needed add fresh oil of proper viscosity and grade See engine manual for oil specifications Do not overfill 3 Replace dipstick before starting engine PERIODIC OIL CHANGES 1 See engine manual for oil and filter change inter vals after the break in period 2 Follow instructions for first oil change above SPARK PLUGS Remove each plug and check c...

Page 26: ...ass valve closed and the engine running slowly move the control levers in both forward and reverse directions 5 to 6 times 5 Stop engine Check the transaxle fluid level add fluid as required 6 It may be necessary to repeat steps 3 5 until all the air is completely purged from the system When the transaxle moves forward and reverse at normal speed purging is complete ENGINE COOLING Continued operat...

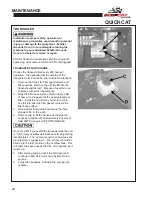
Page 27: ...p side toward the blade as shown the blade and the blade spacer 3 Install assembly on the blade spindle 4 Torque the blade bolt to 70 ft lbs BLADE REMOVAL Follow these instructions to prevent injury during blade removal 1 Loosen with a box wrench or a socket and long breaker bar To gain additional leverage slip a long pipe or thick walled tube over breaker bar or wrench 2 Insert wood block A as sh...

Page 28: ...r bearings and other components This can greatly reduce component life Do not use a pressure washer Do not direct water at bearings or seals High pressure water can blow past seals and enter sealed bearings Allow the machine to cool down before washing Water on a warm machine can be sucked into sealed bearings as they cool Avoid getting electrical connections wet Water can cause electrical faults ...

Page 29: ...oosen nuts on bolts G Move bolts in slot to remove slack in chain Tighten nuts on bolts G A 1 8 forward pitched deck provides the best horsepower A level deck provides the best quality of cut A 1 8 rearward pitched deck provides the best striping Certain grass types and conditions may vary HEIGHT OF CUT The height of cut is set by moving height of cut pin B to the hole designated for the height of...

Page 30: ...k lips have been provided on 48in 52 in and 61 cutterdecks for various grass types and cutting conditions To revise per conditions 1 Loosen the front bolts S 2 Adjust height of H 3 Retighten S once you have desired height Suggested heights for grass types Factory setting is all the way down Southern season grasses generally will work with the lip down When cutting Bahia grass or other grasses wher...

Page 31: ... adjust the parking brake linkage as follows 1 Move the machine to a flat horizontal surface 2 Move the parking brake handle to the OFF posi tion 3 Insure that the brake links K are rotated toward the rear of the machine If not remove cotter pin P from each brake link K and brake rod R Slide brake rod R out of each brake link K and Re insert rod R into each link K and secure with cotter pin P 4 Ti...

Page 32: ...lot of the control panel 4 Tighten the jam nuts A at the top and the bottom of the control rod B 5 Press the control lock rod D into the slot in the control and tighten nut C See FIGURE 2 To check 1 Start the engine and run at 1 2 throttle 2 With the LH control handle in the NEUTRAL po sition rotated up move the parking brake lever to PARK and turn the PTO Blades ON Each check should kill the engi...

Page 33: ...rse order 7 Cutterdeck spring will require tension adjustment after belt installation Adjust eyebolt so the dis tance between the inside of the eyebolt and the inside of the hook is 6 3 4 1 8 TRANSAXLE DRIVE BELT 1 Remove engine cutterdeck belt See cutterdeck belt above 2 To remove transaxle drive belt use a 3 8 ratchet and extension Insert ratchet extension in the square hole A of the transaxle i...

Page 34: ...SCHILLER GROUNDS CARE INC ONE BOB CAT LANE P O BOX 469 JOHNSON CREEK WI 53038 920 699 2000 www schillergc com Schiller Grounds Care Inc 2010 ...

Reviews: