background image

2


PART#-31600075 LIT-SDD4000-HVAC-S INSTALL REV.A

OPERATIONAL BEHAVIOR

Once properly modified and installed The SDD4004 pump cannot turn on while the sensor 
is connected and not installed properly in an operating duct. The “HVAC” icon on the display 
must be shown for fragrance to be dispensed.

MODIFICATION PROCEDURE

1.  Unpack the unmodified SDD4004 system.
2.  On the top of the SDD4004, remove the innermost of the 2 flathead Phillips screws 

directly above the fragrance output opening. This location will be used for the duct 
sensor connector. The original screw will not be reused. (FIG.1)

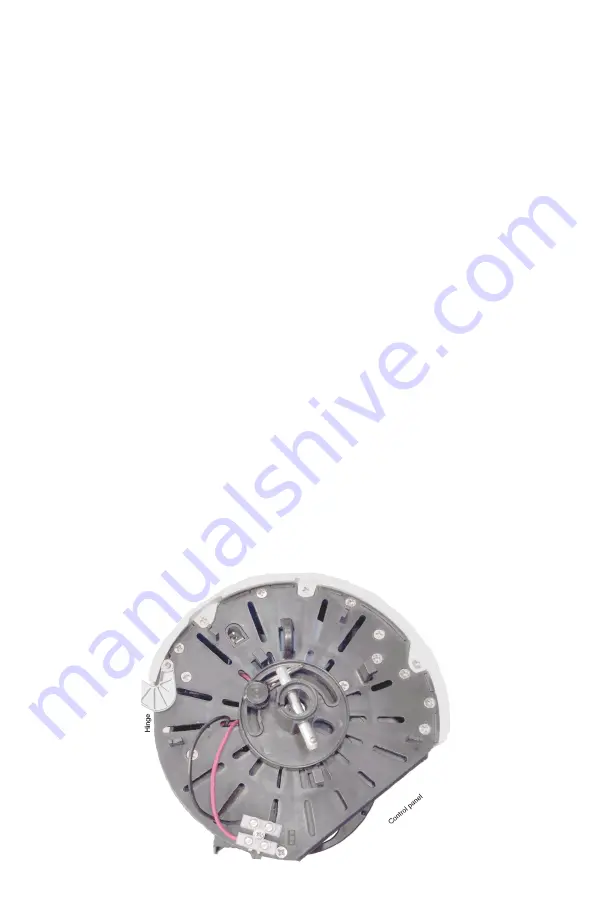
3.  Position the screw terminal connector (Part #11) on the top plate above the location 

where the original screw was located. Fasten the screw terminal connector to the 
machine with the ¾” screw (Part #7) from the kit. (FIG.1)

4.  Unlatch and open the door of the SDD4004 system to access the control panel.
5.  Use the #2 Phillips screwdriver to remove the 4 screws from the front plate of the 

control panel.

6.  Pull the control panel assembly away from the machine. Disconnect the electrical 

connectors from the back of the control panel. 


The power connector must be squeezed to release a latch, the other 2 can simply 
be pulled straight down while holding the board for support.

7.  Remove the 4 screws holding on the black faceplate from the old control panel with the 

screwdriver. Return the old control panel to ScentAir.

PARTS NEEDED

• 

1x SDD4004 


Power supply, brackets and 
installation hardware.

TOOLS REQUIRED

• 

1/4” Drill Bit

• 

Drill

• 

5/16” Drive Socket

• 

Phillips #2 screwdriver 

• 

Phillips #1 screwdriver

• 

Small blade (3.5mm) slotted 
screwdriver

Summary of Contents for ScentDirect HVAC-S

Page 1: ...rately PARTS INCLUDED 1 PVDF Tubing 6 x OD x 17 ID 30200189 x 6 both ends sealed 2 HVAC Adapter Cap 30400032 3 4x Self Tapping Screws 12x1 30210304 4 Duct Mount Assembly 5 3 Zip Tie 30217001 6 Replace...

Page 2: ...located Fasten the screw terminal connector to the machine with the screw Part 7 from the kit FIG 1 4 Unlatch and open the door of the SDD4004 system to access the control panel 5 Use the 2 Phillips s...

Page 3: ...the PCB box through the hole at the rear along with the other wire connectors Feed the wires through the slot in the fan housing FIG 2 11 Pass the wires up and out through the slot shown in the top o...

Page 4: ...wires are connected to the 2 pins on the control board The 3 pin connector on the control board will be left unused 15 Reattach PCB faceplate assembly to SDD4004 and secure with the 4 flathead screws...

Page 5: ...ing through DUCT MOUNT as shown FIG 4 6 Secure the tubing to the Duct Mount as shown using zip ties The opening must be just past the end of the metal rod and the tubing must be secure to allow the ro...

Page 6: ...itch 2 Find a location at least 5 times the diameter downstream from any elbows obstructions fans or any significant change in duct area For a round duct with a 10 diameter the insertion point needs t...

Page 7: ...together at the connector the red wire on the cable to the side of the connector with the red wire from the machine and tighten securely with a fine slotted screwdriver 9 IMPORTANT Check that the HVA...

Page 8: ...For further assistance please contact ScentAir Technical Services North America 1 704 504 2320 Europe 33 0 5 62 57 63 20 Asia 852 356 378 42 techservices scentair com...

Reviews: