12
FP-BA-e-1610
1. Cursor line:
point at the view point of the current curve, move the cursor…line by
pressing the
button
2. Force: value of curve spot that the cursor line points at
3. Time: time of curve spot that the cursor line points at. Unit: seconds
4. Save bit: if save bit is “0”, this means that the current view is the result curve just
now tested. If save bit is 1, 2 or 3, this means that the current view is the measuring
curve of the corresponding grid.
5. Curve located screen indication: this indicates the total pages of screen of the cur-
rent curve, and the locate screen of the current view. Press
button to flat screen
flip.
6. All button: If save bit is “0”, press this button to return to save interface (pic. 11)
If save bit is “1”, “2” or “3”, press this button to return to the curve view interface (pic-
ture 15)
7. Unit button: choose between 4 units, N, Kgf, lbf, ozf, and convert automatically
8. Exit button: press “Exit” to return to test interface
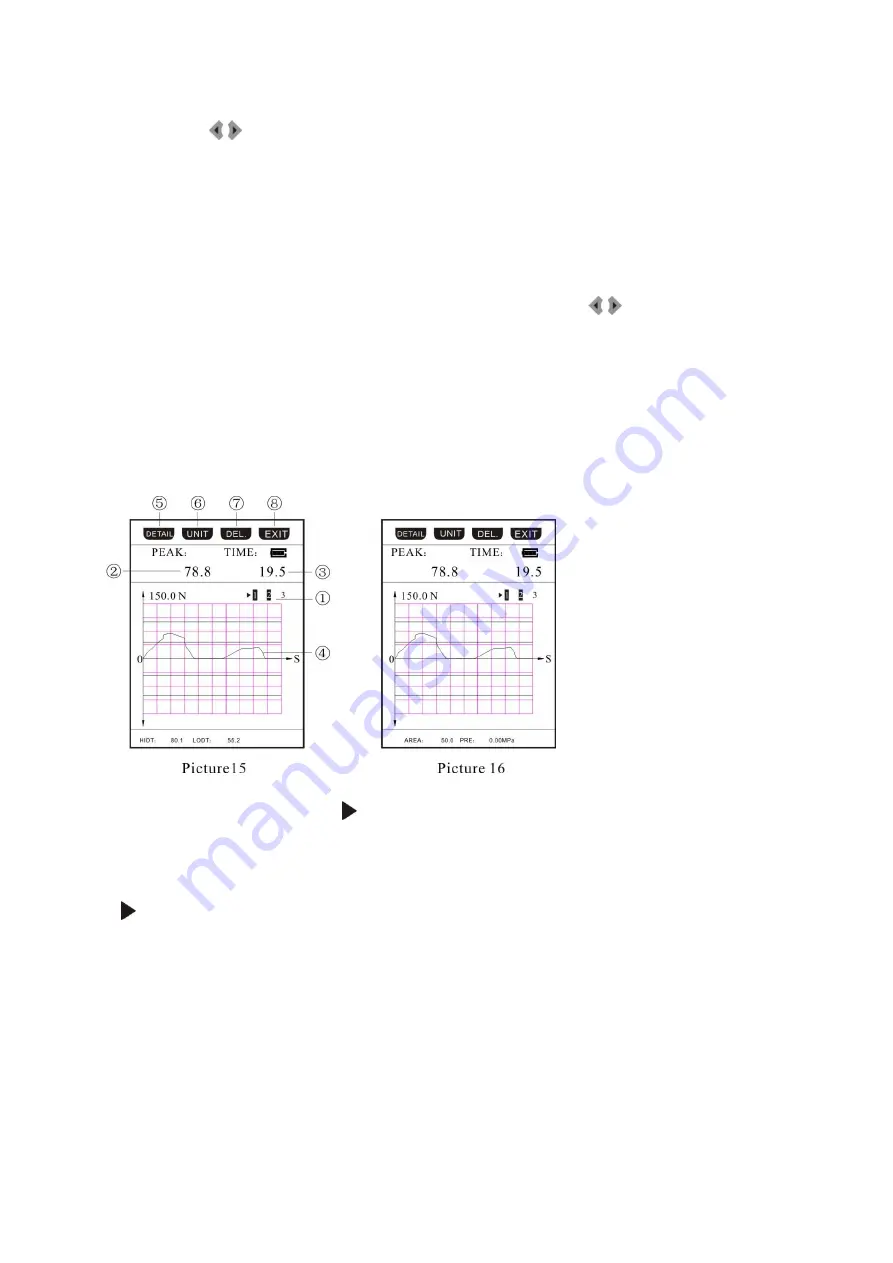
View curve interface:
Press “view” under the initial interface to get into the view curve interface. If there is
no curve button, you can use button.
1. Save bit:
If the front color becomes white, it indicates that the test curve is saved.
If the front color doesn’t becomes white, it indicates that no test curve is saved.
points to the current saved grid
2. Peak: max. force of the current saved test curve
3. Time: total time of the current saved test curve; unit: seconds
4. Test curve: the saved test curve
5. Detail button: pressing this button, you will get into interface to view the detail
Curve.
Unit button: choose between 4 units (N, Kgf, lbf, ozf) and convert automatically
7. Delete button: press this button to delete the curve in the current saved grid,
And front color doesn’t become white
8. Exit button: press this button to get back to the initial interface
9. Data view interface


