


55
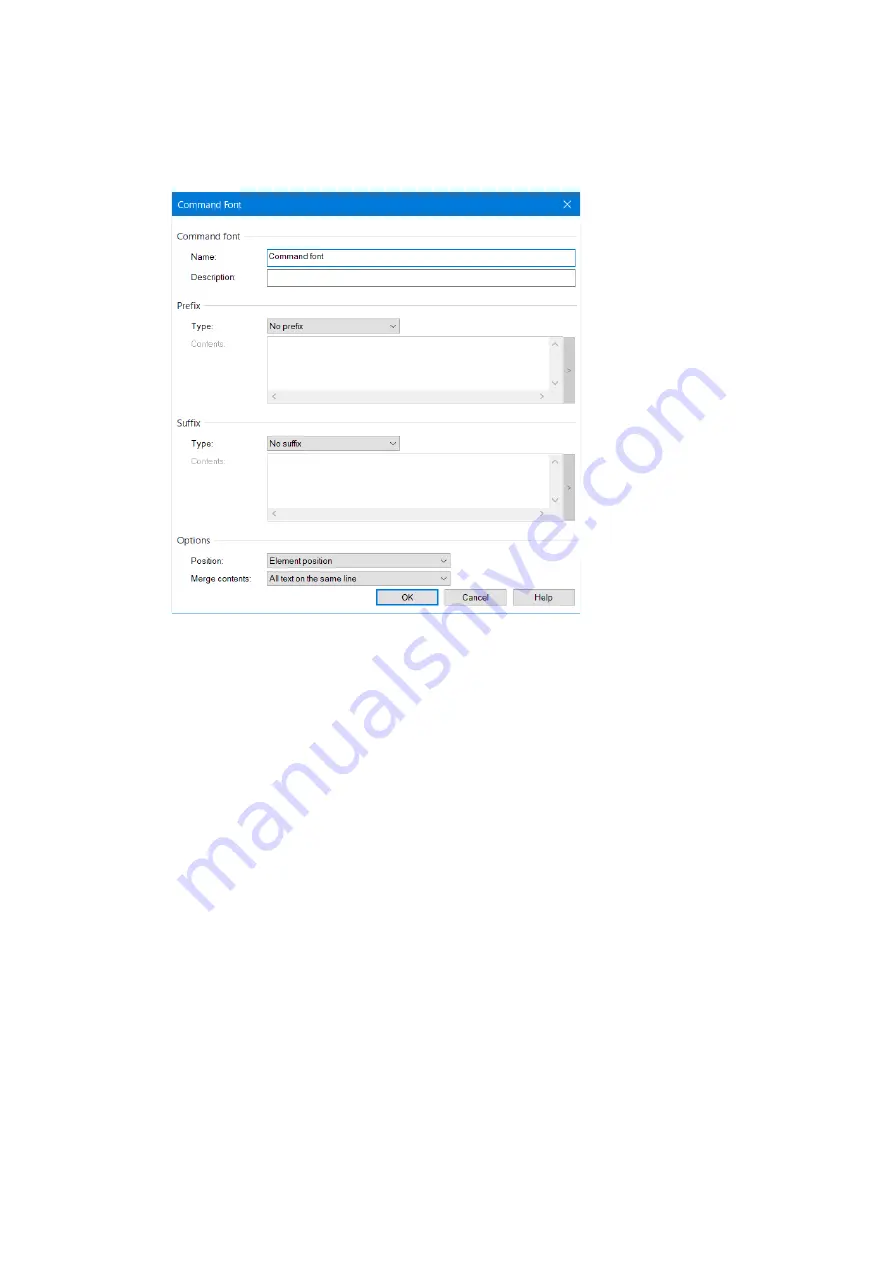
Command font settings and use example
3.2.2
Command font is virtual font for directly sending commands to the printer. You can use features that
are not directly supported by the printer driver. Knowledge of Sato Barcode Printer Language (SBPL)
command is necessary to use command font. For details of SBPL commands, refer to "FX3-LX
Programming Reference."
[Name]
Set the name of the command font that you want to register.
This name is displayed on the font list in the application.
[Description]
You can enter a description of the command font to be registered.
[Prefix] [Suffix]
Specify how the text is to be supplied. The specified text can be appended to the front or the end
of a command.
[No prefix]
: A prefix is not used.
[No suffix]
: A suffix is not used.
[Text]
: Prefixes and suffixes are appended directly as text.
[Parsed text]
:
Prefixes and suffixes are appended directly as text. Reserved variables can be included and
are converted to data during printing.
[File]
: Prefixes and suffixes are loaded from an external file and appended to the data.
[Parsed file]
:
Prefixes and suffixes are loaded from an external file and appended to the data. Reserved
variables can be included and are converted to data during printing.
Summary of Contents for FX3-LX
Page 1: ...For printer model Printer Driver Manual ...
Page 11: ...11 Click USB Port 4 Following the on screen instructions power on the printer 5 ...
Page 16: ...16 Click Manual a Select SATO FX3 LX DT305 Ln and click Next b ...
Page 24: ...24 Click Other 6 Select SATO FX3 LX DT305 Ln and click Next 7 ...
Page 26: ...26 Click Next 11 Click Install 12 When the Windows Security screen appears click Install ...
Page 36: ...36 Select the Hardware tab 2 Select SATO FX3 LX DT305 Ln and click Properties 3 ...
Page 37: ...37 Click Change settings 4 Select the Driver tab 5 Click Update Driver 6 ...
Page 39: ...39 When the Windows Security screen appears click Install Click Close 9 ...
Page 40: ...40 Confirm that the printer is displayed under Printers in Devices and Printers 10 ...
Page 42: ...42 Click the Advanced tab and then Printing Defaults 2 The Printing Defaults screen appears ...
Page 44: ...44 The Preferences screen appears Printing Preferences will be displayed on the title bar ...
Page 79: ...79 Maintenance 4 6 Reset Returns the printer driver settings to their default values ...
Page 80: ...80 International 4 7 Units Select the units to be used for the printer driver settings ...
Page 90: ...90 Click Close 7 Clear the Enable bidirectional support check box and click Close 8 ...
Page 97: ...97 Confirm that succeeded is displayed for the deleted driver and click Exit 5 ...


