


45
How to get administrator privileges
2.2
To change settings, and add and change ports, administrator privileges are required.
Procedure on OSs other than Windows Server 2008
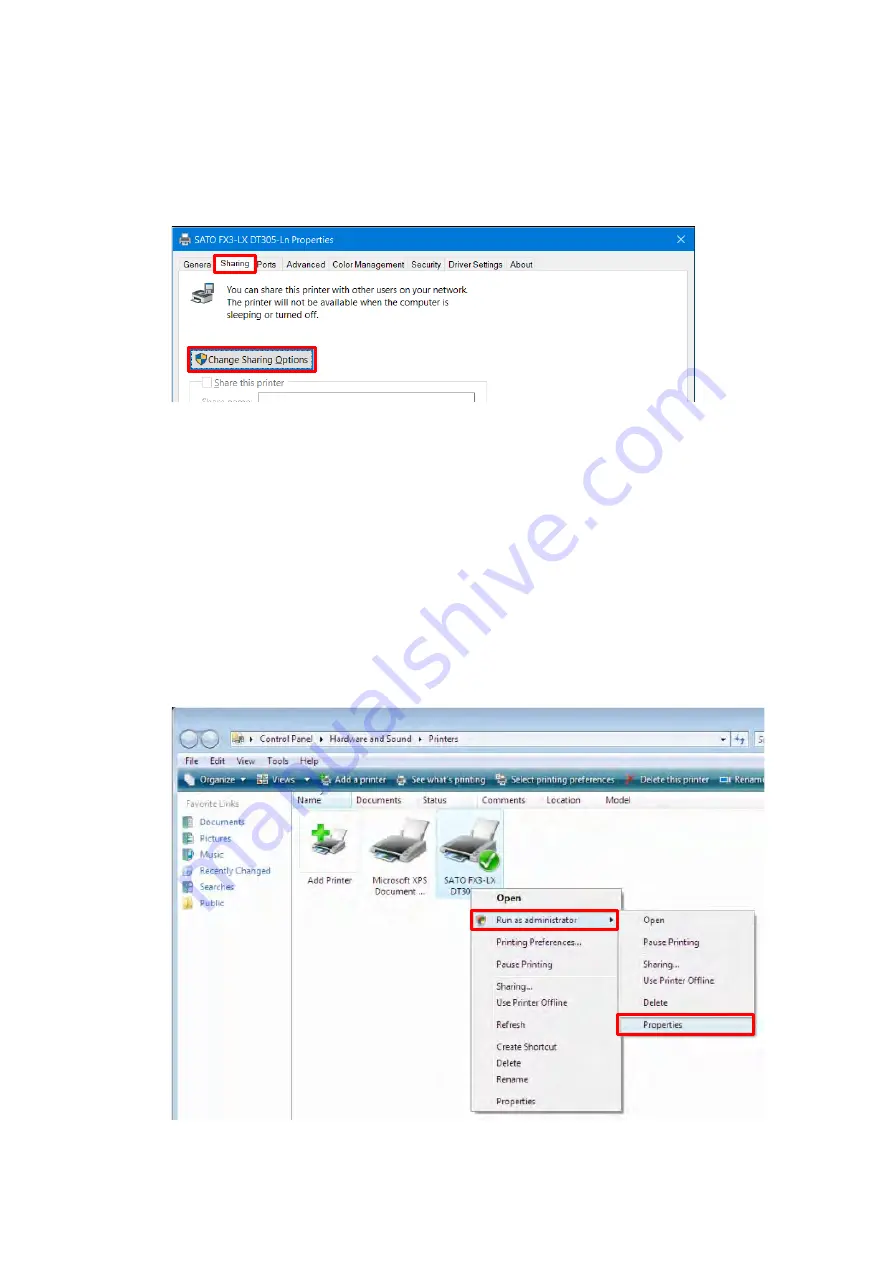
Open [Devices and Printers], right-click the desired printer, and select [Printer properties].
1.
Click the [Sharing] tab and then [Change Sharing Options].
2.
The [Printer Properties] screen will appear with administrator privileges.
What to do if [Change Sharing Options] is not displayed
Perform the procedure below to display the button. This procedure is performed in Windows 10
as an example. Depending on the settings of the Windows version that you are using, the menu
layout may be different. You may also not be able to change settings.
Open Start icon > [All apps] > [Windows System] > [Control Panel] > [Choose homegroup
a.
and sharing options] or [HomeGroup] > [Change advanced sharing settings].
Under [File and printer sharing] in [Home or Work (or Public or Domain) (current profile)],
b.
select [Turn off file and printer sharing], and then click [Save changes].
Procedure on Windows Server 2008
Open [Printers], right-click the desired printer, and select [Run as administrator] > [Properties].
1.
Summary of Contents for FX3-LX
Page 1: ...For printer model Printer Driver Manual ...
Page 11: ...11 Click USB Port 4 Following the on screen instructions power on the printer 5 ...
Page 16: ...16 Click Manual a Select SATO FX3 LX DT305 Ln and click Next b ...
Page 24: ...24 Click Other 6 Select SATO FX3 LX DT305 Ln and click Next 7 ...
Page 26: ...26 Click Next 11 Click Install 12 When the Windows Security screen appears click Install ...
Page 36: ...36 Select the Hardware tab 2 Select SATO FX3 LX DT305 Ln and click Properties 3 ...
Page 37: ...37 Click Change settings 4 Select the Driver tab 5 Click Update Driver 6 ...
Page 39: ...39 When the Windows Security screen appears click Install Click Close 9 ...
Page 40: ...40 Confirm that the printer is displayed under Printers in Devices and Printers 10 ...
Page 42: ...42 Click the Advanced tab and then Printing Defaults 2 The Printing Defaults screen appears ...
Page 44: ...44 The Preferences screen appears Printing Preferences will be displayed on the title bar ...
Page 79: ...79 Maintenance 4 6 Reset Returns the printer driver settings to their default values ...
Page 80: ...80 International 4 7 Units Select the units to be used for the printer driver settings ...
Page 90: ...90 Click Close 7 Clear the Enable bidirectional support check box and click Close 8 ...
Page 97: ...97 Confirm that succeeded is displayed for the deleted driver and click Exit 5 ...


