Network Video Recorder
User Manual
Network Video Recorder
42
Port Mapping
Port mapping is mapping a port of outside web host‟s IP address to a machine inside web, and provide the
service. When user connects to the port of the IP, the server will automatically map the request to the corre-
sponding machine inside LAN.With the function of port mapping, we can map many ports of a machine‟s IP
address to different machines‟ different ports inside web. The port mapping can also have other special
agent functions, like POP, SMTP, TELNET, etc.Theoretically, it can provide more than sixty thousand
ports.For example, if we want to map a web server which has an IP address of 192.168.111.10, we just need
to input the IP address and TCP port 80 into the port mapping chart of the router.There are two ways to map
the port: UPnP function automatically map and modify the router‟s port mapping chart by manual.
Manual port mapping
The first step
Connect the Embedded DVR to the Router, set the static IP.
The second step
Log in Router, enter into the configuration menu of Router, and set the menu. Then get to port, set the IP
distributed by the Embedded DVR, and set the rule of port mapping, add HTTP and TCP port into mapping
list.
Default access ports of Embedded DVR include HTTP port 80 and TCP port 8000, if the ports are occupied
by the other devices, please modify the default port of the Embedded DVR into other vacant ports.
The third step
Input the public net IP address in the IE, and add the port number of the Embedded DVR you want to access
after the IP, for example: http://155.157.12.227:81. If you want to access by Client Software, you can use the
outer net TCP port directly.
Notice: for detail configuration setting, please refer to the user manual of Router.
8.1.2. PTZ Control
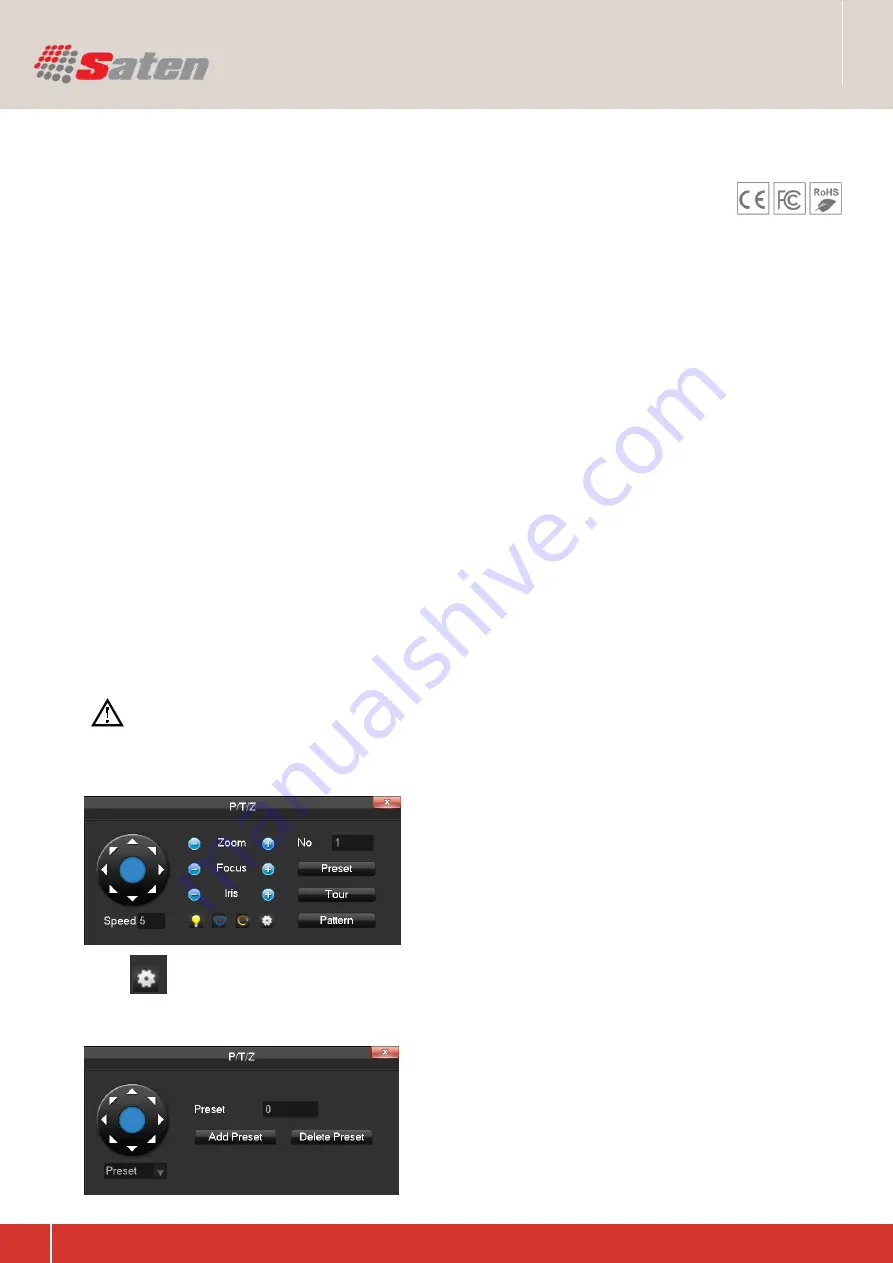
Right click and select PTZ in the corresponding channel. The following interface will pop up.
[Preset] Input the preset point and click the preset button to
call the function.
[Tour] Input the number and click “tour” to call the function.
[pattern] Input the path and click “pattern” to call the func-
tion.
Click “
” to switch to the interface of preset or pattern.
Preset
Choose preset and input a figure in the input box. Click
[Add Preset] to save. Or input the desired preset value in
the preset input box and click [delete preset] to delete.


