background image

Chapter 3  Operating the ETC ONE PLUS 

Using PAS Software 


20


ETC ONE PLUS Network Communicator


Using PAS Software 

Supplemental PAS software that came with your ETC ONE PLUS can be used 
for configuring the ETC ONE PLUS via the Internet or locally (in Programming 
mode only).  

See  the  “PAS  Getting  Started  Guide”  supplied  on  the  installation  CD  for 

information on how to install PAS on your PC. 

Configuration Database 

To communicate with the ETC ONE PLUS from PAS, create a site database 
for your device. All communication and configuration data for your device will 
be stored in this database. During configuration, store all setups to the site 
database so that PAS recognizes device properties regardless of whether the 
ETC ONE PLUS is online or offline. 

To create a new database for your ETC ONE PLUS: 

1.


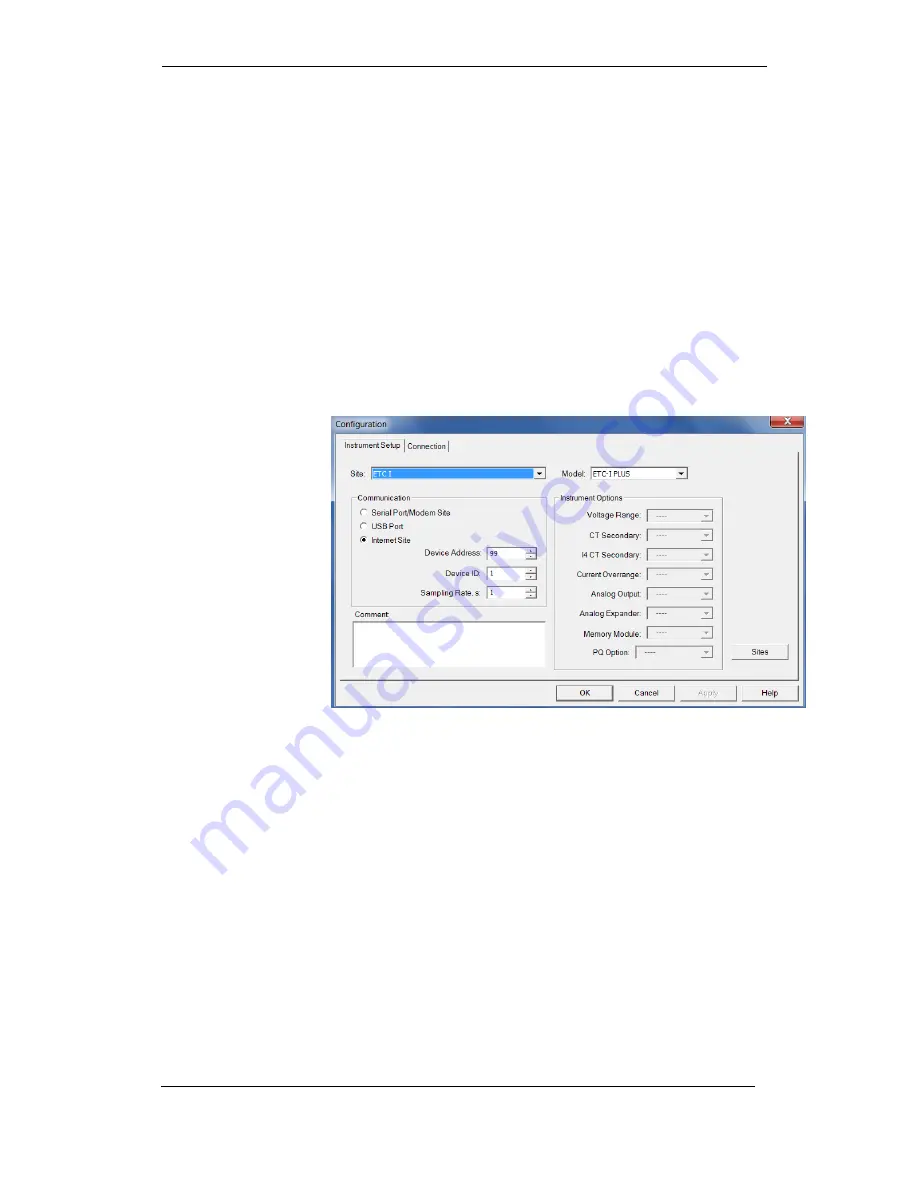
Select Configuration from the Tools menu, and then click the Sites button 
on the right-hand side. 


2.


From the “Look in” box, select the directory where the new database will 
be stored. By default, it is the “Sites” directory. Type a site name for your 
device in the “File name” box, click New, and then click OK. 


3.


On the Instrument 

Setup tab, select “

ETC ONE PLUS

” in the “Model” box.


4.


Set the device address to 99 unless you have changed the  ETC ONE 
PLUS default address in your device. 

5.


If  you  wish  to  add  any  comments  for  your  device,  type  them  into  the 

“Comment” box.


Setting up Communications 

Communicating through the Ethernet 

To communicate through the Ethernet port: 

1.


On the Instrument Setup tab, select Internet Site. 

2.


Click on the Connection tab.  

3.


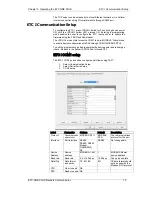
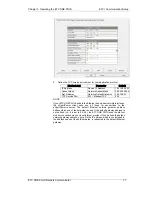
Click on the “IP address” and type in the IP address that you defined in 

Network  Setup  in  your  ETC  ONE  PLUS.  The  factory  set  default  IP 
address is 192.168.0.203. 

Summary of Contents for ETC One Plus

Page 1: ...ETC One Plus Network Communicator Installation and Operation Manual BG0596 Rev A1 ...

Page 2: ...ower and other power sources are turned OFF before performing any work on the instrument Failure to do so may result in serious or even fatal injury and or equipment damage Before connecting the instrument to the power source check the labels on the back of the instrument to ensure that your instrument is equipped with the appropriate power supply voltage input voltages and currents Under no circu...

Page 3: ...ration 14 Operational Mode 14 Program Service Mode 14 Using the ETC ONE PLUS 14 Slave Network Connection 14 Master Network Connections 14 ETC I Communication Setup 15 ETC I COM1 setup 15 ETC I COM2 Ethernet setup 16 ETC I COM2 GPRS setup 18 Setting Up eXpertPower Client 19 Using PAS Software 20 Configuration Database 20 Setting up Communications 20 Setting Up the ETC ONE PLUS 21 Authorization 22 C...

Page 4: ...fer data from to ETHERNET or Cellular module to from serial communication port COM1 COM1 shall operate as a Client Master and COM2 which is tied to Ethernet or Cellular network shall be configured with its IP address to route data server to predefined MODBUS Slave devices MODBUS address from 1 to 31 Features COM1 as RS 485 master ports for connecting slave devices to serial networks COM2 as Ethern...

Page 5: ...nical Installation ETC ONE PLUS Network Communicator 5 Chapter 2 Installation Mechanical Installation Refer to the figures provided in this section to properly perform the mechanical installation Figure 2 1 ETC ONE PLUS Dimensions ...

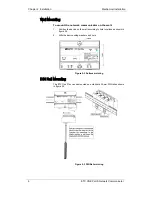
Page 6: ...work communicator on the wall 1 Position the device on the wall according to hole locations as shown in figure 2 2 2 Affix the device using washers and nuts Figure 2 2 Surface mointing DIN Rail Mounting The ETC One Plus can be mounted on a standard 35 mm DIN rail as shown in figure 2 3 Figure 2 3 DIN Rail mointing ...

Page 7: ...ng power sources are shut OFF Failure to observe this practice can result in serious or even fatal injury and damage to equipment 1 Turn off the ETC One Plus ETC I power supply 2 Remove the module connector cover from the ETC I to access the module connector as shown in figure 2 4 below Figure 2 1 ETC I module connector location Figure 2 2 ETC I module assembly ...

Page 8: ...ent Power Source Connection Before connecting your device to the power source check the label on the the device to ensure that it is equipped with the appropriate power supply AC power supply Connect the line wire to terminal L and the neutral wire to terminal N DC power supply Connect the positive wire to terminal L and the negative wire to terminal N Figure 2 5 Power Source Connection Communicat...

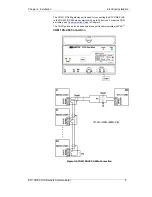
Page 9: ...way port is used for connecting the ETC ONE PLUS to the RS 422 RS 485 slave network with up to 32 devices For device COM port setup see Communication Setup in Chapter 3 The COM1 port can also be used as a slave port to communicate with PAS COM1 RS 485 Connection Figure 2 6 COM1 RS 485 2 Wire Connection ...

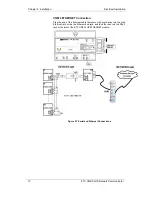
Page 10: ...cator COM2 ETHERNET Connection Plug the end of the Ethernet cable that came with your device into the wall Ethernet jack or into the Ethernet hub jack and the other end into the RJ45 jack at the front of the ETC ONE PLUS ETHERNET module Figure 2 7 Serial and Ethernet Connections ...

Page 11: ...Chapter 2 Installation Electrical Installation ETC ONE PLUS Network Communicator 11 COM2 CELLULAR connection Figure 2 8 Serial and Cellular 3G Connections ...

Page 12: ...connection Connecting a device with the factory set IP address to the Ethernet network can disrupt communications if the IP address exists on the network Change the IP address in your ETC ONE PLUS as instructed in Section 4 before connecting a device to the network See Internet Connections in Chapter 3 and configuring the Network in Chapter 5 for instructions on how to program your device for netw...

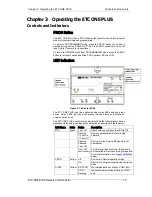
Page 13: ...reen device status LEDs that show the present device status and activity on communication ports The ETC ONE PLUS has four status indicator LEDs that show present device operation status and give diagnostics indication as described in table below LED Name Color Status Description RDY Green 2 sec Off After Power up or Reset the LED is Off Flashing 1 2 sec On 1 2 sec Off Device operational and is fun...

Page 14: ... ONE PLUS is connected to serial RS 485 slave networks via the COM1 gateway ports The COM1 is automatically set to master mode to operate as a gateway port in normal operation See Configuring Serial Ports in Chapter 5 for information on programming serial ports The communication protocol to be used for serial networking via the ETC ONE PLUS is defined by the Network TCP service port setting See Co...

Page 15: ... PAS through COM1 MODBUS RTU To exit the programming mode dis energize the device power and reenergize it back Make sure the yellow PROG Led is turned OFF ETC I COM1 setup The ETC I COM1 port shall be configured as follows using PAS 1 Select Communication Setup 2 Select Serial Ports Setup 3 COM1 setup Label Parameter Options Default Description Protocol Communicatio ns protocol MODBUS RTU MODBUS R...

Page 16: ...ETC I it must be set to Server Slave In normal use to be set to Client Master RX Tmout ETC I COM2 Ethernet setup The ETC I COM2 setup shall be configured as follows depending on attached communication module type The ETC I COM2 port shall be configured as follows using PAS 1 Select Communication Setup 2 Select Serial Ports Setup 3 COM2 setup 4 Select Ethernet interface in case of ETHERNET module E...

Page 17: ...our ETC ONE PLUS has both the Ethernet and modem network interfaces the eXpertPower client uses one of these for connections to the eXpertPowerTM server The default Ethernet network gateway address defines which one of the networks is used If the default gateway address is not defined i e it is set to 0 0 0 0 the ETC ONE PLUS uses the dial out modem connection via your local Internet provider If y...

Page 18: ...ETC I COM2 GPRS setup The ETC I COM2 setup shall be configured as follows depending on attached communication module type The ETC I COM2 port shall be configured as follows using PAS 1 Select Communication Setup 2 Select Serial Ports Setup 3 COM2 setup 4 Select GSM GPRS interface in case of 3G module ...

Page 19: ...ces Connections to the eXpertPowerTM server are handled on a periodic basis To set up communications with the eXpertPowerTM server the ETC I can be configures as follows using PAS 1 Select Communication Setup 2 Select Expertpower Client Setup Parameter Options Default Description XPW Server IP Address 207 232 60 18 The IP address of the eXpertPower server XPW Server Port 0 65535 5001 The TCP servi...

Page 20: ...e To create a new database for your ETC ONE PLUS 1 Select Configuration from the Tools menu and then click the Sites button on the right hand side 2 From the Look in box select the directory where the new database will be stored By default it is the Sites directory Type a site name for your device in the File name box click New and then click OK 3 On the Instrument Setup tab select ETC ONE PLUS in...

Page 21: ...her site database select it from the file panel and then click OK To re use setups from another site copy them to your present site database Click Open select the desired site database and then click OK The opened setup is copied to your site database You can also copy all setups from one site database into another site s database Select a device site from the list box on the toolbar from which yo...

Page 22: ...on the PAS toolbar select the device site from the list box on the toolbar and then select Upload Setups from the Meter Setup menu Authorization If communications with your ETC ONE PLUS is secured you are prompted for the password when you send new setup data to the device Enter the password and click OK If your authorization was successful you are not prompted for the password again until you clo...

Page 23: ...ecurity To change the password check the On line button on the PAS toolbar select Administration from the Monitor menu and then select Change Password To change the password 1 Type in a new 8 digit password 2 Repeat the password in the Confirm box 3 Check the Enable network protection box to enable password checking 4 Click Send Changing Time and Date Select the ETC ONE PLUS site from the list box...

Page 24: ...DST switch dates DST start month DST start week DST start weekday Month week weekday Week 1st 2nd 3rd 4th or Last last week of the month First Sunday in April The date when Daylight Savings Time begins The DST switch point is specified by the month week of the month and weekday By default DST starts at 2 00 AM on the first Sunday in April of each year DST end month DST end week DST end weekday Mon...

Page 25: ...C ONE PLUS Network Communicator 25 Configuring Device Routing Table The ETC I pass through gateway routing table is predefined in the firmware as follows MODBUS Slave devices to be polled shall have fixed address 1 31 the ETC I MODBUS Master address shall be 32 or higher 99 ...

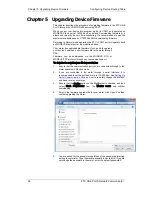
Page 26: ... to the meter through PAS Firmware can be downloaded via the MODBUS RTU or MODBUS TCP protocol through any communication port To download a new firmware file to your device 1 Ensure that the communication port you are connected through to the meter operates in Modbus mode 2 If you are connected to the meter through a serial interface it is recommended to set the port baud rate to 115 200 bps See S...

Page 27: ...Wait until PAS completes upgrading your device It takes about 3 4 minutes at 115 200 bps to download the file to the meter 7 After upgrading firmware is completed the meter restarts so communications can be temporarily lost You may need to wait a short duration until PAS restores a connection with your device ...

Page 28: ...Hz IEC 60068 2 27 AS 60068 2 27 19 Shock Shock level 30 g Time duration 18 ms Shape Half sine Number of shocks 18 Construction Case enclosure Reinforced Polycarbonate Packaging case Carton and Stratocell Polyethylene Foam brackets Labels Polyester film UL94 V0 Power Supply AC DC Power Supply Rated input 40 300VAC 50 60Hz 40 300VDC Burden 5VA Frequency range operation 25 400 Hz Isolation Input to g...

Page 29: ...ar 3G Cellular Port Optional module 2G 3G GSM Network Protocols MODBUS TCP Port 502 Number of simultaneous connections 4 Antenna Connector type SMA RS 232 422 485 Port Optional module RS 232 or RS 422 485 optically isolated port Isolation 3000V AC 1 min Baud rate up to 115 2 kbps Protocols MODBUS RTU Slave Connector type removable 5 pins for RS 422 485 and DB9 for RS 232 Torque terminal screw 0 5 ...

Reviews: