


58
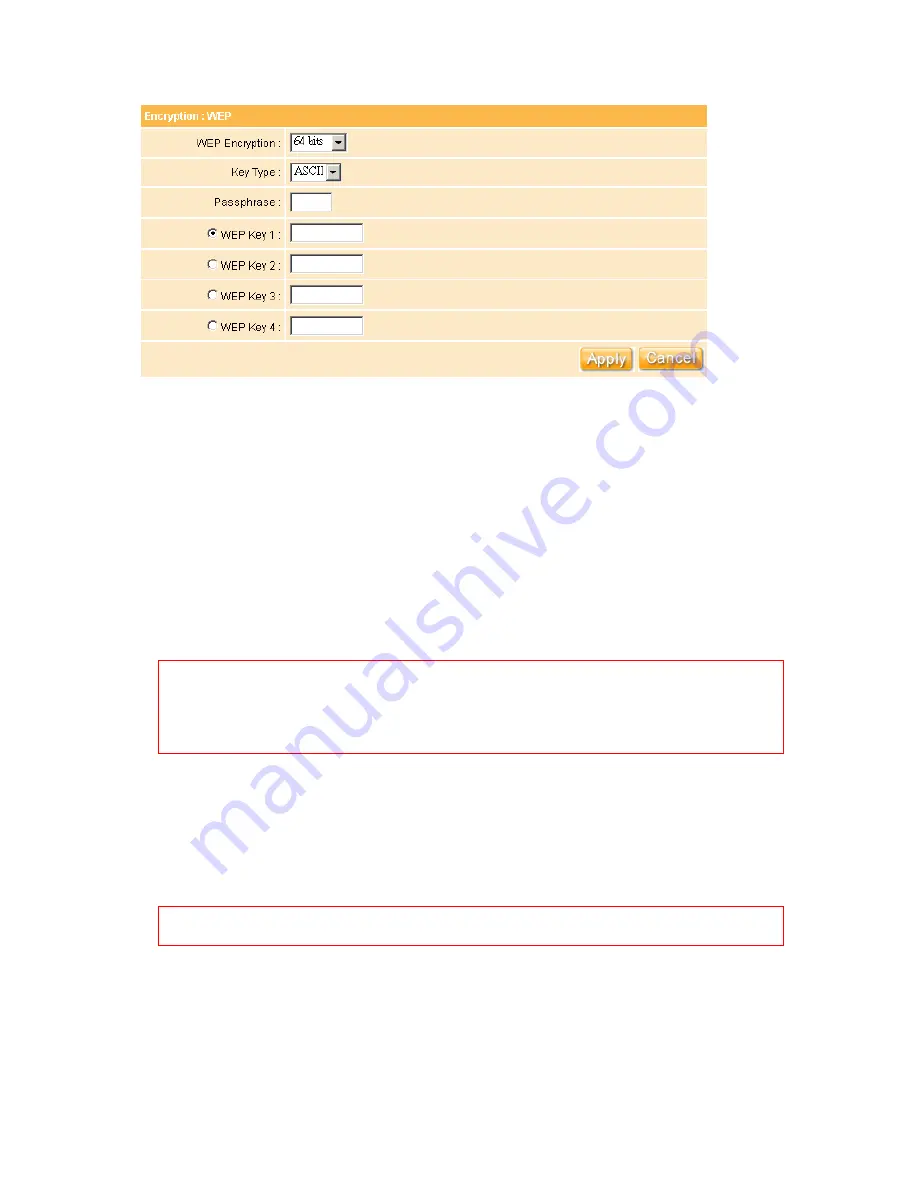
11. Encrypt Type - WEP
There are two types of encrypt type can be selected, including WEP and WPA.
WEP Encryption:
Enabling WEP can protect your data from eavesdroppers. If you
do not need this feature, select “None” to skip the following setting. The WE-1110
supports both 64-bit and 128-bit encryption using the Wired Equivalent Privacy (WEP)
algorithm. Select the type of encryption you want to use (64 or 128 bit) and configure
one to four WEP Keys. The “128-bit” method is more secure than the “64-bit”.
Key Type:
For 64bits WEP key, either 5 ASCII characters or 10 hexadecimal digitals
can be inputed. For 128bits WEP key, either 13 ASCII characters or 26 hexadecimal
digits can be inputed.
Note:
128 bits WEP is most secure, but has more encryption/decryption overhead. Note
that all wireless devices must support the same WEP encryption bit size and
have the same key. Four keys can be inputed here, but only one key can be
selected at a time. The keys can be inputed in ASCII or Hexadecimal. Select the
item from drop-down list you wish to use.
Pass phrase:
Automatically generate four WEP keys. A WEP key is either 10 or 26
hexadecimal digits (0~9, a~f, and A~F) based on whether you select 64 bit or 128 bit
in the WEP drop-down menu. Type a combination of up to 64 letters, numbers, or
symbols in the blank, the WE-1110 uses an algorithm to generate four WEP keys for
encryption. If you want to type in the keys manually, leave this filed blank.
Note: This function eases users from having to remember their passwords. But this isn’t
as secure as manual assignment.
WEP Key:
At most four keys can be set. A WEP key is either 10 or 26 hexadecimal
digits (0~9, a~f, and A~F) based on whether you select 64 bit or 128 bit in the WEP
drop-down list. The WE-1110 must have at least the same default key.
Summary of Contents for we 1110
Page 1: ...1 ...
Page 18: ...18 Step2 Click on Properties button Step3 Double click on Internet Protocol TCP IP ...
Page 23: ...23 If it can t work it will show Request timed out ...
Page 89: ...89 Step 2 Click Add a printer Step 3 Click Next ...
Page 152: ...152 Step 6 Input Username and Password of your own You will see like as below monitor screen ...
Page 258: ...258 Step3 Please finish these blank fields Then click on Create Account button ...
Page 261: ...261 Step7 Click on the My Services under Account Step8 And then click on Add Host Services ...


