23
English
Regulations on wire size differ from locality to locality.
For field wiring requirements, please refer to your local
electrical codes. Make sure that the installation fully
complies with all local and national regulations.
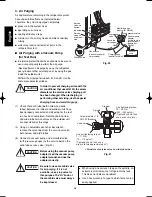
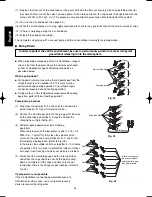
(1) Remove access panel “C”. (Fig. 32)
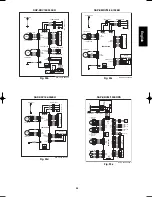
(2) Connect the inter-unit wiring and power line
according to the drawing on the panel side.
(3) Be sure to size each wire allowing approx. 10 cm
longer than the required length for wiring. Store
excess wiring inside the cabinet.
(4) When connections are completed, check that all
connections are correct as shown in the wiring
system diagram on panel side.
(5) Be sure to ground the unit according to your local
codes.
Fig. 32
Acce
ss
pa
n
el C
Cabi
n
et
6. Test Run
Performing a test run
!
Refer to the test run procedures in the indoor unit
installation manual.
!
Perform the test run separately for each connected
indoor unit. If 2 units are operated simultaneously, it is
not possible to correctly check for errors in tubing and
wiring.
!
If the room temperature is 15°C or below, it may not
be possible to check for tubing errors with cooling
operation. If this occurs, perform heating operation for
each unit individually, and check that warm air is dis-
charged from each unit. If there is cold air mixed in
with the warm air, check the tubing connections
again.
Checking tubing and wiring
Perform the test run and check that operation is normal.
If there is an error in tubing or wiring, the refrigerant may
flow to indoor unit B when indoor unit A is operated (for
example).
!
Stop operation immediately if there is an error in tub-
ing or wiring. Turn the power (breaker) OFF, and
check whether the inter-unit cables are connected
incorrectly, or whether the narrow tubes A and B are
connected in reverse. Correct the connections.
!
If there is an error in tubing, pump-down must be
performed. Be sure to perform pump-down. After
making corrections, again purge the air from the
tubes.
CAUTION
08-253 CMRV3146EH_OU EN 10/14/08 2:39 PM Page 23

