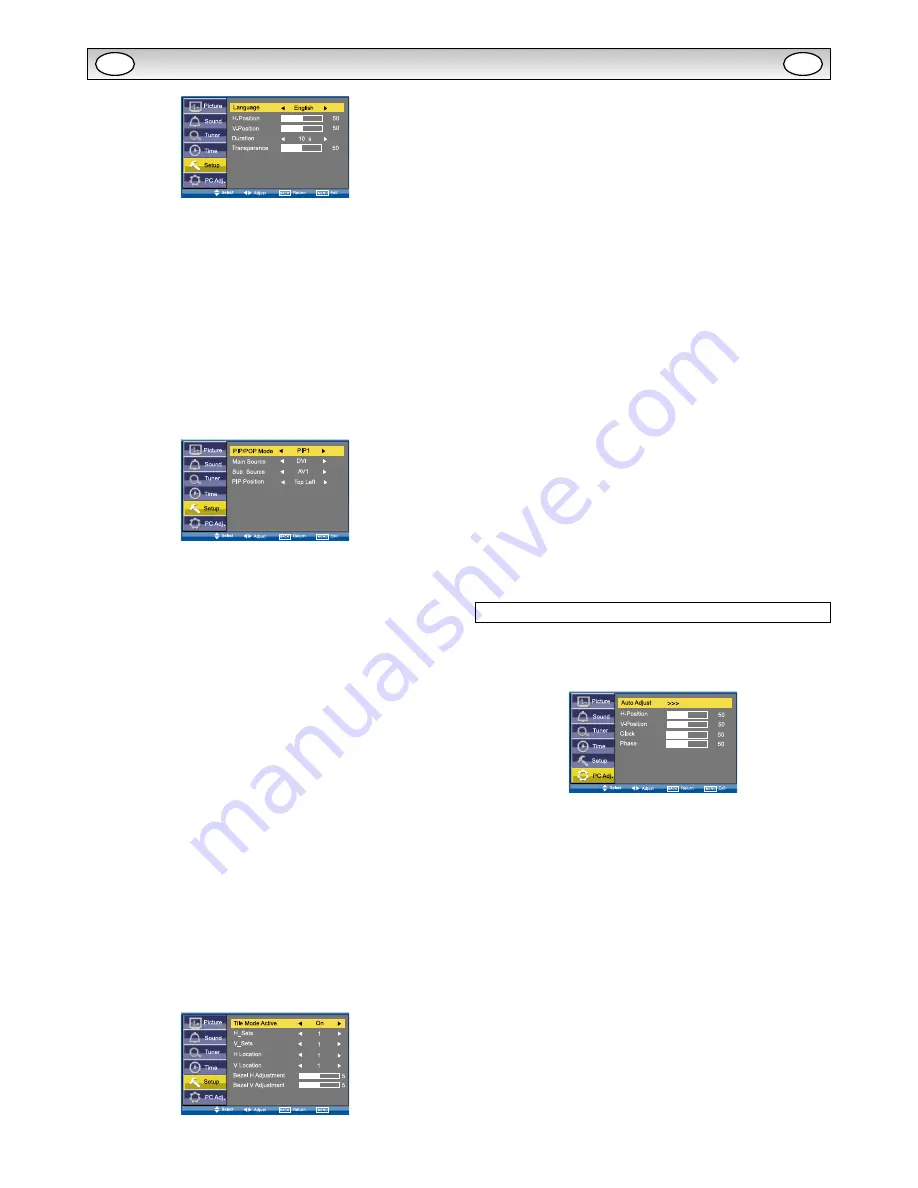
background image

12

MENU OPERATION

Language

 is used to select the preferred language . Use the 

1

 or 

2


button

 to select 

English

French

German

Italian

Spanish

 or 

Dutch

 .

H-Position

 changes the OSD position horizontally by using the 

1


or 

2


button

 .

V-Position

 changes the OSD position vertically by using the 

1

 or 

2


button

 .

Duration

 is used to set the display time of the MENU by using the 

1

 or 

2


button

 . (5 ~ 120 seconds)

Transparence

 is used to adjust transparence of menu display . Use 

the 

1

 or 

2


button

 to adjust levels .

 PIP/POP Setup

Use the 

5

 or 

6


button

 to select 

PIP/POP Setup

 and press the 

1

 or 

2


button

 to enter the sub menu .

PIP/POP Mode:

 Using the 

1

 or 

2


button

 select the most suit-

able mode 

PIP1

PIP2

POP

 or 

Off

 . (Please refer to page 15 .)

  When Mode is set to 

Off

Sub Source

 and 

PIP Position

 will not 

work. 

Main Source

 is used to select input source (AV1, RGB, AV2, AV3, PC, 

DVI or Network ) for main picture by using the 

1

 or 

2


button

 .

Sub Source

 is used to select input source (AV1, AV2, AV3, PC or 

DVI) for sub picture by using the 

1

 or 

2


button

 .


For a combination of main picture and sub picture: only DVI or 
Network input can assemble with other input source. For example, 
if main source is selected as AV1 input, then the sub source must 
be DVI or Network input.

PIP Position:

 Using the 

1

 or 

2


button

 it can be selected 

Top


Left

Top Right

Bottom Right

 or 

Bottom Left

 .

 Initial Settings

This function returns all setting values 

except for

 Installation Mode . 

 Text Language

Use the 

5

 or 

6


button

 to select 

Text Language

 and press the 

1

 or 

2


button

 to select Western, Eastern, Russian, Arabic or 

Farsi .

 Tile Mode 

This function allows you to split an image to suit your monitor grid 
format to create a video wall .
Use the 

5

 or 

6

 button to select 

Tile Mode

 and press the 

1

 or 

2


button

 to enter the sub menu as follows .

Tile Mode Active

 can be set 

On

 or 

Off

 using the 

1

 or 

2


but-

ton

 .

H_Sets

 is used to divide the horizonal picture into more than one 

part, but the most is 5 parts (5 monitors) .

V_Sets

 is used to divide the vertical picture into more than one part, 

and the most is also 5 parts (5 monitors) . Using the 

1

 or 

2


but-

ton

 to set .

H Location

 is used to select one part of the horizonal picture to dis-

play on the current LCD Monitor using the 

1

 or 

2


button

 .

V Location

 is used to select one part of the vertical picture to display 

on the current LCD Monitor using the 

1

 or 

2


button

 .

Bezel H Adjustment

 is used to align the image horizontally with 

respect to the other monitors in the video wall to accommodate the 
bezel width using the 

1

 or 

2


button

 . (0 ~ 10) 

Bezel V Adjustment

 is used to align the image vertically with respect 

to the other monitors in the video wall to accommodate the bezel 
width using the 

1

 or 

2


button

 . (0 ~ 10)

 AV2 Setting

Use the 

5

 or 

6


button

 to select 

AV2 Setting

 and press the 

1


or 

2


button

 to select 

YPbPr

 or 

RGBHV

 .

Connect your PC to either PC-IN or RGBHV on the rear of the set . 
Once connected select PC mode or AV2 (RGBHV, see page 8 for AV2 
input settings) via the 

INPUT


button

 on your remote control .

The set will become a monitor for the PC .

 XGA Mode

Use the 

5

 or 

6


button

 to select 

XGA Mode

 and press the 

1

 or 

2


button

 to select 

XGA

 or 

WXGA 1366 x 768

 .

 PC Power Save

The monitor set automatically turns off with no PC input signal and 
wakes up with signal while PC Power Save is active.
Use the 

5

 or 

6


button

 to select PC Power Save and press the 

1

 or 

2


button

 to select 

ON

 or 

OFF

 .

PC Adj. menu

Press the 

MENU button

 and select 

PC Adj.

 using the 

5

 or 

6


buttons

, press the 

1

 or 

2


button

 to enter . Press the 

BACK 

button

 to return to the previous menu . Press the 

MENU button

 to 

exit menu operation .

Auto Adjust

 is used to automatically detect incoming signal, and 

adjust itself to optimize its performance by using the 

1

 or 

2


button

 . If the image is not displayed properly, a manual adjustment is 

required (Refer to following adjustments) .

H-Position

 is used to move the horizontal picture position by using 

the 

1

 or 

2


button

 .

V-Position

 is used to move the vertical picture position by using the 

1

 or 

2


button

 .

Clock

 is used to eliminate flicker from the image by using the 

1

 or 

2


button

 .

Phase

 is used to eliminate disorder from the image by using the 

1


or 

2


button

 .

GB

GB

Summary of Contents for PID-42AE1 - 16:9

Page 1: ...INSTRUCTION MANUAL PID 42AE1 PID 42AS1 LCD Monitor Please read this Instruction book before using your LCD monitor We wish you many hours of pleasure from your new LCD monitor ...

Page 2: ...s 17 DIMENSIONS 18 PC DVI D COMPONENT SIGNAL SUPPORT TIMING LIST 19 RS232C COMMAND TABLES 20 TABLE OF CONTENTS Standard monitor PID 42AE1 EXTENSIVE INPUT OUTPUT TERMINALS for all products This monitor set has various input and output terminals including component Y Pb Pr or RGBHV input and output with 5 BNC composite video input and output with BNC and RS 232 control port serial D Sub 9 input and ...

Page 3: ...cm distance around the top and sides Always mount using recommended and substantial fixtures and fit tings 10cm 10cm 10cm 5cm Do not cover the ventilation slot on the LCD monitor Heat build up can reduce the service life of your LCD monitor and can also be dangerous Do not apply liquid cleaners or aerosol cleaners directly onto the LCD monitor Use a damp cloth for cleaning ADDITIONAL FOR NORTH AME...

Page 4: ...ed n If the LCD monitor exhibits a distinct change in performance n If the LCD monitor does not operate normally by following the operating instructions n If the LCD monitor has been exposed to rain or water Adjust only those controls that are covered in the operating instructions as improper adjustment of other controls may result in damage This will often require extensive work by a qualified te...

Page 5: ...ommunications Operation of this equipment in a residential area is likely to cause harmful interference in which case the user will be required to correct the interference at his own expense Do not make any changes or modifications to the equipment unless otherwise specified in the instructions If such changes or modifications should be made you could be required to stop operation of the equipment...

Page 6: ...ership rights in the Software to you The Software provided hereunder may contain or be derived from portions of materials provided to SANYO under license by a third party supplier 5 Except as expressly permitted by statute you may not use the Software in conjunction with any other computer hardware other than the product copy all or part of the Software incorporate all or any of the Software into ...

Page 7: ... done by a qualified professional Installing the bracket by unqualified personnel may result in injury Always use the mounting device specified by a qualified professional Note For use only with UL Listed Wall Mount Bracket SERVICING Screw holes for installing Screw holes for installing Screws Spec M6 X 12MM metric Material Stainless Steel Or Note Don t install the TV set reversed as shown below N...

Page 8: ...ting AV2 Setting in Set up menu see page 12 You can connect your DVD player to the Y Pb Pr terminals instead of using a scart lead This can support high definition in analogue component form RGB H V can be used as a PC input via the BNC terminals Both options support a large range of resolutions page 19 AV2 OUT can be used to output the incoming AV2 signal to the other monitor 4 AV3 Composite CVBS...

Page 9: ...or dimly lit rooms and gives a cin ema like effect Freeze To switch picture still on or off Green Press this button for more than 5 seconds installa tion mode will appear Remote control Remote control battery installation Install two AA 1 5 volt batteries so that the and marks on the batteries match the and marks inside the unit into the remote control handset FOR EU USERS The symbol mark and recy...

Page 10: ...I Network Menu Setup PIP POP Setup Initial Settings Text Language Tile Mode AV2 Setting Western Eastern Russian Arabic Farsi Tile Mode Active H V_Sets H V Location Bezel H V Adjustment RGBHV YPbPr Auto Adjust H Position V Position Clock Phase Language H V Position Duration Transparence PIP POP Mode Main Sub Source PIP Position Time Action Active Power On Power Off On Off 1 20 Current Weekday XGA M...

Page 11: ...r 2 button to enter Press the BACK but ton to return to the previous menu Press the MENU button to exit menu operation Current Weekday Use to set current weekday using the 1 or 2 button Current Time Use to set the current time using the Numeric buttons Other items in Time Menu should not be selected until Current Time has been set Schedule Use to set up to 20 separate time schedules for Power On o...

Page 12: ... the vertical picture into more than one part and the most is also 5 parts 5 monitors Using the 1 or 2 but ton to set H Location is used to select one part of the horizonal picture to dis play on the current LCD Monitor using the 1 or 2 button V Location is used to select one part of the vertical picture to display on the current LCD Monitor using the 1 or 2 button Bezel H Adjustment is used to al...

Page 13: ...eration of the LCD monitor via the buttons on the rear of the monitor Select using the 5 or 6 button Press the 1 button to select On or OFF The Child Lock OSD will appear if buttons are pressed when child lock is On Standby operates normally when childlock is set On Address Set the address for the LCD monitor 0 999 Setting the monitor address in RS232 mode Each monitor can have a specific Address ...

Page 14: ... more to allow subtitles to be seen As Zoom 16 9 but bottom is compressed even more to allow subtitles to be seen As Zoom 16 9 but bottom is compressed even more to allow subtitles to be seen As Zoom 16 9 but bottom is compressed even more to allow subtitles to be seen 4 3 14 9 16 9 Letterbox Video The correct picture width is maintained but the top and bot tom are cropped Zooms in slightly croppi...

Page 15: ...PIP POP mode press the Main Sub Picture Swap but ton will switch the location for main and sub picture Only the sound on the main picture is heard from the monitor speaker The sound on the sub picture cannot be heard The details for PIP POP operation eg location for sub picture or input source for any picture etc please refer to page 12 PIP1 mode OFF mode PIP2 mode POP mode The left picture is mai...

Page 16: ... ture appears on the screen Press this button once again or press TXT TV button CANCEL mode will be cancelled In CANCEL mode CAN is always displayed on the upper left of the screen Text Hold Press Text Hold button to stop page request and updating HOLD ON The Hold symbol will appear instead of the page number Update of TELETEXT is forbidden It holds on the current TEXT screen display now HOLD OFF ...

Page 17: ...AST levels too low NO COLOUR PICTURE OK Adjust COLOUR control Check lead connections Does the signal input have colour REMOTE CONTROL DOES NOT WORK Check batteries are inserted correctly Check condition of batteries Check to see if remote control inhibit is set ON PICTURE OK NO SOUND Check external speakers are connected correctly Check lead connections to external equipment Check volume turned do...

Page 18: ... 525 3 100 55 23 5 400 5 45 125 6 51 6 VIEWING AREA H VIEWING AREA V Control buttons WALL MOUNT S 4 x M6 1 0 PITCH RC RECEIVER LED INDICATOR Unit mm 100 55 5 397 2 330 400 400 5 45 125 6 51 6 Control buttons WALL MOUNT SCREW 4 x M6 1 0 PITCH x 12MM GB GB ...

Page 19: ...400 31 47 70 09 DOS VGA 640 x 480 31 43 59 88 VGA VESA 60Hz 640 x 480 37 50 75 00 VGA VESA 75Hz 640 x 480 37 86 72 81 VGA VESA 72Hz 640 x 480 43 27 85 00 VGA VESA 85Hz 640 x 480 35 00 66 67 Mac 13 640 x 480 34 97 66 60 Mac LC 13 800 x 600 35 16 56 25 SVGA VESA 56Hz 800 x 600 37 88 60 32 SVGA VESA 60Hz 800 x 600 46 875 75 00 SVGA VESA 75Hz 800 x 600 34 50 55 38 SVGA 800 x 600 38 00 60 51 SVGA 800 x...

Page 20: ...r CR TINT Status of Tint CR SHARP Sharpness CR WBAL Status of White Balance Mode informa tion CR WBAL R Status of White Balance Red CR WBAL G Status of White Balance Green CR WBAL B Status of White Balance Blue CR NZRED Status of Noise reduction setting CR FILM Status of Film mode setting CR IMAGE Status of Image selection The same as PICTURE mode CR DCDI Status of DCDi setting CR ACCACM Status of...

Page 21: ...on Wait and transmit command again 101 The errors not including above Sound control Read Command Table Status read command Item CR VOLUME Status of volume value CR MUTE Status of MUTE Other Read Command Table Status read command Item CR STATUS Status of the operation of the monitor CR SIGNAL Status of with or without signal CR FREEZE Status of Freeze setting CR FANLOCK Statuses of fan lock error C...

Page 22: ...N8FA N8FD A SANYO Electric Co Ltd ...

Reviews: