Maintenance
41
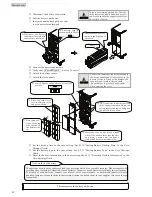
⑤
Disconnect the battery connectors.
⑥
Pull the battery packs out.
⑦
Insert the new battery packs so that
the connector faces forward.
⑧
Connect the battery connectors.
⑨
Verify that Forced Bypass is set to “Inverter”.
⑩
Attach the battery covers.
⑪
Attach the front panels.
⑫
Set the backup time in the user setting. See §3.12 “Setting Battery Backup Time ”in the
User
Settings Guide
.
⑬
Set the battery type in the user setting. See § 3.13 “Setting Battery Type” in the
User Settings
Guide
.
⑭
Reset the battery information in the user setting. See §3.15 “ Resetting Battery Information” in the
User Settings Guide
.
This completes the battery exchange.
The batteries used in this product are lead type batteries which are a reusable resource. Please cooperate by
recycling when replacing or disposing of used batteries. Dispose of used batteries according to the instructions.
To dispose of used batteries, contact your nearest sales representative, an authorized industrial waste
handling company, or repack them in their original cartons and send them to your supplier. (An extra charge
is required.)
Note on the used battery
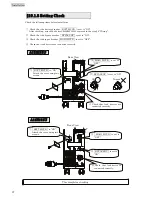
⑨
Forced Bypass switch should be inverter
position.
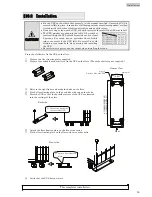
⑪
Place the front cover
over the battery cover,
and press it down.
⑪
First catch the
claws on the top
side, then push
the bottom side
in.
Scale
⑦
Insert the new battery
packs in the direction of
the arrow.
CAUTION
!
There is no retaining mechanism. Pull out
the battery packs slowly and when a scale
can be seen on the side, support the bottom.
Be careful no to drop.
⑤
Disconnect the battery
connectors. Insulate with
tape or other insulator.
This battery pack is
not equipped in Model
A11H***U
011
...
TW
.
CAUTION
!
・
The battery connectors cannot be inserted in
the wrong orientation. If it does not go in, do
not try to force it. Doing so can damage the
connector and result in electric shock.
・
Be careful not to get your hands caught
when securing the cover.
⑩
Insert the tabs on the left and right
sides of the battery cover into the slots
and press it down until you hear a
click sound. Secure with the screws.
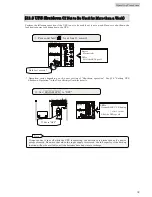
⑧
The connectors cannot be inserted
in the wrong orientation. Check the
correct insert orientation, and push
in until you hear a click.
Summary of Contents for A11H
Page 1: ...Instruction Manual 120V Model 2kVA 3kVA Uninterruptible Power Supply M0008068...
Page 70: ...Blank page...
Page 71: ...Blank page...
Page 72: ......

