background image

1.  

2.  

1.  

2.  

3.  

1.  
2.  
3.  

4.  

1.  

PBXact System 1000 Recovery

The following steps will guide you through the re-installation process of your System 1000 Sangoma appliance

Preparation
USB Recovery Process
Final Steps

Preparation

Verify that the appliance is powered off.

Connect the appliance to the internet using a LAN cable (The system requires internet to setup timezone and network details)

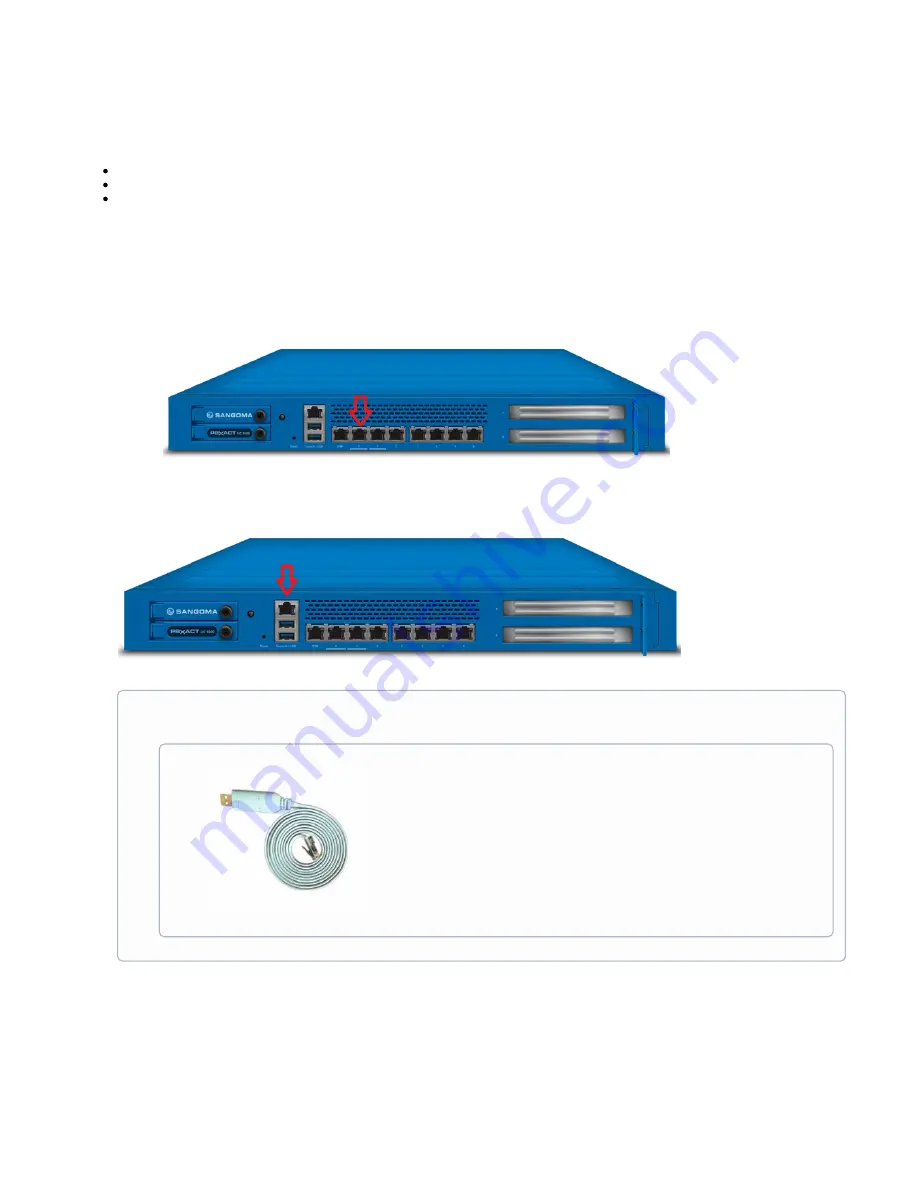
Plug a network cable (cat 5) into 

 on the appliance as seen below:

port 0

Plug the other end of the network cable into a network that will provide internet access to the appliance
 

Plug a USB-to-Serial Console Cable into the Console Port located on the front of the appliance, as seen below:


Plug the 

 end into the the Console port on the appliance

RJ45

Plug the 

 end into a laptop or desktop computer

USB

If your computer does not have the software drivers installed for the usb-to-serial cable please visit the following page:
-> 

Appliance USB to Serial Cable

-> you must have the drivers installed otherwise your computer will not be able to communicate with the appliance through the 
console cable.

From the computer determine which USB port the console cable is plugged into.

The System 300 does not come shipped with a USB-to-Serial Console cable. However, it is the standard console cable that is 
used with any networking equipment. 

See the below image for an example usb-to-seial console cable:


serial-to-usb console cable

Summary of Contents for PBXact UC1000

Page 1: ...the Console Port located on the front of the appliance as seen below Plug the end into the the Console port on the appliance RJ45 Plug the end into a laptop or desktop computer USB If your computer d...

Page 2: ...screen should appear black blank which is normal as the appliance is powered off and there is nothing to be seen on screen USB Recovery Process A USB recovery key was included with the packaging of y...

Page 3: ...Recovery Stick Navigate down the list to and press enter as seen below USB Device BBS Priorities As seen in the below image the AMI Virtual CDROM is in Boot Option 1 This must be changed to have the...

Page 4: ...asking you to select the your network cable is plugged into Ethernet interface Since your network cable is plugged into select from the list by moving your cursor key down Port 0 eth0 Once is selecte...

Page 5: ...board to move forward to the button and then press the TAB OK enter key If you want to setup a static IP address press the TAB key over Manual configuration to setup a static IP address Select a Time...

Page 6: ...ith your root password that you created in the previous step The final step is to reactivate the appliance with the that originally shipped with your system deployment ID To reactivate your appliance...

Page 7: ...umerous times until you log into the BIOS screen as in the initial steps Using the arrow keys on your keyboard navigate to the menu item as seen below BOOT Navigate down the list to and press enter as...

Page 8: ...ployment ID The activation process will install additional RPMs and make the necessary changes to the GUI behind the scenes The end result is a complete new PBXact system This process takes about 3 4...

Reviews: