background image

2

VERY IMPORTANT PLEASE READ

Sangean suggest that you keep your AC Adapter at least 12 inches away from the radio while listening to the AM 
Band.
Your Sangean Radio is powered by an AC adapter which is a “switching” or “switch-mode” type. The DOE 
(Department Of Energy) has a Federal mandate; requiring all manufactures to use this type of power supply.
This newer power saving technology has the unfortunate side effect of causing interference to the AM radio band.
Therefore, we recommend that customers keep at least a 1 foot distance between the AC adapter and the radio. 
This interference will not affect the FM Band. If you have any questions please contact customer service at 
(888)726-4326, (562)941-9900 or [email protected] If an AC adapter isn’t included in this model and if you 
wish to purchase an AC Adapter separately, please refer to the specifications for the AC Adapter stated on the 
final page of the manual, or please contact Sangean for the correct AC Adapter and specifications.
To learn more about the DOE mandate please visit http://www1.eere. energy. gov/buildings/appliance_standards/
product.aspx/productid/23

Please note not all AC adapters are alike.
The AC adapter that is included with this radio is designed to be used exclusively with this device. Do not use an 
AC adapter that differs from the specifications on the AC adapter that is included.
If an AC adapter is NOT included with your radio and in order not to damage the unit and void your warranty, 
specifications for the AC Adapter are stated on the final page of the manual, or please contact Sangean for the 
correct AC Adapter and specifications. For customers in the US and Canada, please call 888-726-4326. For all 
other areas, please contact us via [email protected].
Do not use an AC adapter that does not meet the correct specifications.

Summary of Contents for HD Radio HDR-14

Page 1: ...GB Version 1 HDR 14...

Page 2: ...d in accordance with the instruction may cause harmful interference to radio communication However there is no guaranty that interference will not occur in a particular installation If this equipment...

Page 3: ...apter separately please refer to the specifications for the AC Adapter stated on the final page of the manual or please contact Sangean for the correct AC Adapter and specifications To learn more abou...

Page 4: ...as vases shall be placed on the radio It is recommended to operate the product such that there is a minimum distance 4 recommended to adjacent objects in order to ensure good ventilation The ventilati...

Page 5: ...2 LCD display 3 Power button 4 Low battery indicator 5 Tuning up down button 6 Select Page button 7 HD Seek APS button 8 Preset 1 5 9 Info Menu button 10 Band button 11 Volume control 12 Headphone so...

Page 6: ...GB 5 Controls 14 Telescopic antenna 15 Battery compartment 16 Lock switch...

Page 7: ...6 Controls 17 Swivel stand If needed when the antenna is fully extended you can stabilize the radio using the swivel stand located on the bottom of your radio by following the above diagram...

Page 8: ...ch of young children they can be a choking hazard Using the AC power adaptor 1 The AC power adaptor required for this unit should be 5 volts DC at 0 8A center pin positive Insert the adaptor plug into...

Page 9: ...urs the symbol CT will disappear on the display 2 If clock time from local RDS RBDS station is not correct you should consider disabling the RBDS Auto CT function 3 Please note that at times the RDS R...

Page 10: ...standby mode under battery operation but is enabled under AC adaptor power The factory default is Auto Press the Select button to confirm your setting Note When in Auto mode the menu cannot be set if...

Page 11: ...your radio has any interference in the AM band because of its adaptor please move your radio away from its AC adaptor at least 12 Presetting stations There are 20 presets 4 pages x 5 presets each for...

Page 12: ...ened to has a weak signal some hiss may be audible It is possible to reduce this hiss by forcing the radio to play the station in mono rather than stereo 1 Press the Power button to switch on your rad...

Page 13: ...erase your preset stations stored in the radio The memory presets will revert to the factory default settings Receiving HD Radio stations When the radio is tuned to an HD Radio station the HD Radio l...

Page 14: ...ll the preset station press the Page button to select Page 1 to 4 and then press the preset numeric button Emergency alert EA Emergency Alerts EA is a warning system used by broadcasters to notify lis...

Page 15: ...ning up down button to select your desired Alert Location option and then press the Select button to enter the setting If State County was selected 1 Press the Tuning up down button to change the Stat...

Page 16: ...volume Press and hold the Menu button to enter the menu setting and then press the Tuning up down button to select Alert Volume Press the Select button and then press the Tuning up down button to sele...

Page 17: ...urs Before the ignore time has expired no alert functionality will be triggered However if a new alert message is received ignore will be cancelled immediately Indicators for Emergency alerts Your rad...

Page 18: ...le So if there is no text for example that display is not available If no RDS information is available the radio will be unable to display the program service e g station name scrolling text and progr...

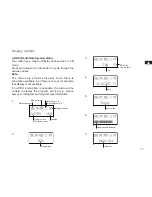
Page 19: ...Audio mode 5 Signal strength indicator 6 Radio text 7 Station name HD Radio indicator Multicast set index Current station supports Emergency Alerts Plus indicator additional HD Radio stations are ava...

Page 20: ...will show the frequency options for the alarm Daily the alarm will sound everyday Weekends the alarm will sound only on weekends Weekdays the alarm will sound on weekdays only Once the alarm will soun...

Page 21: ...utton Sleep timer Your radio can be set to turn off after a preset time has elapsed The sleep timer setting can be adjusted between 15 and 180 minutes 1 Press the Power button to switch on your radio...

Page 22: ...g up down button to select your required language 3 Press the Select button to confirm your selection The display will change to the chosen language Headphone socket A 3 5mm Headphone socket located o...

Page 23: ...may be required to resume normal operation Lock Switch The lock switch is used to prevent unintentional operation of the radio Set the Lock switch located on the right hand side of the radio to the p...

Page 24: ...temperature range 0 C to 40 C If at any time in the future you should need to dispose of this product please note that Waste electrical prod ucts should not be disposed of with household waste Please...

Reviews: