background image

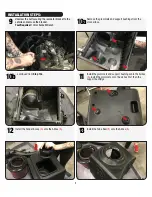
10a

9

10b

11

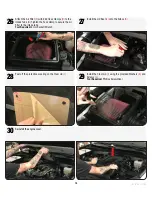
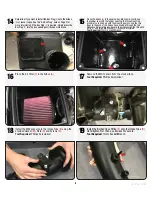
Unscrew the bolt securing the resonator bracket to the 

vehicle and remove the bracket. 

Tool Required: 

10mm Socket/Wrench

Remove the grommets and support bushings from the 

stock airbox. 

12

...continued from 

Step 10a

.

Install the grommets and support bushings onto the Airbox 

(A)

. Install the grommets onto the air box first then the 

support bushings.

Install the Fender Scoop 

(G)

 onto the Airbox 

(A)

.

13

Install the Tube Seal 

(E)

 onto the Airbox 

(A)

.

7

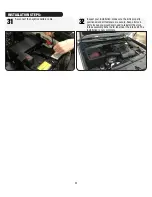
INSTALLATION STEPS:

Summary of Contents for 75-5115

Page 1: ...15461 SLOVER AVE FONTANA CA 92337 PH 909 947 0015 FAX 909 947 0603 WWW SBFILTERS COM INSTALLATION INSTRUCTIONS INSTALLATION INSTRUCTIONS P N 75 5115 75 5115D...

Page 2: ...at Blade Screwdriver Panel Popper TOOLS REQUIRED Kit may not fit with the following Aftermarket Parts installed Body Lift or Lowering Kit Custom Hood Throttle Body Spacer Upgrade NOTES Product will be...

Page 3: ...ck the following The California Air Resource Board CARB requires that an E O Identification label be applied to the vehicle in order to pass a smog check inspection when a Performance Intake Kit has b...

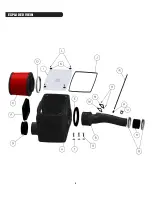
Page 4: ...3 EXPLODED VIEW...
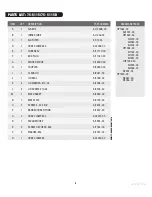
Page 5: ...AG1038 00 E 1 TUBE SEAL AI1717C 00 F 1 BOX PLUG AI1718C 00 G 1 FENDER SCOOP AI1859C 00 H 1 COUPLER AI2055C 00 I 1 CLEAR LID AI2081 00 J 1 LID SEAL AI1766 02 K 4 LID WASHER 10 24 AI2006 00 L 4 LID SCR...

Page 6: ...p Tool Required 10mm Socket Wrench Lift and pull to remove the engine cover from the vehicle 4 Disconnect the CCV hose from the intake tube by moving the clamp and pulling the hose Also disconnect and...

Page 7: ...uring the lid to the airbox then remove the lid resonator and intake tube from the vehicle Tool Required 10mm Socket Wrench 8 Loosen and remove the three bolts securing the base of the airbox to the v...

Page 8: ...Remove the grommets and support bushings from the stock airbox 12 continued from Step 10a Install the grommets and support bushings onto the Airbox A Install the grommets onto the air box first then...

Page 9: ...oints and the two pegs in the back of the Airbox have lined up through the two clearance holes in the box Secure the airbox using the three M8 bolts S and three M8 Washers T we have provided Tool Requ...

Page 10: ...H over the throttle body then tighten both 52 Hose Clamp Q 23 Remove the stock hose clamp from the CCV hose and install the 8 Hose Clamp U Connect the stock CCV hose to the Intake Tube B and tighen t...

Page 11: ...provided Washers K and Screws L Tool Required Phillips Screwdriver Attach the Air Filter C with 84 Hose Clamps D to the Intake Tube B Tighten the hose clamp to secure the air filter to the intake tube...

Page 12: ...allation make sure the kit is properly positioned and all fasteners are secure Keep all stock parts incase you would ever need to reinstall the stock intake assembly Affix the ID label near the intake...

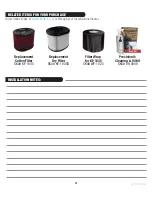
Page 13: ...ers com or through your local S B distributor Replacement Dry Filter SKU KF 1035D Filter Wrap for KF 1035 SKU WF 1023 Precision II Cleaning Oil Kit SKU 88 0008 Replacement Cotton Filter SKU KF 1035 RE...

Reviews: