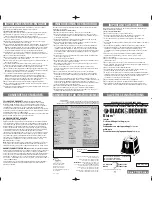
background image


2.   HOW   TO   USE


PARTS:   


1.Toasting   slots                       
2.   Push   knob                   
3.   Bread   browning   lever                           
4.   Cancel   button           
5.   Reheat   button           
6.   Defrost   button           
7.   Crumb   tray   
   
-­‐   

Cancel   button

:   to   interrupt   toasting   at   any   time,   press   this   button.   

-­‐   

Reheat   button

:   to   toast   warm   bread,   press   this   button.   

-­‐   

Defrost   button

:   to   toast   cold   bread,   press   this   button.


HOW   TO   USE       

Before   first   use   

1.


Remove   all   packaging   material,   labels   and/or   stickers   from   your   toaster.   Make   sure   there   is   no   
packaging   material   remaining   in   the   slots.   

2.


Insert   the   removable   crumb   tray   into   the   crumb   tray   slot.   

3.


Select   a   location   for   the   toaster.   The   location   should   be:   

-­‐   A   flat,   heat-­‐resistant,   non-­‐flammable   surface   
-­‐   At   least   3   inches   (7   cm)   away   from   walls   or   back   of   the   countertops.   
-­‐   At   least   one   foot   (30   cm)   away   from   a   cabinet   or   shelving   that   may   be   above   the   toaster.   
-­‐   Away   from   flammable   materials,   such   as   curtains   and   wall   fabrics.   
-­‐   Away   from   a   gas   stove   flame   or   electric   element.   

4.


Plug   the   power   cord   into   220-­‐240V,   50Hz   AC   outlet.   To   minimize   cord   clutter   on   kitchen   countertops,   
use   cord   wrap   located   under   the   toaster.       

1

2

3

7

4 5 6 4

Summary of Contents for 37684

Page 1: ...60Hz 850W MANUAL DE INSTRUCCIONES INSTRUCTION MANUAL MANUEL D INSTRUCTIONS MANUALE D INSTRUZIONI MANUAL DE INSTRU ES ANTES DE USAR LEA ATENTAMENTE ESTE MANUAL PLEASE READ CAREFULLY THIS MANUAL BEFORE...

Page 2: ...das para evitar el derramamiento de l quidos calientes Este aparato est previsto para su utilizaci n como aparato de uso dom stico y an logo como peque as reas de cocina en tiendas oficinas y otros en...

Page 3: ...inas de su tostadora Aseg rese de que no hay ning n material de embalaje que pueda quedar en las ranuras 2 Inserte la bandeja recogemigas en la ranura destinada a ella 3 Coloque la tostadora en su ubi...

Page 4: ...orriente Para evitar el riesgo de descarga el ctrica no limpie la unidad base o el cable de alimentaci n con agua y no los sumerja en el agua No utilice productos abrasivos soluciones de limpieza fuer...

Page 5: ...eriales y mano de obra por un per odo de dos a os a partir de la fecha de compra Bajo esta garant a el fabricante se compromete a reparar o reemplazar cualquier pieza que se encuentre defectuosa siemp...

Page 6: ...laced in a stable place with the handles positioned to prevent spillage of hot liquids This appliance is intended for being used as a household appliance and similar uses as small kitchen areas in sho...

Page 7: ...o packaging material remaining in the slots 2 Insert the removable crumb tray into the crumb tray slot 3 Select a location for the toaster The location should be A flat heat resistant non flammable su...

Page 8: ...nit or the power cord with water and do not immerse them in water Clean the toaster regularly This appliance contains no user serviceable parts and requires little maintenance Leave any servicing or r...

Page 9: ...e providing the product is returned to one of our authorised service centres This guarantee is only valid if the appliance has been used in accordance with the instructions and provided that it has no...

Page 10: ...ement de liquides chauds Cet appareil est con u pour tre utilis comme un appareil usage domestique et similaire un petit coin cuisine dans les magasins les bureaux et autres environnements de travail...

Page 11: ...in Assurez vous qu il n y a pas de mat riel d emballage reste dans les fentes 2 Ins rez le tiroir du ramasse miettes amovible dans les d chets de fente du plateau 3 Placez le grille pain dans votre em...

Page 12: ...les fentes de pain 3 ENTRETIEN ET NETTOYAGE Avant de nettoyer l appareil retirer la fiche de la prise Pour viter le risque de choc lectrique ne pas nettoyer l unit de base ou le cordon d alimentation...

Page 13: ...accumuler dans le tiroir ramasse miettes et peuvent prendre feu si pas vid p riodiquement Garantie Ce produit est garanti contre les d fauts de mat riaux et de fabrication pour une p riode de deux an...

Page 14: ...per evitare la fuoriuscita di liquidi caldi Questo dispositivo stato progettato per essere utilizzato come apparato uso domestico e similare come piccole aree cucina in negozi uffici e altri ambienti...

Page 15: ...o adesivi del vostro tostapane Assicurarsi che non vi alcun materiale d imballaggio rimane nelle fessure 2 Inserire il vassoio estraibile nei rifiuti fessura cassetto 3 Posizionare il tostapane nella...

Page 16: ...zione con acqua e non immergerli in acqua Non utilizzare abrasivi soluzioni detergenti aggressivi o spazzole dure per la pulizia Pulire il tostapane regolarmente Questo dispositivo non contiene parti...

Page 17: ...aranzia il produttore si impegna a riparare o sostituire le parti difettose fornendo il prodotto viene restituito a uno dei nostri centri di assistenza autorizzati Questa garanzia valido solo se l app...

Page 18: ...reas de cozinha em lojas oficinas e outros espa os de trabalho casas de campo por clientes em hot is mot is e outros espa os de uso residencial estabelecimentos de tipo albergue N o use acess rios n...

Page 19: ...chama fog o a g s ou el trico elemento 4 Conecte o cabo de alimenta o na tomada Para minimizar a confus o no balc o da cozinha enrole o fio sob a torradeira Usando o seu Torradeira 1 A maioria dos tip...

Page 20: ...l localiza se na parte inferior Segure a al a da bandeja de res duos e remov lo completamente Descarte as migalhas e lavar a bandeja com gua morna e sab o As n doas dif ceis podem ser removidas com um...

Page 21: ......

Page 22: ......

Reviews: