background image

Picture Viewing

Picture Viewing

1

1

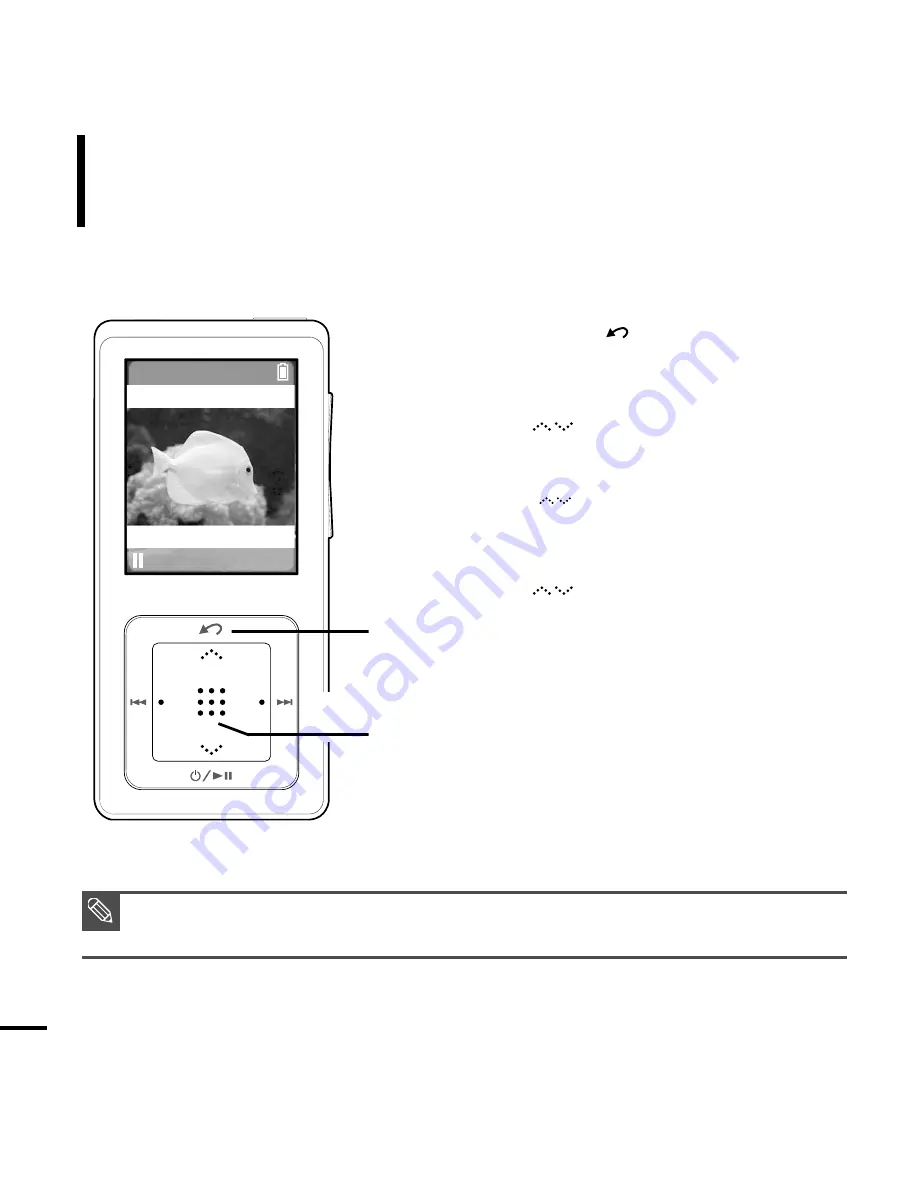
2,3

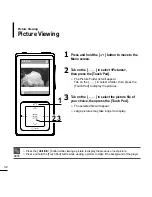
Press and hold the [      ] button to move to the
Menu screen.

3

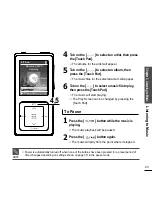
Tab on the [         ] to select the picture file of
your choice, then press the [Touch Pad].

The selected file will appear.

Large pictures may take longer to display.

2

Tab on the [         ] to select <Pictures>,
then press the [Touch Pad].

The Picture Folder list will appear.
Tab on the [       ] to select a folder, then press the
[Touch Pad] to display the pictures.

NOTE

■   

Press the [ l

œœ √√

l ] button while viewing a picture to display the previous or next picture.

■   

Press and hold the [Touch Pad] button while viewing a picture to make it the background of the player.

32

2:10 

AM

Summary of Contents for YP-Z5

Page 1: ......

Page 2: ...areas as it could result in fire or electric shock Avoid using your product at high volume levels as it may result in permanent hearing damage If you experience ringing in your ears while using the e...

Page 3: ...her causes Failure to follow all instructions lead to physical injuries or damage to the product Do not cause excessive impact on the product by dropping it Do not place heavy objects on top of the pr...

Page 4: ...sic Use 14 Chapter 2 Connecting to a PC Connecting to a PC 18 Transferring Music to your Player 19 Chapter 3 Listening to Music Listening to Music 22 Transferring Playlists from WMP10 25 To Play a Pla...

Page 5: ...p 37 Repeat Setup 38 Timer Setup 39 Language Setup 40 Reset 41 Checking the System Infomation 42 Chapter 6 Troubleshooting Appendix System Reset 44 To Upgrade Firmware 45 Troubleshooting 47 Menu Tree...

Page 6: ...Chapter 1 Preparation Checking the Product and Accessories 7 Charging the battery 13 Basic Use 14...

Page 7: ...ny necessary software needed including Windows Media Player 10 and support for online music stores This CD will also show you how to rip CDs download new music from an online store manage your music w...

Page 8: ...and Accessories Front Right Side and Top Earphone Connection Port Neck String Hole Lock Switch Screen Display Volume Control Button Back Button Move Track Quick Search Button Outer Ring Touch Pad Sele...

Page 9: ...Chapter 1 Preparation Checking the Product and Accessories 9 Bottom Power USB Connection Port Reset Button Earphone Connection Top Earphones...

Page 10: ...Title Display 4 3D Sound Displays 5 File Type Display MP3 WMA etc 6 Play Status Bar 7 Play Time Display 8 Play Pause Display 10 Street Mode Display 9 Music Title Display 11 Repeat Play Display 12 Tota...

Page 11: ...k Short press to move to the previous track or to play the current track from the start Long press to scan to a point on the current track Short press to move to the next track Push in the direction o...

Page 12: ...de to move left or right by one selection Picture mode Tap and hold on top or bottom side to move up or down continuously Press the center of the Touchpad to select the function and move to the next s...

Page 13: ...other end of the USB cable to the Power USB Connection Port on bottom of the player Connected appears on the screen dis play of the player When connected with the USB cable it takes about 4 hours for...

Page 14: ...turned off when none of the buttons have been pressed for a preset period of time Default 1 minute in the pause mode 1 Press and hold the button to move to the Menu screen 2 Tab on the to select Music...

Page 15: ...rease it In Hold mode all buttons are disabled This function is useful when you are walking or jogging 1 Push the HOLD button on the top of the unit in the direction of the arrow 2 Push the HOLD butto...

Page 16: ...Basic Use Continued 16 If a product malfunction occurs you can re initialize the system by pressing the Reset button P44 Reset Function Reset Button...

Page 17: ...Chapter 2 Connecting to a PC Connecting to a PC 18 Transferring Music to your Player 19...

Page 18: ...nnected appears on the screen display of the player For use in conjunction with a PC the following is required Pentium 300MHz or higher USB Port 2 0 only Windows XP Service Pack 1 or higher DirectX 9...

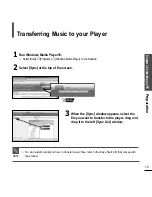
Page 19: ...the file you want to transfer to the player drag and drop it to the left Sync List window 2 Select Sync at the top of the screen Chapter 2 Connecting to a PC Preparation 19 NOTE For an in depth tutor...

Page 20: ...you want to download are checked and then press Start Sync at the top of the screen Synchronized to Device message will appear on the left window The downloaded files will appear in the right window u...

Page 21: ...Listening to Music 22 Transferring Playlists from WMP10 25 To Play a Playlist 27 Shuffle Play Random Repeat 28 Checking the Music Information 30 Before you start Transfer the music file of your choic...

Page 22: ...ear Music Menu Artists To play by artist Albums To play by album Genres To play by genre Composers To play by composer Playlists To play by Playlist Shuffle To play continuously in random order All So...

Page 23: ...then press the Touch Pad The music will start playing The Play Screen can be changed by pressing the Touch Pad NOTE Power is automatically turned off when none of the buttons have been pressed for a p...

Page 24: ...arts playing from the beginning To play the previous next track Press the l button within 10 seconds of play The previous track will start playing Press the l button The next track will start playing...

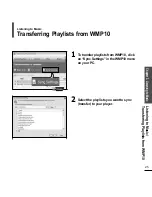
Page 25: ...sic Transferring Playlists from WMP10 25 Transferring Playlists from WMP10 Listening to Music 1 To transfer playlists from WMP10 click on Sync Settings in the WMP10 menu on your PC 2 Select the playli...

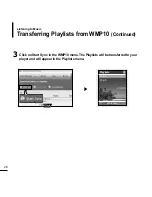
Page 26: ...g Playlists from WMP10 Continued Listening to Music 26 Pop 1 Pop 5 Playlists Welcome 3 Click on Start Sync in the WMP10 menu The Playlists will be transferred to your player and will appear in the Pla...

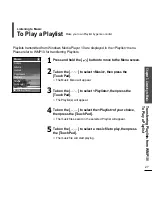
Page 27: ...to WMP10 for transferring Playlists 2 Tab on the to select Music then press the Touch Pad The Music Menu will appear 3 Tab on the to select Playlists then press the Touch Pad The Playlist s will appe...

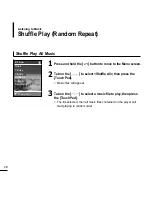
Page 28: ...Pad Music files will appear 3 Tab on the to select a music file to play then press the Touch Pad The file selected then all music files contained on the player will start playing in random order 1 Pr...

Page 29: ...ouch Pad The music files for the selected artist will appear in random order 6 Tab on the to select a music file to play then press the Touch Pad The music files under that particular Artist will star...

Page 30: ...2 Tab on the to select Now Playing then press the Touch Pad The music information screen for the track currently playing will appear 1 Press and hold the button to move to the Menu screen NOTE Pressin...

Page 31: ...ter 4 Picture Viewing Picture Viewing 32 Picture Enlarging Slideshow Viewing 33 Before you start Transfer picture files to the player using WMP10 For further details refer to WMP10 software s Help sec...

Page 32: ...pictures may take longer to display 2 Tab on the to select Pictures then press the Touch Pad The Picture Folder list will appear Tab on the to select a folder then press the Touch Pad to display the p...

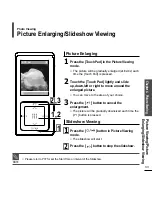
Page 33: ...he button to cancel the enlargement The picture will be gradually downsized each time the button is pressed 2 Touch the Touch Pad lightly and slide up down left or right to move around the enlarged pi...

Page 34: ...Chapter 5 Setup Setup 35 Audio Setup 35 Display Setup 36 Slideshow Setup 37 Repeat Setup 38 Timer Setup 39 Language Setup 40 Reset 41 Checking the System Infomation 42...

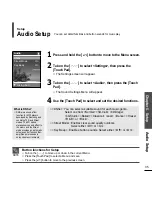
Page 35: ...Street Mode Enables clear sound quality outdoors Select either Off or On Key Beep Enables button sounds Select either Off or On NOTE Button functions for Setup Tab on the to move up or down in the cu...

Page 36: ...ve been pressed for a preset period of time Select either Always On 15s 30s 60s or 120s Off Batt When running on battery power the screen display will be automatically turned off if none of the button...

Page 37: ...you can set the start time of the slideshow after the Menu and function screen disappears Select either Off 1m 5m 10m or 15m Start USB When connected via USB you can set the start time of the slidesho...

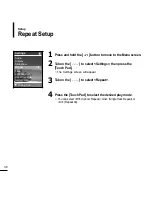
Page 38: ...3 Tab on the to select Repeat 1 Press and hold the button to move to the Menu screen 4 Press the Touch Pad to select the desired play mode You can select Off Cancel Repeat One Single Track Repeat or...

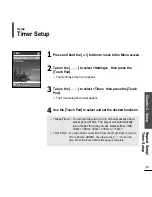
Page 39: ...the desired functions 1 Press and hold the button to move to the Menu screen Sleep Timer You can set the power to turn off automatically after a preset period of time The player will automatically tur...

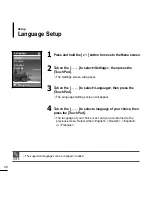
Page 40: ...ect Language then press the Touch Pad The Language Settings screen will appear 4 Tab on the to select a language of your choice then press the Touch Pad The language of your choice is set and you are...

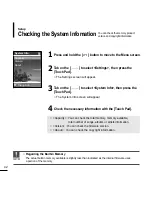
Page 41: ...he to select Settings then press the Touch Pad The Settings screen will appear 3 Tab on the to select Reset Settings then press the Touch Pad The Reset Confirm screen will appear 4 Tab on the to selec...

Page 42: ...ouch Pad The System Info screen will appear 4 Check the necessary information with the Touch Pad CAUTING Regarding the Built In Memory The actual built in memory available is slightly less than indica...

Page 43: ...Chapter 6 Troubleshooting Appendix System Reset 44 To Upgrade Firmware 45 Troubleshooting 47 Menu Tree 50 Product Specifications 51 License 52 Safety Information 54 Warranty 56...

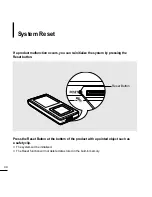
Page 44: ...om of the product with a pointed object such as a safety clip The system will be initialized The Reset function will not delete data stored in the built in memory If a product malfunction occurs you c...

Page 45: ...for this player to enhance performance and compatibility 2 When the product page appears select Firmware below the model name to download the latest firmware 3 Uncompress the downloaded file in a fold...

Page 46: ...are upgrade 8 Connect the player to your PC with the USB cable The firmware will be upgraded It will take 1 minute or so NOTE Check the battery charge status of the player If the battery is not suffic...

Page 47: ...nd turn the power on again Check if the HOLD switch is in the HOLD position Check if you pressed the right button then press again Press the Reset Button If you had set Off Batt or Off USB in Settings...

Page 48: ...ected Reconnect if necessary Check if the memory is full Press the Reset button Check if the USB cable has been disconnected during file or data transmission If this is the case it may cause serious d...

Page 49: ...points Troubleshooting Please check if the PC requirements are met Press Start on the toolbar of your PC to run Windows Update Select Key Updates and Service Packs then update all Reboot the PC and re...

Page 50: ...city Version About Sleep Timer set Time Display Brightness Dim Batt Off Batt Dim USB Shuffle Off USB Start Batt Start USB Slide Time DNSe Street Mode Key Beep Music Menu Select Screen Pictures Playlis...

Page 51: ...able 820 mAh AUDIO MPEG1 2 2 5 Layer3 8kbps 320kbps 8kHz 48kHz MPEG1 Layer2 32kbps 384kbps 32kHz 44 1kHz 48kHz WMA 8kbps 192kbps 8kHz 44 1kHz IMAGE JPEG ISO IEC 10918 1 Annex F Sequential DCT based mo...

Page 52: ...by end user consumers for licensed contents No rights are granted for commercial use The license does not cover any product unit other than this product unit and the license does not extend to any un...

Page 53: ...Memo...

Page 54: ...harmful interference and 2 this device must accept any interference received including interference that may cause undesired operation Caution Any changes or modifications in construction of this dev...

Page 55: ...responsibility that the product Trade Name Samsung Electronics Co Ltd Model Number YP Z5 has been tested according to the FCC CISPR22 95 requirements for Class B devices and found compliant with the f...

Page 56: ...ranty is only valid when the warranty card is properly completed and upon presentation of the proof of purchase consisting of original invoice or sales slip confirmation indicating the date of purchas...

Page 57: ...nor use not consistent with technical or safety standardsin current force or failure to comply with productmanual instructions Accidents Acts of God or any cause beyond the control of Samsung caused b...

Page 58: ...UNG AND CAUSING THE ALLEGED DAMAGE WITHOUT LIMITING THE FOREGOING PURCHASER ASSUMES ALL RISK AND LIABILITY FOR LOSS DAMAGE OR INJURY TO PURCHASER AND PURCHASER S PROPERTY AND TO OTHERS AND THEIR PROPE...

Page 59: ...If you have any questions or comments relating to Samsung products please contact the SAMSUNG customer care center Samsung Electronics America Inc 1 800 SAMSUNG 7267864 www samsung com...

Page 60: ......

Reviews: