3-8
Samsung Electronics
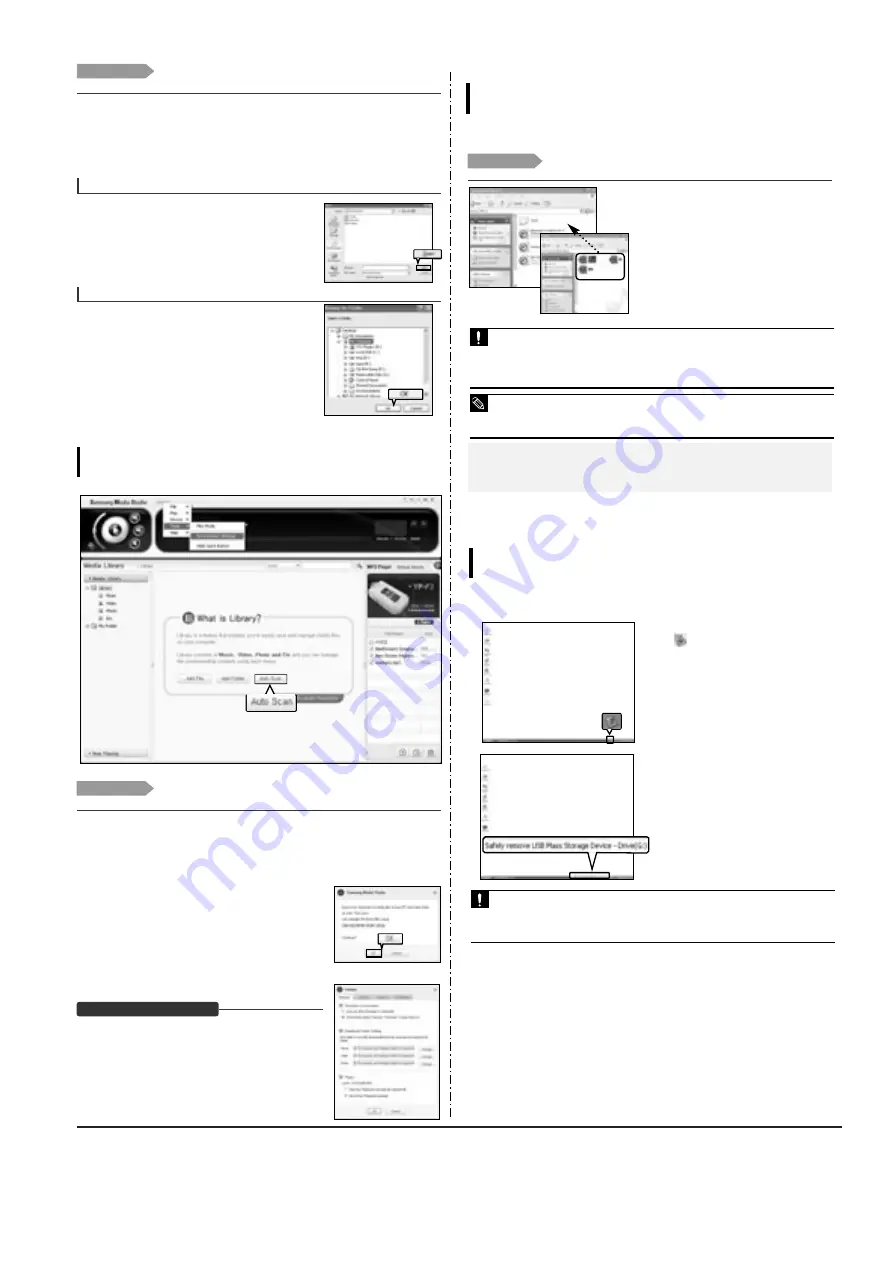
Using as a Removable Disk
Before you start!
■
Connect the player to your PC.
1
Open files/folders to transfer from your PC.
2
Open <My Computer>
➝
<Removable
Disk> from the desktop.
3
Select the files/folders to transfer from your
PC and drag and drop them to a folder of
your choice in the <Removable Disk>.
■
The selected folders or files are transferred to the
player.
■
What is DRM?
DRM (Digital Rights Management) is a technology and service to prevent the illegal use of digital contents
and protect the profit and rights of copyright holders. DRM files are charged music files applied with the ille-
gal copy protection technology of legally purchased MP3 music.
You can use the player as a removable
storage device.
■
The <USB Transferring> message will appear during file download or upload. Disconnecting the USB cable
while <USB Transferring> is displayed may cause malfunction of the player.
■
The order of music files displayed in Windows Explorer may differ from the play order on your device.
■
If you move a DRM file(charged file) to the removable disk, the file will not be played.
CAUTION
■
Select the file to save and drag-and-drop it into the removable disk icon.(In numerical, alphabetical order)
If you change the name of music files in Windows Explorer like 001* * * , 002* * *...,
music files will be played in the order of number indicated.
NOTE
Disconnecting from your PC
Follow the steps below to prevent damage to the
player and data when disconnecting from your PC.
1
Place the mouse cursor on top of the
@
icon on the taskbar at the bottom
right corner of the desktop and click
the left mouse button.
2
Click the <Safely Remove USB Mass
Storage Device Drive> message.
■
Once you clicked <Safely Remove USB
Mass Storage Device Drive>, the player
could not be recharged with power even if
it is connected to the PC.
3
Disconnect the player from your PC.
■
Do not disconnect the player from the PC during file transfer. This may cause damage to data
and the player.
■
You cannot remove the hardware while files within the player are being played on your PC. Please
retry after file playback is finished.
CAUTION
1
2
1
Media Studio will automatically start when the player is connected to your PC.
■
If the program does not start automatically, double Click the Media Studio icon on the desktop.
2
Click the <Media Library>
➝
<Library> tab on the left of the Media Studio window.
■
The <Add File>/<Add Folder>/<Auto Scan> taps will appear.
3
Click <Add File>.
■
The Open window will appear.
4
Select the files to add and click <Open>.
■
The selected files are added to the list.
Before you start!
■
Connect the player to your PC.
■
Media Studio must be installed on your PC.
To add files
3
Click <Add Folder>.
■
The Browse folder is window will appear.
4
Select the folder to add and click <OK>.
■
The selected folder is added to the list.
To add folders
4
4
Adding Files/Folders in Media Studio with Autoscan
Importing Music Files
3
1
Media Studio will automatically start when the player is connected to your PC.
■
If the program does not start automatically, double Click the Media Studio icon on the desktop.
2
Click the <Media Library>
➝
<Library> tab on the left of the Media Studio window.
■
The <Add File>/<Add Folder>/<Auto Scan> taps will appear.
3
Click <Auto Scan>.
■
The Autoscan window will appear.
4
Click <OK>.
■
Automatically scans files and adds them to the library.
■
The first time you use Media Studio, the Autoscan Confirm win-
dow and Options window appear accordingly. Set the options,
then click <OK> to start Autoscan.
Click <MENU>
➝
<Tools>
➝
<Environment Settings>
from the top of the Media Studio Window and then click the
<Library> tab.
■
Select the range and file type to autoscan.
How to setup Autoscan Options
Before you start!
■
Connect the player to your PC.
■
Media Studio must be installed on your PC.
4
Summary of Contents for YP-F2
Page 2: ...ELECTRONICS Samsung Electronics Co Ltd MAR 2006 Printed in Korea Code no AH68 01819P ...
Page 18: ...Samsung Electronics 4 1 Samsung Electronics 4 Adjustments 1 How to recover the device ...
Page 19: ...4 2 Samsung Electronics 2 How to upgrade Firmware ...
Page 22: ...Samsung Electronics 6 1 6 Troubleshooting 1 Power failure ...
Page 23: ...6 2 Samsung Electronics 2 No audio sounds ...
Page 24: ...Samsung Electronics 6 3 3 Cannot make a voice recording ...
Page 25: ...6 4 Samsung Electronics 4 Buttons do not work ...
Page 26: ...Samsung Electronics 6 5 5 Connection with the pc is abnormal ...
Page 27: ...Samsung Electronics 7 1 7 Exploded View Parts List 1 Total Exploded View ...
Page 30: ...9 1 9 BLOCK DIAGRAM YP F2 BLOCK DIAGRAM 9 1 Samsung Electronics ...
Page 31: ...10 Wiring Diagram Samsung Electronics 10 1 ...
Page 32: ...11 PCB Diagram 1 TOP 11 2 Samsung Electronics T Top op Vie View w Osil 24MHz ...
Page 33: ...2 BUTTOM Samsung Electronics 11 2 Bottom Bottom Vie View w ...
Page 38: ...Samsung Electronics 13 2 2 Main Functions by Block ...


