Alignment and Adjustments
3-5
Samsung Electronics
3-2-2 Camera Adjustment
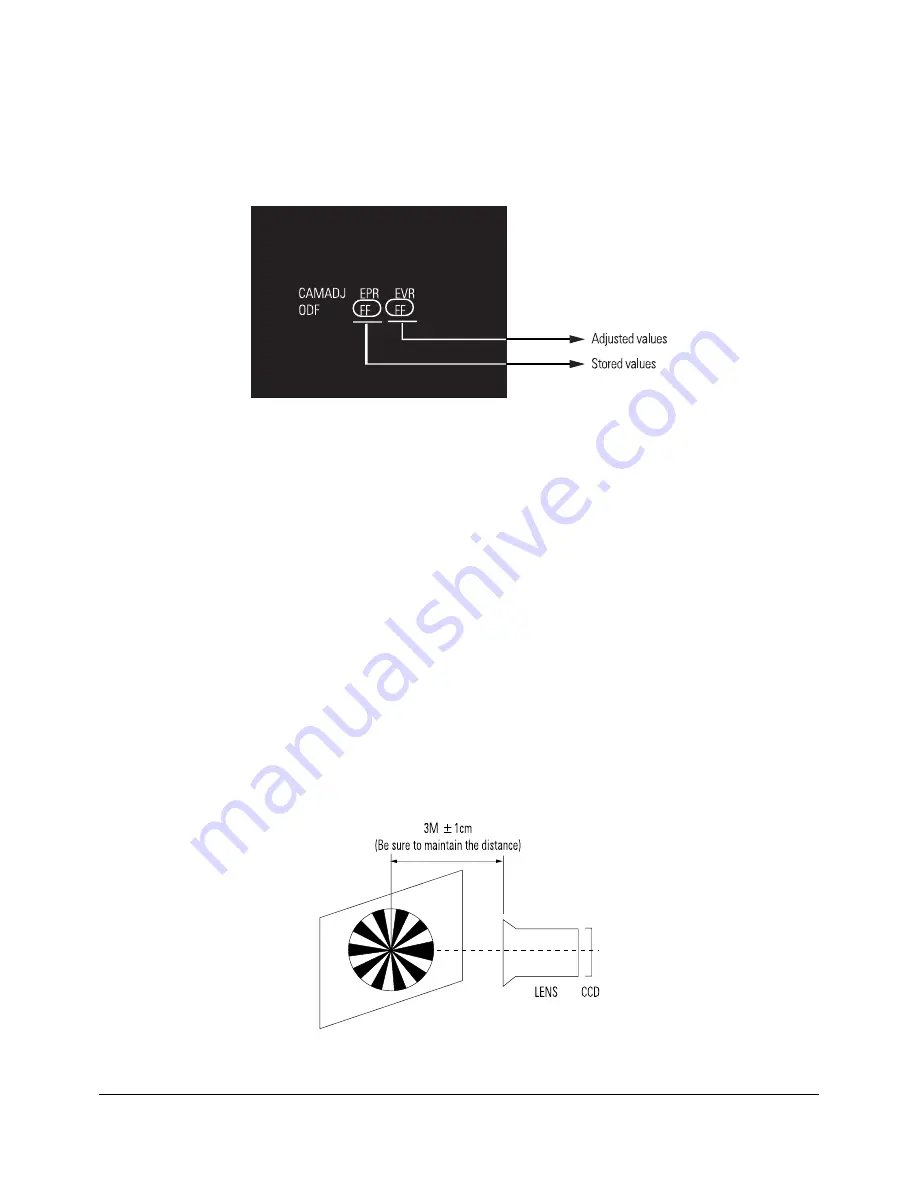
Note : "XX XX" indicate the previous preset value and adjusted value.
Press the “PHOTO Button” (Confirm) to store the adjusted value.
Fig. 3-6
1) EEPROM Data Initialize
Caution : This adjustment must do following items changing new EEPROM (IC505) or Main PCB.
Œ
OE Press the "EASY-Q"(Mode Up)/"DISPLAY"(Mode Down) buttons so that OSD shows "00DF XX XX".
´
Press the “T(
) orW(
)"(Data Up/Down) so that display data of EVR is "AA"
ˇ
Press the "OK" Button (Confirm).
¨
The OSD shows "OK" after huithing the initalize.
2) Lens Zoom Track
Caution : For whole zoom range, it shall be in focus.The location of a focus lens is moving depending on the location of
Zoom Lens. During adjusting, micom measures the focus location from a near distance to a long.
Œ
Camera is set to E-E mode.
´
Focus chart photo.
ˇ
Ensure that camera is left an about 3m distance from a focus chart and the focus of lens is placed vertically.
Attach a focus chart to white or gray wall of a flat surface.
¨
Connect a video output terminal to a TV.
ˆ
Press the "EASY-Q"(Mode Up)/"DISPLAY"(Mode Down) buttons so that OSD shows "00D0 XX XX".
Ø
Press the "OK"Button (Confirm). Never impact on the lens when adjusting zoom and focus Lens. The OSD
shows "OK" after finishing the adjustment.
(Show Fig. 3-8)
Fig. 3-7
Summary of Contents for VP-D371
Page 12: ...Product Specification 2 4 Samsung Electronics MEMO ...
Page 46: ...4 18 Disassembly and Reassembly Samsung Electronics MEMO ...
Page 66: ...Exploded View and Parts List 5 20 Samsung Electronics MEMO ...
Page 83: ...Samsung Electronics 8 1 8 Wiring Diagram ...
Page 84: ...Wiring Diagram 8 2 Samsung Electronics MEMO ...
Page 93: ...PCB Diagrams Samsung Electronics 9 9 9 10 CVF PCB COMPONENT SIDE CONDUCTOR SIDE ...
Page 94: ...PCB Diagrams 9 10 Samsung Electronics MEMO ...
Page 118: ...Schematic Diagrams 10 24 Samsung Electronics MEMO ...
Page 119: ...Samsung Electronics 11 1 11 Operating Instructions ...
Page 120: ...Operating Instructions 11 2 Samsung Electronics ...
Page 121: ...Operating Instructions 11 3 Samsung Electronics ...
Page 122: ...Operating Instructions 11 4 Samsung Electronics ...
Page 123: ...Operating Instructions 11 5 Samsung Electronics ...
Page 124: ...Operating Instructions 11 6 Samsung Electronics ...
Page 125: ...Operating Instructions 11 7 Samsung Electronics ...
Page 126: ...Operating Instructions 11 8 Samsung Electronics ...
Page 127: ...Operating Instructions 11 9 Samsung Electronics ...
Page 128: ...Operating Instructions 11 10 Samsung Electronics ...
Page 129: ...Operating Instructions 11 11 Samsung Electronics ...
Page 130: ...Operating Instructions 11 12 Samsung Electronics ...
Page 131: ...Operating Instructions 11 13 Samsung Electronics ...
Page 132: ...Operating Instructions 11 14 Samsung Electronics ...
Page 133: ...Operating Instructions 11 15 Samsung Electronics ...
Page 134: ...Operating Instructions 11 16 Samsung Electronics ...
Page 135: ...Operating Instructions 11 17 Samsung Electronics ...
Page 136: ...Operating Instructions 11 18 Samsung Electronics MEMO ...
Page 148: ...Troubleshooting 12 12 Samsung Electronics MEMO ...
Page 168: ...Circuit Operating Description 13 20 Samsung Electronics MEMO ...
Page 183: ...Reference Information Samsung Electronics 14 15 Fig 14 14 ...
Page 212: ...Reference Information 14 44 Samsung Electronics 14 5 Abbreviated word ...


