background image


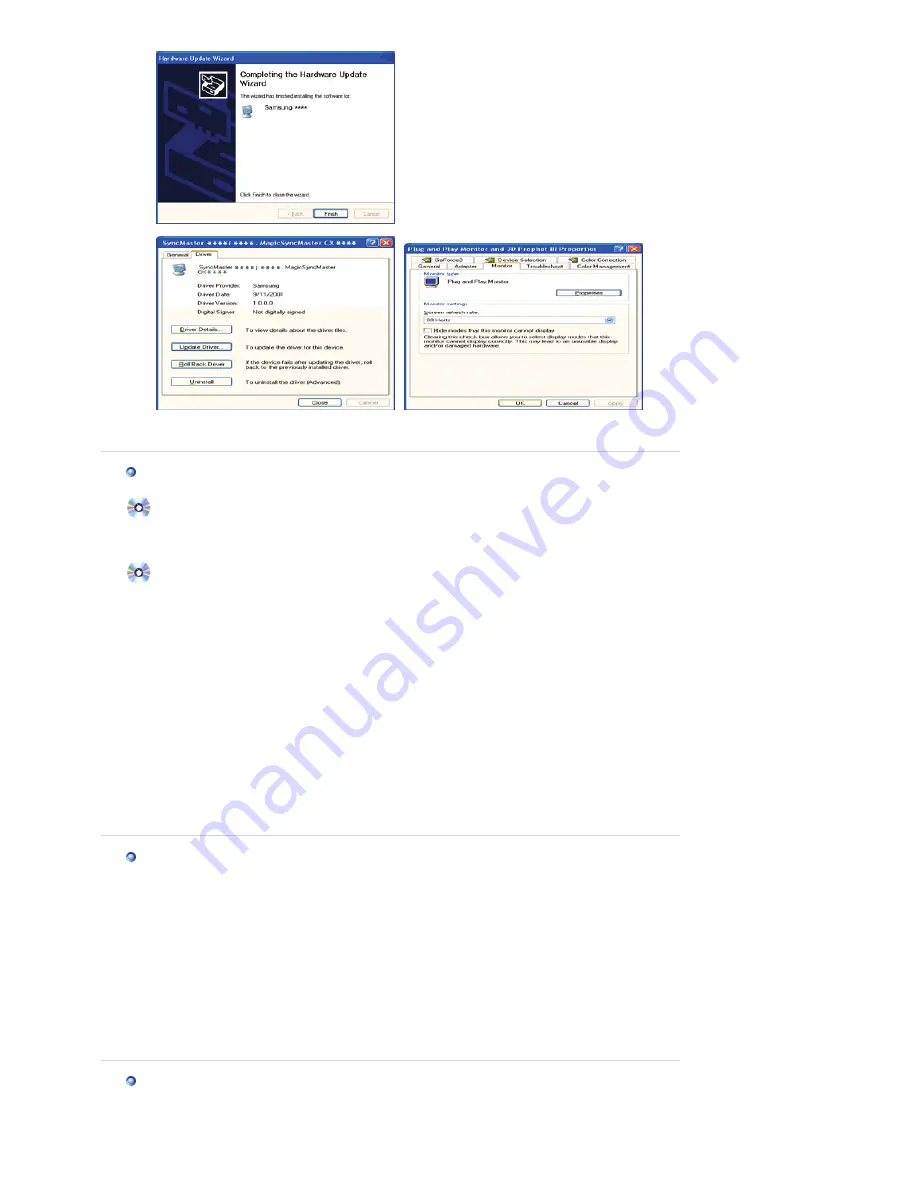
10. Monitor driver installation is completed.  


  Microsoft

®

 Windows

®

 2000 Operating System 


When you can see "Digital Signature Not Found" on your monitor, follow these steps.

1. Choose "

OK

" button on the "

Insert disk

" window.  

2. Click the "

Browse

" button on the "

File Needed

" window.  

3. Choose A:(D:\Driver) then click the "Open" button and then click "

OK

" button. 

How to install

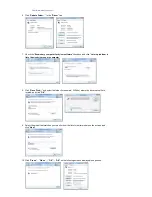
1. Click "

Start

" , "

Setting

" , "

Control Panel

".  

2. Double click the "

Display

" Icon.  

3. Choose the "

Settings

" tab and then click "

Advanced..

".  

4. Choose "

Monitor

".  

5. Click "

Driver

" and then click on "

Update Driver..

" then click on the "Next" button.  

6. Choose "

Display a list of the known drivers for this device so that I can choose a specific 

driver

" then click "

Next

" and then click "

Have disk

".  

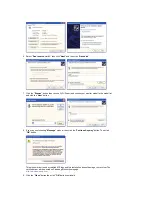
7. Click the "

Browse

" button then choose A:(D:\Driver).  

8. Click the "

Open

" button, then click "

OK

" button.  

9. Choose your monitor model and click the "

Next

" button then click "

Next

" button.  

10. Click the "

Finish

" button then the "

Close

" button.  

If you can see the "

Digital Signature Not Found

" window then click the "

Yes

"button. And click 

the "

Finish

" button then the "

Close

" button. 

Case1: If the "Properties" button is inactive, it means your monitor is properly configured. Please 

stop installation 

Case2: If the "Properties" button is active, click the "Properties" button then follow next steps 

continually.


  Microsoft

®

 Windows

®

 Millennium Operating System 


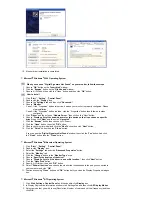
1. Click "

Start

" , "

Setting

" , "

Control Panel

".  

2. Double click "

Display

" icon.  

3. Select the "

Settings

" tab and click "

Advanced Properties

" button.  

4. Select the "

Monitor

" tab.  

5. Click the "

Change

" button in the "

Monitor Type

" area.  

6. Choose "

Specify the location of the driver

".  

7. Choose "

Display a list of all the driver in a specific location..

" then click "

Next

" button.  

8. Click the "

Have Disk

" button  

9. Specify A:\(D:\driver) then click "

OK

" button.  

10. Select "

Show all devices

" and choose the monitor that corresponds to the one you connected to 

your computer and click "

OK

".  

11. Continue choosing "

Close

" button and "

OK

" button until you close the Display Properties dialogue 

box.  


  Microsoft

®

 Windows

®

 NT Operating System 


1. Click 

Start

Settings

Control Panel

, and then double-click 

Display

 icon.  

2. In Display Registration Information window, click Settings Tab and then click 

All Display Modes

.  

3. Select a mode that you wish to use (Resolution, Number of colors and Vertical frequency) and then 

click 

OK

.  

Summary of Contents for SyncMaster 2023 NW

Page 1: ...SyncMaster 923NW 2023 NW 2223NW...

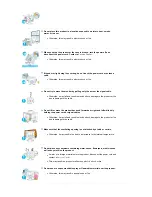
Page 2: ...read and understand at all times Do not disassemble Disconnect the plug from the outlet Do not touch Ground to prevent an electric shock Power When not used for extended period of time set your comput...

Page 3: ...re Do not forcefully bend or pull the power plug and do not place any heavy material on it z Otherwise this may result in fire Do not connect multiple appliances to the same power outlet z Otherwise t...

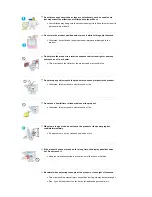
Page 4: ...age the product When installing the product in a cabinet or rack make sure that the front end of the bottom of the product does not project out z Otherwise it may fall or cause personal injury z Use a...

Page 5: ...in the internal temperature Ensure that the packaging vinyl is kept away from children z Otherwise it may result in serious harm suffocation if children play with it If the height of your monitor is a...

Page 6: ...using is easily scratched make sure to use the specified cloth only z Use the specified cloth adding only a little water As the product may be scratched if there is any foreign material on the cloth m...

Page 7: ...to damage to the cable Do not lift or move the product back and forwards or right and left while only holding the power cord or signal cables z Otherwise it may fall and result in electric shock dama...

Page 8: ...e eye strain take at least a five minute break after every hour of using the monitor Do not install it in an unstable location such as an unstable rack or uneven surface or a location exposed to vibra...

Page 9: ...drop any objects onto the product or cause any impact to the product z Otherwise this may result in electric shock or fire Do not use a humidifier or kitchen table near the product z Otherwise this m...

Page 10: ...correct position z Keep your back straight while looking at the product z The distance between your eyes and the screen should be between 45 to 50 cm Look at the screen from a slightly higher location...

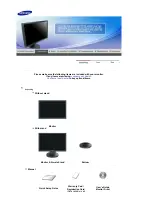
Page 11: ...If any items are missing contact your dealer Contact a local dealer to buy optional items Unpacking Without stand Monitor With stand Monitor Simple Stand Bottom Manual Quick Setup Guide Warranty Card...

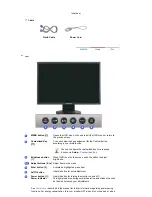
Page 12: ...is not on the screen push the button to adjust brightness Adjust buttons Adjust items in the menu Enter button Activates a highlighted menu item AUTO button Use this button for auto adjustment Power b...

Page 13: ...back of the monitor RGB IN port Connect the signal cable to the 15 pin D sub port on the back of your monitor Kensington Lock The Kensington lock is a device used to physically fix the system when us...

Page 14: ...connection for your computer Using the D sub Analog connector on the video card Connect the signal cable to the 15 pin D sub port on the back of your monitor RGB IN Connected to a Macintosh Connect th...

Page 15: ...de of the Monitor z For wall mounts that do not comply with VESA standard screw specifications the length of the screws may differ depending on their specifications z Do not use screws that do not com...

Page 16: ...msungmonitor com cn China 1 Insert CD into the CD ROM drive 2 Click Windows 3 Choose your monitor model in the model list then click the OK button 4 If you can see following message window then click...

Page 17: ...d Control Panel Then double click on Appearance and Personalization 3 Click Personalization and then Display Settings 4 Click Advanced Settings 5 Click Properties in the Monitor tab If the Properties...

Page 18: ...ck from a list of device drivers on my computer 8 Click Have Disk and select the folder for example D Drive where the driver setup file is located and click OK 9 Select the model that matches your mon...

Page 19: ...Start Control Panel then click the Appearance and Themes Icon 3 Click Display icon and choose the Settings tab then click Advanced 4 Click the Properties button on the Monitor tab and select Driver ta...

Page 20: ...and click the Next button 8 If you can see following Message window then click the Continue Anyway button Then click OK button This monitor driver is under certified MS logo and this installation doe...

Page 21: ...n then the Close button Case1 If the Properties button is inactive it means your monitor is properly configured Please stop installation Case2 If the Properties button is active click the Properties b...

Page 22: ...ter at the first and the second screen after executing the X86Config file 2 The third screen is for setting your mouse 3 Set a mouse for your computer 4 The next screen is for selecting a keyboard 5 S...

Page 23: ...reen or close screen adjustment menu 2 This button allows you to adjust items in the menu 3 Press this button to activate a highlighted menu item 4 AUTO Press to self adjust to the incoming PC signal...

Page 24: ...nitor to self adjust to the incoming video signal The values of fine coarse and position are adjusted automatically Available in analog mode only If auto adjustment does not work properly press AUTO b...

Page 25: ...enu Description Customized key You can customize key assignment for the Custom button according to your preferences To view the operating screen displayed when pressing the button after configuring th...

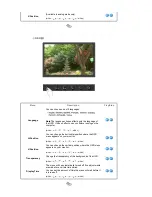
Page 26: ...ghtness Picture Brightness Contrast MagicBright Color MagicColor Color Tone Color Control Color Effect Gamma Image Coarse Fine Sharpness H Position V Position OSD Language H Position V Position Transp...

Page 27: ...des are available Custom Text Internet Game Sport Movie and Dynamic Contrast Each mode has its own pre configured brightness value You can easily select one of seven settings by simply pressing Custom...

Page 28: ...clearness Color Tone The tone of the color can be changed and one of four modes can be selected Cool Normal Warm and Custom MENU MENU Cool Makes whites bluish Normal Keeps whites white Warm Makes whi...

Page 29: ...e area You may relocate it to the center using the horizontal control menu Available in analog mode only MENU MENU Fine Removes noise such as horizontal stripes If the noise persists even after fine t...

Page 30: ...n You can change the horizontal position where the OSD menu appears on your monitor MENU MENU V Position You can change the vertical position where the OSD menu appears on your monitor MENU MENU Trans...

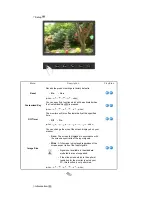
Page 31: ...MENU MENU z Off z On Image Size You can change the size of the screen displayed on your monitor z Auto The screen is displayed in accordance with the screen aspect ratio of the input signals z Wide A...

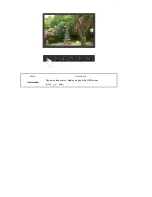
Page 32: ...Menu Description Information Shows a video source display mode on the OSD screen MENU MENU...

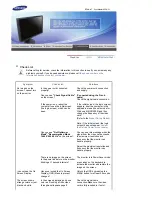
Page 33: ...screen the login screen does not appear contact the Service Center or your dealer Can you see Not Optimum Mode Recommended Mode 1440 X 900 60 Hz on the screen You can see this message when the signal...

Page 34: ...the Control Panel Display Settings Has the video card been set properly Set the video card by referring to the video card manual There is a message that reads Unrecognized monitor Plug Play VESA DDC m...

Page 35: ...whether your monitor is functioning properly Self Test Feature Check 1 Turn off both your computer and the monitor 2 Unplug the video cable from the back of the computer 3 Turn on the monitor If the...

Page 36: ...se the monitor to become blank have poor coloring noise Video mode not supported etc In this case first check the source of the problem and then contact the Service Center or your dealer z Judging the...

Page 37: ...screen the login screen does not appear contact the Service Center or your dealer Can you see Not Optimum Mode Recommended Mode 1680 X 1050 60 Hz on the screen You can see this message when the signal...

Page 38: ...the Control Panel Display Settings Has the video card been set properly Set the video card by referring to the video card manual There is a message that reads Unrecognized monitor Plug Play VESA DDC m...

Page 39: ...whether your monitor is functioning properly Self Test Feature Check 1 Turn off both your computer and the monitor 2 Unplug the video cable from the back of the computer 3 Turn on the monitor If the...

Page 40: ...se the monitor to become blank have poor coloring noise Video mode not supported etc In this case first check the source of the problem and then contact the Service Center or your dealer z Judging the...

Page 41: ...screen the login screen does not appear contact the Service Center or your dealer Can you see Not Optimum Mode Recommended Mode 1680 X 1050 60 Hz on the screen You can see this message when the signal...

Page 42: ...the Control Panel Display Settings Has the video card been set properly Set the video card by referring to the video card manual There is a message that reads Unrecognized monitor Plug Play VESA DDC m...

Page 43: ...whether your monitor is functioning properly Self Test Feature Check 1 Turn off both your computer and the monitor 2 Unplug the video cable from the back of the computer 3 Turn on the monitor If the...

Page 44: ...se the monitor to become blank have poor coloring noise Video mode not supported etc In this case first check the source of the problem and then contact the Service Center or your dealer z Judging the...

Page 45: ...lay Color 16 7M Resolution Optimum resolution 1440 x 900 60Hz Maximum resolution 1440 x 900 75Hz Input Signal Terminated RGB Analog 0 7 Vp p 5 Separate H V sync Composite SOG TTL level V high 2 0 V V...

Page 46: ...nt Information Communication equipment for residential use This product complies with the Electromagnetic Compatibility Directives for residential use and can be used in all areas including common res...

Page 47: ...50 36 000 VESA 800 x 600 37 879 60 317 40 000 VESA 800 x 600 46 875 75 000 49 500 VESA 800 x 600 48 077 72 188 50 000 VESA 1024 x 768 48 363 60 004 65 000 VESA 1024 x 768 56 476 70 069 75 000 VESA 102...

Page 48: ...lor 16 7M Resolution Optimum resolution 1680 x 1050 60Hz Maximum resolution 1680 x 1050 60Hz Input Signal Terminated RGB Analog 0 7 Vp p 5 Separate H V sync Composite SOG TTL level V high 2 0 V V low...

Page 49: ...ment Information Communication equipment for residential use This product complies with the Electromagnetic Compatibility Directives for residential use and can be used in all areas including common r...

Page 50: ...000 31 500 VESA 800 x 600 35 156 56 250 36 000 VESA 800 x 600 37 879 60 317 40 000 VESA 800 x 600 48 077 72 188 50 000 VESA 800 x 600 46 875 75 000 49 500 VESA 1024 x 768 48 363 60 004 65 000 VESA 102...

Page 51: ...16 7M Resolution Optimum resolution 1680 x 1050 60Hz Maximum resolution 1680 x 1050 60Hz Input Signal Terminated RGB Analog 0 7 Vp p 5 Separate H V sync Composite SOG TTL level V high 2 0 V V low 0 8...

Page 52: ...ent Information Communication equipment for residential use This product complies with the Electromagnetic Compatibility Directives for residential use and can be used in all areas including common re...

Page 53: ...000 31 500 VESA 800 x 600 35 156 56 250 36 000 VESA 800 x 600 37 879 60 317 40 000 VESA 800 x 600 48 077 72 188 50 000 VESA 800 x 600 46 875 75 000 49 500 VESA 1024 x 768 48 363 60 004 65 000 VESA 102...

Page 54: ...http www samsung com cl COLOMBIA 01 8000112112 http www samsung com co COSTA RICA 0 800 507 7267 http www samsung com latin ECUADOR 1 800 10 7267 http www samsung com latin EL SALVADOR 800 6225 http w...

Page 55: ...0 http www samsung com no POLAND 0 801 801 881 022 607 93 33 http www samsung com pl PORTUGAL 80820 SAMSUNG 726 7864 http www samsung com pt SLOVAKIA 0800 SAMSUNG 726 7864 http www samsung com sk SPAI...

Page 56: ...epetition per second is called Vertical Frequency or Refresh Rate Unit Hz Example If the same light repeats itself 60 times per second this is regarded as 60 Hz Horizontal Frequency The time to scan o...

Page 57: ...executing auto adjustment function in display screen that is appeared as window termination button is pressed If there s still noise after automatic adjustment use FINE COARSE adjustment function 5 I...

Page 58: ...http www samsung com cl COLOMBIA 01 8000112112 http www samsung com co COSTA RICA 0 800 507 7267 http www samsung com latin ECUADOR 1 800 10 7267 http www samsung com latin EL SALVADOR 800 6225 http w...

Page 59: ...0 http www samsung com no POLAND 0 801 801 881 022 607 93 33 http www samsung com pl PORTUGAL 80820 SAMSUNG 726 7864 http www samsung com pt SLOVAKIA 0800 SAMSUNG 726 7864 http www samsung com sk SPAI...

Page 60: ...epetition per second is called Vertical Frequency or Refresh Rate Unit Hz Example If the same light repeats itself 60 times per second this is regarded as 60 Hz Horizontal Frequency The time to scan o...

Page 61: ...y executing auto adjustment function in display screen that is appeared as window termination button is pressed If there s still noise after automatic adjustment use FINE COARSE adjustment function 5...

Page 62: ...http www samsung com cl COLOMBIA 01 8000112112 http www samsung com co COSTA RICA 0 800 507 7267 http www samsung com latin ECUADOR 1 800 10 7267 http www samsung com latin EL SALVADOR 800 6225 http w...

Page 63: ...0 http www samsung com no POLAND 0 801 801 881 022 607 93 33 http www samsung com pl PORTUGAL 80820 SAMSUNG 726 7864 http www samsung com pt SLOVAKIA 0800 SAMSUNG 726 7864 http www samsung com sk SPAI...

Page 64: ...epetition per second is called Vertical Frequency or Refresh Rate Unit Hz Example If the same light repeats itself 60 times per second this is regarded as 60 Hz Horizontal Frequency The time to scan o...

Page 65: ...y executing auto adjustment function in display screen that is appeared as window termination button is pressed If there s still noise after automatic adjustment use FINE COARSE adjustment function 5...

Page 66: ...ave Mode Ex z Turn the power off when using a stationary pattern z Use a Screen saver if possible z Set the Monitor to power off with the PC Display Properties Power Scheme Turn the power off for 4 ho...

Page 67: ...atterns When the LCD panel is operated for a long time with a fixed pattern over 12 hours there may be slight difference in voltage between electrodes that work the liquid crystal LC in a pixel The vo...

Page 68: ...ment or human health from uncontrolled waste disposal please separate this from other types of wastes and recycle it responsibly to promote the sustainable reuse of material resources Household users...

Reviews: