background image

2

 - English


Safety Information


~

The slots and openings in the cabinet and in 
the back or bottom are provided for necessary 
ventilation. To ensure reliable operation of this 
apparatus, and to protect it from overheating, 
these slots and openings must never be blocked or 
covered.


-

Do not place this apparatus in a confined space, 
such as a bookcase, or built-in cabinet, unless 
proper ventilation is provided.


-

Do not place this apparatus near or over a 
radiator or heat register, or where it is exposed 
to direct sunlight.


-

Do not place vessels (vases etc.) containing 
water on this apparatus. A water spill can cause 
a fire or electric shock.


~

Do not expose this apparatus to rain or place it 
near water (near a bathtub, washbowl, kitchen 
sink, or laundry tub, in a wet basement, or near a 
swimming pool, etc.). If this apparatus accidentally 
gets wet, unplug it and contact an authorized 
dealer immediately.


~

This apparatus uses batteries. In your community, 
there might be environmental regulations that 
require you to dispose of these batteries properly. 
Please contact your local authorities for disposal or 
recycling information.


~

Do not overload wall outlets, extension cords or 
adaptors beyond their capacity, since this can result 
in fire or electric shock.


~

Route power-supply cords so that they are not 
likely to be walked on or pinched by items placed 
on or against them. Pay particular attention to 
cords at the plug end, at wall outlets, and the point 
where they exit from the apparatus.


~

To protect this apparatus from a lightning storm, 
or when it is left unattended and unused for long 
periods of time, unplug it from the wall outlet and 
disconnect the antenna or cable system. This will 
prevent damage to the set due to lightning and 
power line surges.


~

Before connecting the AC power cord to the DC 
adaptor outlet, make sure the voltage designation 
of the DC adaptor corresponds to the local 
electrical supply.


~

Never insert anything metallic into the open parts 
of this apparatus. Doing so may create a danger of 
electric shock.


~

To avoid electric shock, never touch the inside of 
this apparatus. Only a qualified technician should 
open this apparatus.


~

Make sure to plug the power cord in until it is 
firmly seated. When unplugging the power cord 
from a wall outlet, always pull on the power cord's 
plug. Never unplug by pulling on the power cord. 
Do not touch the power cord with wet hands.


~

If this apparatus does not operate normally - in 
particular, if there are any unusual sounds or smells 
coming from it - unplug it immediately and contact 
an authorized dealer or service center.


~

Maintenance of Cabinet.


-

Before connecting other components to this 
product, be sure to turn them off.


-

If you move your product suddenly from a cold 
place to a warm place, condensation may occur 
on the operating parts and lens and cause 
abnormal disc playback. If this occurs, unplug the 
product, wait for two hours, and then connect 
the plug to the power outlet. Then, insert the 
disc, and try to play back again.


~

Be sure to pull the power plug out of the outlet 
if the product is to remain unused or if you are 
leaving the house for an extended period of time 
(especially when children, elderly, or disabled 
people will be left alone in the house).


-

Accumulated dust can cause an electric shock, 
an electric leakage, or a fire by causing the 
power cord to generate sparks and heat or the 
insulation to deteriorate.


~

Contact an authorized service center for 
information if you intend to install your product 
in a location with heavy dust, high or low 
temperatures, high humidity, chemical substances, 
or where it will operate 24 hours a day such as in 
an airport, a train station, etc. Failing to do so may 
lead to serious damage of your product.


~

Use only a properly grounded plug and wall outlet.


-

An improper ground may cause electric shock or 
equipment damage. (Class l Equipment only.)


~

To turn this apparatus off completely, you must 
disconnect it from the wall outlet. Consequently, 
the wall outlet and power plug must be readily 
accessible at all times.

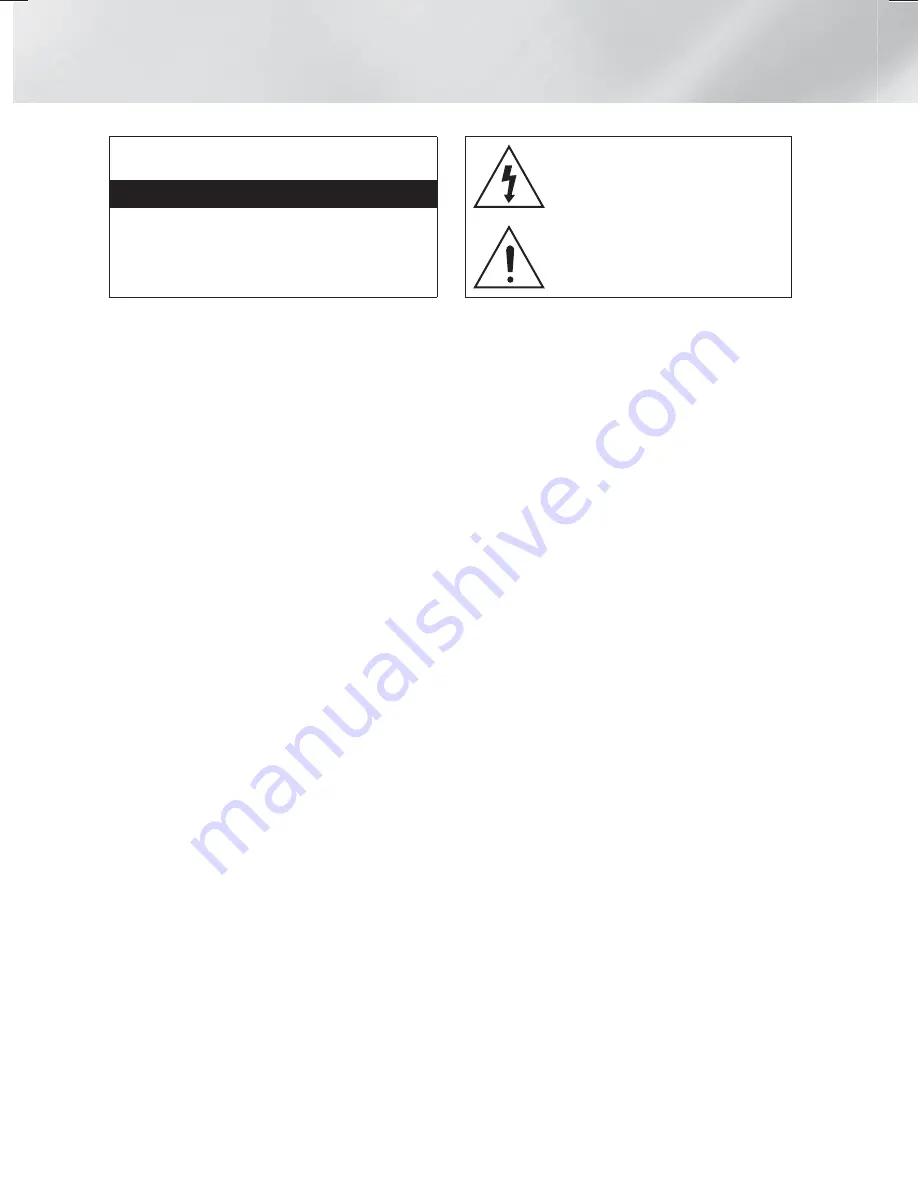
CAUTION

RISK OF ELECTRIC SHOCK DO NOT OPEN

CAUTION: TO REDUCE THE RISK OF ELECTRIC SHOCK, DO 

NOT REMOVE THE COVER (OR BACK). THERE ARE NO 

USER SERVICEABLE PARTS INSIDE. REFER ALL SERVICING TO 

QUALIFIED PERSONNEL.

This symbol indicates that high voltage 
is present inside. It is dangerous to 
make any kind of contact with any 
internal part of this product.

This symbol indicates that important 
literature concerning operation and 
maintenance has been included with 
this product.

HT-H6500WM_ZA-0326_Eco.indd   2

HT-H6500WM_ZA-0326_Eco.indd   2

2014-03-26     3:18:56

2014-03-26     3:18:56

Summary of Contents for SWA-6000

Page 1: ... for purchasing this Samsung product To receive more complete service please register your product at www samsung com register 5 1CH Blu ray Home Entertainment System user manual HT H6500WM This Nanum Gothic Eco font is provided by NAVER ...

Page 2: ... Make sure to plug the power cord in until it is firmly seated When unplugging the power cord from a wall outlet always pull on the power cord s plug Never unplug by pulling on the power cord Do not touch the power cord with wet hands If this apparatus does not operate normally in particular if there are any unusual sounds or smells coming from it unplug it immediately and contact an authorized de...

Page 3: ...f not installed and used in accordance with the instructions may cause harmful interference to radio or television reception which can be determined by turning the equipment off and on If interference is present the user is encouraged to try to correct the interference by one or more of the following measures Reorient or relocate the receiving antenna Increase the separation between the equipment ...

Page 4: ...ausea and headaches If you experience any such symptom stop viewing 3D TV remove the 3D Active Glasses and rest Watching 3D images for an extended period of time may cause eye strain If you feel eye strain stop viewing 3D TV remove your 3D Active Glasses and rest A responsible adult should frequently check on children who are using the 3D function If there are any reports of tired eyes headaches d...

Page 5: ...ommercial Discs 26 Playing Multimedia Files 28 Controlling Video Playback 31 Controlling Music Playback 36 Using Bluetooth 38 Playing Photo Contents 39 Listening to the Radio 40 Using the Special Effects Remote Control Buttons NETWORK SERVICES 41 Logging In to Your Samsung Account 41 Adding a Credit Card 41 Before Using MOVIES TV SHOWS or SAMSUNG APPS 42 Using MOVIES TV SHOWS 43 Using SAMSUNG APPS...

Page 6: ...ote control supplied with This product contains a coin button cell battery If the coin button cell battery is swallowed it can cause severe internal burns in just 2 hours and can lead to death Keep new and used batteries away from children If the battery compartment does not close securely stop using the product and keep it away from children If you think batteries might have been swallowed or pla...

Page 7: ...ou cannot select the BD DVD mode with the SOURCE button To select the BD DVD mode exit the Internet or stop the content you are playing on the TV and then select the BD DVD mode Rear Panel HDMI OUT LAN POWER AUX IN FM ANT OPTICAL DIGITAL AUDIO IN L R HDMI IN SPEAKERS OUT CENTER SUBWOOFER FRONT L FRONT R IMPEDANCE 3 COOLING FAN FM ANTENNA AUX IN HDMI OUT SPEAKER OUTPUT CONNECTORS POWER CORD LAN TER...

Page 8: ...enu Press to apply sound effects Press to apply the DTS Neo Fusion II or 3D sound effect These buttons are used both for menus on the product and also several Blu ray Disc functions Press to select MANUAL PRESET in the Tuner function Cut off the sound temporarily Press to play disc or files or Press to pause playing Press to select the Home Theater s mode HDMI AUX BD DVD etc Press to use the Tools...

Page 9: ...ith the front face of the center speaker or place them slightly in front of the center speakers Center Speaker It is best to install the Center Speaker at the same height as the front speakers You can also install it directly over or under the TV Surround Speakers Place these speakers to the side of your listening position If there isn t enough room place these speakers so they face each other Pos...

Page 10: ...tening position If the wireless receiver module is too close to the product sound from the speakers may be disrupted because of interference If you use a device such as a microwave oven wireless LAN Card Bluetooth device or any other device that uses the 2 4 5 8GHz frequencies near the product sound from the speakers may be disrupted because of interference The maximum transmission distance from t...

Page 11: ...antenna is built into the wireless receiver module Keep it away from water and moisture For optimal listening performance make sure that the area around the wireless receiver module location is clear of any obstructions In 2 CH mode you will hear no sound from the wireless surround speakers Attaching the Toroidal Ferrite Core to the Power Cord of the Wireless Receiver Module SWA 6000 If you attach...

Page 12: ...s on the input and output jacks Method 2 OPTICAL Connecting an External Digital Audio Component Use to connect the digital audio output of digital signal components such as Cable Boxes and Satellite Receivers Set Top Boxes to the home theater Using a digital optical cable not supplied connect the Optical Digital Audio In jack on the product to the Digital Optical Out jack of the external digital d...

Page 13: ... wired or wireless Wireless Network Broadband service Wireless IP sharer If your wireless IP router supports DHCP this product can use a DHCP or static IP address to connect to the wireless network Set your wireless IP router to Infrastructure mode Ad hoc mode is not supported The product supports only the following wireless security key protocols WEP OPEN SHARED WPA PSK TKIP AES WPA2 PSK TKIP AES...

Page 14: ...information about the disc currently in the disc tray Press OK to start playing the disc 2 MOVIES TV SHOWS Download movies and TV Shows from the Internet Depending on your country this menu function may not be supported 3 MULTIMEDIA Play photos videos or music content from Discs USB devices PCs mobile devices or cloud services 4 SAMSUNG APPS Download Access various for pay or free of charge applic...

Page 15: ...cription of each Settings function starts below Additional information on some of the functions is also in the Appendix of this manual Settings Menu Functions Picture 3D Settings Set up the 3D related functions 3D Blu ray Playback Mode Select whether to play a Blu ray Disc with 3D contents in 3D Mode If you move to the Home or Smart Hub Home menu while in 3D mode the product will switch to 2D auto...

Page 16: ...s are active either the TV s speakers or the home theater s speakers Settings Home Theater Speakers Lets you adjust the following speaker settings and turn the test tone on and off so you can test the speakers Volume Level Lets you adjust the relative loudness of each speaker from 6dB to 6dB For example if you like deep bass you can increase the loudness of the subwoofer by 6dB Distance Lets you a...

Page 17: ...er Lets you configure the Equalizer settings manually Smart Volume Lets you set the product so that the volume remains stable when a scene change occurs or when you change the channel Audio Return Channel ARC Lets you direct the sound from the TV to the Home Theater speakers Requires an HDMI connection and an Audio Return Channel ARC compatible TV If Audio Return Channel is set to On and you are u...

Page 18: ...D Live service or Blu ray Disc To use BD Live you must insert a USB storage device into the home theater s USB port Smart Hub Apps Settings You can edit the settings for using Apps Push Notification Settings Receive notifications from selected services VOD Rating Lock Lets you lock access to Video on Demand VOD content based on its rating To use you must enter the security PIN Press and hold the 1...

Page 19: ...r to the product Security Press and hold the 123 button until the Num pad appears on the screen When the Num pad appears select a number using the button and then press the OK button The default security PIN is 0000 Enter the default PIN to access the security function if you haven t created your own PIN BD Parental Rating Prevents playback of Blu ray Discs with a rating equal to or above a specif...

Page 20: ... s software through the network connection For more information about accessing and using Internet services see the Network Services chapter of this manual on pages 41 48 Instructions for configuring the network connection start below Configuring Your Network Connection If you didn t configure your network connection during the initial settings procedure or you need to reset the network connection...

Page 21: ...he buttons on the remote control to move from entry field to entry field within a parameter When done with one parameter press the OK button 5 Press the or button to move to another parameter and then enter the numbers for that parameter following the instructions in Step 4 6 Repeat Steps 4 and 5 until you have filled in all parameters You can get the network parameter values from your Internet pr...

Page 22: ...ss the OK button 7 Select the IP Setting field and then set it to Enter manually 8 Select a network parameter to enter IP Address for example and then press OK button Use the buttons on the remote control to enter the numbers for the parameter Or use the Num keypad to enter a parameter number Press and hold the 123 button until the Num pad appears on the screen When the Num pad appears select a nu...

Page 23: ...Direct device to connect to AndroidXXXXXXX Disconnected Close Settings 5 You have three ways to complete the Wi Fi connection Through the Wi Fi device Through the product using PBC Through the product using a PIN Each is covered below Through the Wi Fi Device 1 On the Wi Fi device follow the device s procedure for connecting to another Wi Fi Direct device See the device s user manual for instructi...

Page 24: ...tions are on the next page 1 Select Update now and then press the OK button The Update now pop up appears 2 The product searches on line for the latest software version 3 If it does not find an update the There are no new updates for you at the moment pop up appears Press the OK button to exit 4 If it finds a new version the Update Request pop up appears 5 Select OK The product upgrades the softwa...

Page 25: ...ave a single folder with the same name as the zip file 10 Copy the folder to a USB flash drive 11 Make sure no disc is inserted in the product and then insert the USB flash drive into the USB port of the product 12 In the product s menu go to Settings Support Software Update 13 Select Update now 14 The product searches for the software on the USB drive When it finds the software the Update Request...

Page 26: ...an protective jacket and store vertically Playing Multimedia Files 1 In the Home screen select MULTIMEDIA and then press the OK button The Recently Played screen appears 2 Select Storage Network Device or Storage Service at the bottom of the screen Storage Displays storage devices connected to the product Network Device Displays mobile devices PCs tablets and similar devices connected through the ...

Page 27: ...button 4 Select a file to view or play and then press the OK button 5 Press the RETURN button to exit a folder or the e EXIT button to return to the Home screen 6 Go to pages 28 39 for instructions that explain how to control playback of videos music and pictures on a storage device If you insert a disc when playing a USB device or phone the device mode changes to Disc automatically If your cellul...

Page 28: ...tion about linking your Samsung account to a cloud service account refer to the Logging In to Your Samsung Account section 1 In the Home screen move to MULTIMEDIA and press OK button 2 Select Storage Service at the bottom of the screen 3 The cloud services linked with your Samsung account appear 4 Select a cloud service The folders and files in the selected cloud service are listed 5 If necessary ...

Page 29: ...he file is damaged or the file does not support indexing you will not be able to use the Select Scene function If you are using the DLNA function after connecting to a computer through your network Select Scene may not be supported Search Titles If there is more than one movie on the disc or device select to start a different title 1 Select Search Titles and then press the OK button 2 Use the butt...

Page 30: ...ualizer Equalizer Settings Lets you set the equalizer Equalizer Settings only appears when Equalizer Mode is On Audio Select to set the desired audio language Audio Sync In some cases when the product is connected to a digital TV the audio signal may not synchronize with the video signal If this occurs use Audio Sync to adjust the audio delay time to match the video signal Subtitle Lets you set th...

Page 31: ...d files to on line sites Picasa Facebook etc or to devices To use Send with an on line site you need to establish an account with the on line site and then log in using the Log In function Send works essentially the same way for music photos and videos For general instructions see Using the Send Function on page 39 Depending on the disc or storage device the Options and Sort By menus may differ Al...

Page 32: ...Equalizer Mode is on Play Selected Play Selected lets you select specific files to play It works essentially the same way for all media See Using Play Selected with Self Recorded Media CDs USB Devices etc on page 34 Ripping The Ripping function converts CD audio to the mp3 format and saves the converted files on a USB device or a mobile device connected to the product See Ripping on page 36 Inform...

Page 33: ...c photos and videos For general instructions see Using the Send Function on page 39 Encoding Select to manage the text encoding options Rename Playlist Lets you modify the name of a playlist Delete Playlist Lets you delete a playlist Add to Playlist Lets you add additional files to a playlist Depending on the disc or storage device the Options menu may differ All options may not be displayed Renam...

Page 34: ...ll tracks from Track 001 Use Deselect All to deselect all selected tracks at once Then select individual tracks or use Select All to select all the tracks and then press the RETURN button on your remote or select Play and then press the OK button If you do not use Select All or select individual tracks the Play Selected list will not change Cancel cancels any changes you made on the Play Selected ...

Page 35: ...w name When finished select Done press OK and then go to Step 9 9 Navigate to the screen that displays the music you want to put into the playlist 10 Use the buttons to select a track and then press the OK button A check appears in the check box on the left side of the track icon 11 Repeat Step 10 to check and select additional tracks 12 To remove a track from the list move to the track and then p...

Page 36: ...ete the Successfully Ripped message appears Press the OK button The Track List screen reappears Using Bluetooth You can use a Bluetooth device to enjoy music with high quality stereo sound all without wires What is Bluetooth Bluetooth is a technology that enables Bluetooth compliant devices to interconnect with each other easily using a short wireless connection A Bluetooth device may hum or malfu...

Page 37: ...round the home theater If several Bluetooth devices are simultaneously paired with product If the Bluetooth device is turned off not in place or malfunctions Note that such devices as microwave ovens wireless LAN adapters fluorescent lights and gas stoves use the same frequency range as the Bluetooth device and can cause electric interference For a more reliable connection to a Bluetooth device or...

Page 38: ... menu drop down list appears Slideshow Settings Speed Select to set a slide show s speed Effects Select to set a slide show s special effects Rotate Select to rotate the picture This will rotate the picture either clockwise or counter clockwise Zoom Select to enlarge the current picture Enlarge up to 4 times Picture Mode Dynamic Choose to increase sharpness Standard Choose for most viewing applica...

Page 39: ...tion Depending on the disc or storage device the Options menu may differ All options may not be displayed Using the Send Function 1 Use the buttons to select Send and then press the OK button The Selection screen appears 2 Use the buttons to select a picture and then press the OK button A check appears to the left of the picture 3 Repeat Step 2 to select and check additional pictures 4 To remove a...

Page 40: ...ex mp3 music You can upscale your MP3 level sound 24 kHz 8bit to CD level sound 44 1 kHz 16bit Power Bass Increases the volume level of bass tones and provides thudding sound effects Virtual 7 1 Creates a virtual 7 1 CH sound using the 5 1 CH speaker system Off Select for normal listening Virtual Surround You can set a two channel input source to produce sound in 5 1 channel surround mode SFE Mode...

Page 41: ...uct will automatically enter your e mail and password All you need to do is select Sign In If you press the button after you have logged in the Sign In screen appears You can select Link Accounts Edit Profile Remove Account and Sign Out Adding a Credit Card To add a credit card to your account follow these steps 1 Select the in the upper right of the Home Screen and then press the OK button The Ac...

Page 42: ...n a page displaying movies or TV shows use the buttons to make a selection and then press the OK button 3 If you have downloaded and installed one of the video streaming apps that you can use to stream the movie or show select Watch Now and then press the OK button The app launches Follow the directions on the screen to watch the movie or show you have chosen If you have not downloaded one of the ...

Page 43: ...displays the apps in that category Downloading an App 1 Select Most Popular What s new or Categories and then press the OK button 2 If you selected Categories select a category icon and then press the OK button Otherwise go to Step 3 On the Most Popular What s new and Categories screens a green arrow is displayed on apps you have already downloaded 3 Select an app you want to download and then pre...

Page 44: ...Select Lock Unlock and then press the OK button 3 The PIN input pop up appears Enter your PIN Press and hold the 123 button until the Num pad appears on the screen When the Num pad appears select a number using the button and then press the OK button If you haven t set a PIN enter the default PIN 0000 4 A checkbox appears on each app icon Use the button to move to the app you want to lock and then...

Page 45: ...If you attempt to download a file and the file cannot be saved an error message will appear E commerce purchasing produc ts online is not supported ActiveX is not supported Access may be blocked to some websites or to web browsers operated by certain businesses Link Browsing and Pointer Browsing The Web Browser provides two types of browsing Pointer Browsing and Link Browsing When you launch the b...

Page 46: ...er or number of your choice 2 Press the OK button to enter the letter or number into the entry field 3 To access capital letters move the highlight to the Caps key on the top left and then press the OK button Press the OK button again with the Caps key highlighted to access small letters again 4 To access symbols and additional punctuation marks highlight the 123 button on the left and then press ...

Page 47: ...u can change the PIN using the Reset password for the Approved Sites function See below Approved Sites feature Turns the Approved Sites function on or off Reset password for Approved Sites Change the Approved Sites password Add current site Lets you add the currently displayed web site to the Approved Sites list Manage Approved Sites Lets you key in URLs to add to the Approved Sites List and delet...

Page 48: ... service you want to link to the product and then press the OK button 5 In the ID and Password screen enter the ID you use to log in to the service you selected using the pop up keyboard When finished select Done and then press the OK button 6 Repeat the same process for the password When finished select Done and then press the OK button 7 Select OK and then press the OK button BD LIVE Once the pr...

Page 49: ...select the correct Digital Output or you will hear no sound or just loud noise If the HDMI device AV receiver TV is not compatible with compressed formats Dolby Digital DTS the audio signal outputs as PCM Regular DVDs do not have BONUSVIEW audio and Navigation Sound Effects Some Blu ray Discs do not have BONUSVIEW audio and Navigation Sound Effects This Digital Output setup does not affect the ana...

Page 50: ...n the disc and may not be available on all Blu ray Discs DVDs Information about the main feature BONUSVIEW mode will also appear if the Blu ray Disc has a BONUSVIEW section This function changes both the primary and secondary subtitles at the same time The total number of primary and secondary subtitles respectively is displayed Playing JPEG files You can t enlarge the subtitle and PG graphics in ...

Page 51: ... certain features during playback Please note that this is not a defect in the product Samsung cannot guarantee that this product will play every disc bearing the Blu ray Disc DVD or CD logo because disc formats evolve and problems and errors may occur during the creation of Blu ray Disc DVD and CD software and or the manufacture of discs Please contact the SAMSUNG Customer Care Center at 1 800 72...

Page 52: ...olution and frame rate Supported Formats Notes on the USB connection Your product supports USB storage media MP3 players digital cameras and USB card readers The product does not support folder or file names longer than 128 characters Some USB digital camera devices may not be compatible with the product Your product supports the FAT 16 FAT 32 and NTFS file systems Connect USB devices directly to ...

Page 53: ...tents with bitrate frame rates that are above standard The seek skip function is not available if the file s index table is damaged Depending on your network status play may become disrupted when playing contents from the network Some USB Digital camera devices may not be compatible with the product RMVB format is supported in China and Hong Kong only AVS codec is supported for contents for China ...

Page 54: ...WMA WMA Supports WMA 10 Pro Up to 5 1 Does not support WMA lossless audio Supports up to M2 profile wav wav wav mid midi midi midi type 0 and type 1 Seek not supported Supported on USB only ape ape ape NonSmart not supported aif aiff AIFF AIFF m4a ALAC ALAC Picture File Support File Extension Type Resolution Comments jpg jpeg JPEG 15360x8640 png PNG 4096x4096 bmp BMP 4096x4096 mpo MPO 15360x8640 ...

Page 55: ...y the main feature audio stream so that your AV receiver can decode the audio bitstream You will not hear BONUSVIEW audio or Navigation Sound Effects Decodes the main feature audio and BONUSVIEW audio stream together into PCM audio and adds Navigation Sound Effects then re encodes the PCM audio into DTS bitstream Decodes the main feature audio and BONUSVIEW audio stream together into PCM audio and...

Page 56: ...factory default Run the Initial Settings procedure again Then go to Settings Picture Resolution in the Menu and select the correct resolution for your TV When you run the Initial Settings procedure re select the language and aspect ratio screen size and format only Resetting does not affect your network settings so you should be able to skip Network Setup and Software Update When the factory defau...

Page 57: ...does not work Are you operating the remote within its operational range and within the proper angle relative to the sensor Are the batteries drained The disc is rotating but there is no picture Picture quality is poor and the picture is shaking Is the TV power on Are the video cables connected properly Is the disc dirty or damaged A poorly manufactured disc may not be playable Audio language and s...

Page 58: ...e feature e g angles 3 The feature is not available at the moment 4 You ve requested a title or chapter number or search time that is out of range If the HDMI output is set to a resolution your TV cannot support for example 1080p you may not see a picture on your TV Press and hold the button on front panel for more than 5 seconds with no disc in the product All settings will revert to their factor...

Page 59: ... contact the contents provider or update to the latest firmware When using the BD LIVE service an error occurs The USB memory device must have at least 1GB of free space to accommodate the BD LIVE service You can check the available size in BD Data Management See page 49 When the factory default settings are restored all stored user BD data is deleted Repairs If you contact us to repair your produ...

Page 60: ... system Impedance Frequency range Output sound pressure level Rated input Maximum input Dimensions W x H x D inches Weights Ibs Front 3 Ω 140Hz 20kHz 87dB W M 165W 330W 3 7 x 11 0 x 4 0 3 85 Surround 3 7 x 5 9 x 4 0 1 41 Center 170W 340W 12 6 x 3 2 x 4 0 2 25 Subwoofer 40Hz 160Hz 88dB W M 6 6 x 13 8 x 11 4 7 52 Samsung Electronics Co Ltd reserves the right to change the specifications without noti...

Page 61: ...and the logos are trademarks of Blu ray Disc Association This product uses Cinavia technology to limit the use of unauthorized copies of some commercially produced film and videos and their soundtracks When a prohibited use of an unauthorized copy is detected a message will be displayed and playback or copying will be interrupted More information about Cinavia technology is provided at the Cinavia...

Page 62: ...problems incorrect electrical line voltage fluctuations and surges customer adjustments and failure to follow operating instructions cleaning maintenance and environmental instructions that are covered and prescribed in the instruction book product removal or reinstallation reception problems and distortion related to noise echo interference or other signal transmission and delivery problems SAMSU...

Page 63: ...tronics Co Ltd All rights reserved QUESTIONS OR COMMENTS COUNTRY CALL OR VISIT US ONLINE AT WRITE IN THE US 1 800 SAMSUNG 726 7864 www samsung com us support Samsung Electronics America Inc 85 Challenger Road Ridgefield Park NJ 07660 ...

Reviews: