background image

Troubleshooting

10-17

Chapter 

10

Troubleshooting

10-16

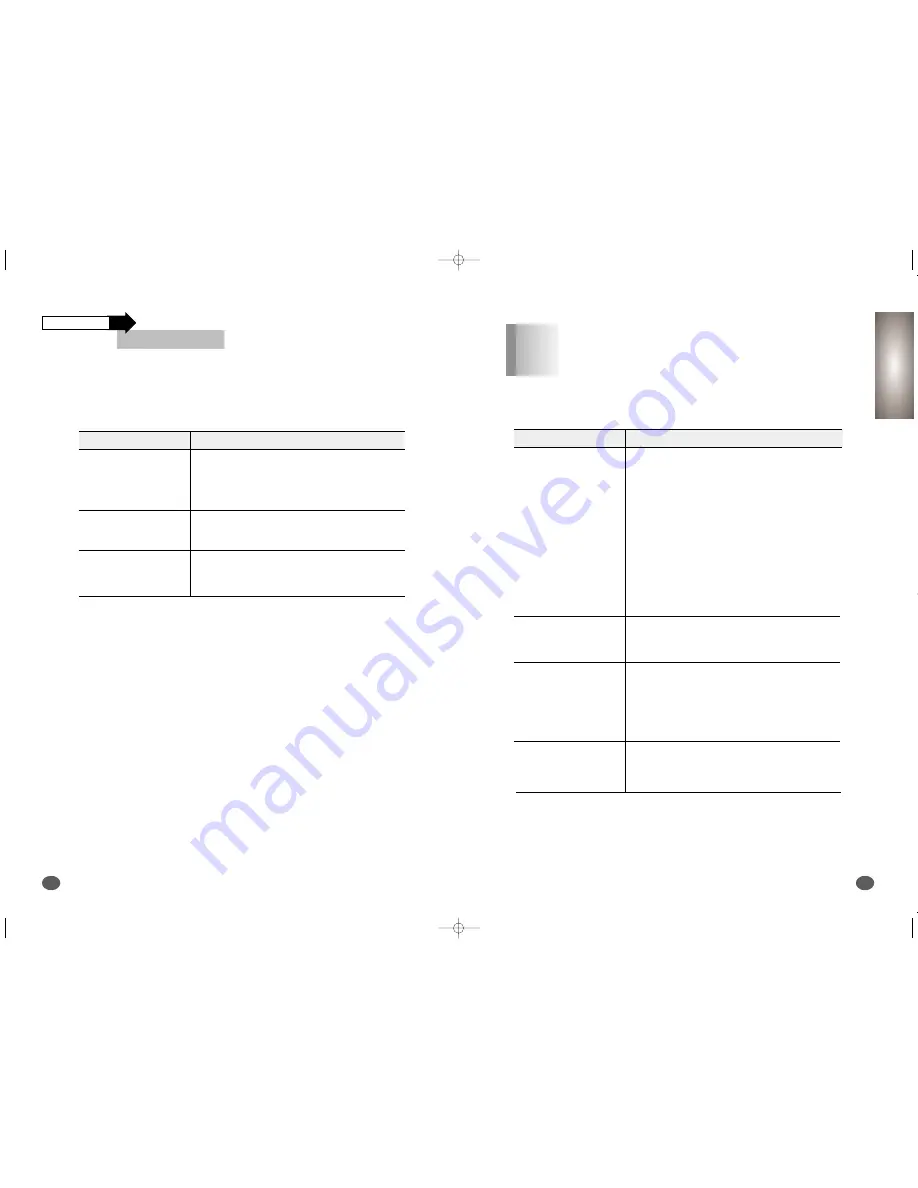
Problem

Cause & Solution

Scan error occurs. Turn the printer off and back 
on. If you still have the same problem, restart 
your computer.

‘Scanning has failed. 
Restart your scanner
and try again’ message
appears on the screen

If Samsung TWAIN UI is used for scanning, 
you must close the Samsung TWAIN UI program.

After scanning, scan
program is not closed

Match scan area of the image being scanned to 
the data size.

Part of data is not
automatically scanned

Scanning Problems

Continued

Problem

Cause & Solution

The original document is scanned with improper
brightness or too low resolution. Adjust the
scanning brightness to medium in your scanning
application.

The original document contains wrong text
language. You can recognize English text only.

You have set wrong text type. Text type is set in the
AnyPage Lite system automatically. But if you have
to recognize typewritten or matrix printer texts, set
the corresponding text type to increase recognition
accuracy. Do not forget to set the switch back to
Auto position if you are recognizing text, which are
neither typed on a typewriter nor printed on matrix
printer in draft mode.

The recognized page
contains many
unrecognized words

In most cases the system analyzes text layout
successfully. But if there are mistakes, you can mark
blocks manually.

The result of automatic
segmentation is not
correct

You may be trying to load an image file of a format
not supported in AnyPage Lite.

AnyPage Lite can load image files in the following
formats: BMP, PCX, DCX, JPEG, TIFF.

AnyPage Lite can save images in the following
formats: BMP, PCX, JPEG, TIFF.

The system does not
load your image file

AnyPage Lite does not offer the scan feature. 

It provides only the recognizing feature of the

scanned image.

Scanning is not
achieved in AnyPage
Lite.

O

CR Problems

Chapter 10

10-M30UK(10-4 to 10-17)  5/22/00 3:32 PM  Page 16

Summary of Contents for SCX-1000 Series

Page 1: ...8 00390A Rev 1 00 Visit us at http www samsungprinter com If you have access to this online service you can download the User s Guide and drivers from Samsung Electronics 00 M30UK Cover 5 22 00 4 08 PM Page 1 ...

Page 2: ...the safety information You may have misunderstood the operating instruction If you cannot resolve the conflict contact your sales or service representative for assistance 5 Unplug the machine from the AC wall socket before cleaning Do not use liquid or aerosol cleaners Use only a damp cloth for cleaning 6 Do not place the machine on an unstable cart stand or table It may fall causing serious damag...

Page 3: ... reassembly could cause electric shock when the unit is subsequently used 13 Unplug the machine from the printer and AC wall outlet and refer servicing to qualified service personnel under the following conditions When any part of the power cord plug or connecting cable is damaged or frayed If liquid has been spilled into the product If the product has been exposed to rain or water If the product ...

Page 4: ...5 Deleting Images 7 6 Storing Images 7 7 7 Chapter Changing Printer Setting Overview 8 1 Selecting the Paper Size 8 2 Selecting the Paper Type 8 3 8 Chapter Using the Control Panel Overview 3 1 Control Panel Buttons 3 2 Control Panel Display 3 4 3 Chapter Print Media Overview 4 1 Media Size 4 2 Print Media Characteristics 4 3 Paper Guideline 4 4 Using the Manual Feed Slot 4 5 4 Chapter Printing Ta...

Page 5: ... 3 Cleaning Your Printer 9 4 Cleaning the Print Cartridge Carrier Contacts 9 6 Printing the Help List 9 7 Restoring the Menu to the Default Setting 9 8 9 Chapter Troubleshooting Overview 10 1 Clearing Paper Jams 10 2 Error Messages 10 5 General Printing Problems 10 10 Print Quality Problems 10 12 Scanning Problems 10 14 OCR Problems 10 17 10 Chapter 00 M30UK i to 1 5 5 22 00 2 59 PM Page vi ...

Page 6: ...r Introduction Overview Congratulations on the purchase of your SCX 1000 Series printer This chapter provides the following information About This Guide Main Features Printer Components 00 M30UK i to 1 5 5 22 00 2 59 PM Page 1 ...

Page 7: ...cuments and photographs into your computer and maintain them as electronic documents You can also use SmarThru to quickly transmit scanned documents by fax or electronic mail or to print a copy on your printer Scan Copy Scan to FAX Scan to E mail Scan to OCR Scan to Smart Media SCX 1000S only Main Features Chapter 1 Introduction 1 2 C Conventions used This guide will show you to get started and pe...

Page 8: ...nly Control Panel Smart Media Function Buttons SCX 1000S only Handle Paper Out Tray Paper Input Tray Ink Cartridge and Carrier inside Scanner Bed Display Rear View The following illustration shows the rear view of your printer and indicates the various main elements Parallel Interface Connector USB Port Manual Feeder Power Connector Rear Cover Scanner bed Printer Components Chapter 1 00 M30UK i to...

Page 9: ...ter provides step by step information on setting up your printer Unpacking Your Printer Connecting the Printer Cable Connecting the Power Cord Loading Paper into the Input Tray Installing the Print Cartridge Testing the Printer Installing the Printer Software 01 M30UK 1 6 to 2 11 5 22 00 3 18 PM Page 1 ...

Page 10: ...el Cable Print Cartridges Colour Black User s Guide SmarThru 2 Guide CD ROMs 1Remove all the adhesive tapes as illustrated below 2Slide the Input Tray out of the printer Remove the packaging material from the tray When you start unpacking the box of your printer you will find the following items in addition to your printer During the storage and transport of your printer adhesive tape is used to p...

Page 11: ...nter If you need to purchase another cable ensure that it is complies to IEEE 1284 1 Check that both the printer and the computer are powered off and disconnected from the power point 2 Plug one end of the parallel cable into the connector on the rear of the printer 3 Push the metal clips down to fit inside the notches on the cable plug 4 Plug the other end of the cable into the appropriate parall...

Page 12: ... higher and have a USB port 1 Make sure that both the printer and computer are turned off 2 Plug one end of the certified USB cable into the USB port on the printer 3 Plug the other end into the USB port on the computer The USB and parallel printer cables cannot be connected simultaneously You should decide which connection to use and the best connection to fit your requirement Connecting the Powe...

Page 13: ...ray completely out of the printer 2 Slide the paper width and length guides to their outermost positions 3 Place the paper against the right side of the tray with the recommended print side face down If necessary flex the sheets back and forth to loosen them then fan them Do not fold or crease the paper Loading Paper into the Input Tray Chapter 2 Your printer has the Input Tray that can hold up to...

Page 14: ...to the installation position a Press Setup until CARTRIDGE appears in the display b Press ˆ or until CHANGE CAR appears in the second row of the display c Press Enter Select The Print Cartridge Carrier moves to the far left side of the printer You are now ready to install the print cartridges Cartridge Type Black Photo Colour Copper Contact Area Cartridge Carrier Slot Right Left 1 Remove the stick...

Page 15: ... similar to the ones shown on next page is printed Each pattern has a number under it 10 Press Enter Select RIGHT CARTRIDGE appears in the display 11Press ˆ or to select the black photo cartridge type that you installed Installing the Print Cartridge Continued The cartridge types you can select are NEW STD COLOR for a new standard colour cartridge NEW HIGH COLOR for a new high yield colour cartrid...

Page 16: ... Once you pressed Enter Select to choose the correct value for ALIGNMENT F the printer returns to the Ready Mode Continued Cartridge type Part number Standard Lexmark P N 12A1970 High yield Lexmark P N 12A1975 Standard Lexmark P N 15M0120 High yield Lexmark P N 15M0125 Lexmark P N 12A1990 Black cartridge Photo cartridge optional Colour cartridge When either print cartridge starts to run out of ink...

Page 17: ...river accesses the printer features and allows the computer to communicate with the printer SmarThru 2 program The program called SmarThru 2 is an application program that helps you manage your printer Samsung SmarThru 2 provides you with A Mail Box that can send receive and store e mail and fax messages An Image Manager that supports operations on images Scan Manager that supports scanner operati...

Page 18: ... If you are installing the software onto a Windows NT 4 Workstation you must have installed Service Pack 3 or higher Internet Explorer 4 01 or later 1 Make sure the printer is plugged in and connected to your computer 2 Start Windows 3 When the New Hardware Found message appears click the Cancel button 5 Select the printer model which is connected to your computer 6 Select the language you want to...

Page 19: ...ur screen as the program files are copied onto your computer Select this icon to make diskettes of your software Select this icon to to uninstall the Samsung Software on your computer 9 Type the user name and company and click the Next button Select the folder which the Samsung Software will be installed in and click the Next button 10 11 Choose the Setup type and click the Next button 12 Select t...

Page 20: ...m 2 2 Contact your Internet Service Provider for more details If Use Dial up for internet connection is selected in step 1 follow the instructions on the screen 1 Select the way you are connected to the Internet and then click the Next button Set up your Internet connection if you have an E mail account from your company or a service provider 2 If Connection to internet over LAN is selected in ste...

Page 21: ...ng it If prompted to do so restart your computer If necessary re install the Samsung Software To uninstall the printer driver proceed as follows Close any programs that are running first 1 Click Start Programs Samsung SCX 1000 Series SCX 1000 Series Uninstall from the Windows task bar 2 Follow the instructions on the screen The printer driver is removed from your hard disk To uninstall the SmarThr...

Page 22: ...se 4 Click the Make icon 5 The Copy to Floppy dialog box appears Select the floppy disk drive that you will insert the diskette in 7 When prompted insert a blank and formatted diskette into the floppy drive and click Yes to start copying 8 If you need more than one disk insert the next disk and click Yes 9 When completed copying click Close in the Copy to Floppy dialog box 6 Click Copy all disk im...

Page 23: ...n Control Panel Buttons Control Panel Display 1 Insert the first diskette 2 Select Start Run from the Windows task bar 3 Type A setup exe substitute your floppy disk drive letter for A on the command line and then click the OK button 4 Follow the instructions on the screen to complete the installation Setting Up Your Printer 2 28 Installing Software from Diskette Making Installation Diskettes Cont...

Page 24: ...art Media Function Buttons SCX 1000S only Function Press Zoom Rate to reduce or enlarge the size of a copied image from 25 to 400 Press Copy Page to determine the number of copies 1 to 99 printed for each page Press Special Copy to sort the copy job MONO COLLATE print several page images on a single page N UP SCX 1000S only clone the same images on a single page CLONE print a single image on 4 9 o...

Page 25: ...with your printer Media Size Print Media Characteristics Paper Guideline Using the Manual Feed Slot Status Message Status Message indicates the current state of the printer For example if you first plug in the power cord the printer enters the Ready Mode and shows following information Resolution Paper Size Zoom Rate Number of Copies Attendance Message Attendance Message helps you to solve printer...

Page 26: ...ness of the paper affects print quality If the paper is too rough the ink may not adhere to the paper properly resulting in poor print quality Moisture Content The amount of moisture in the paper affects both print quality and paper feeding reliability Always test a sample of paper before purchasing large quantities Using media that does not conform to the specifications listed in the paper specif...

Page 27: ...r allows only one sheet at one time Insert the media with the recommended print side face up Not supported paper types Multiple sheet forms or documents Preprinted papers with chemicals that may contaminate the printer Rough edged or curled papers Synthetic paper Thermal paper 1 Insert the media fully until the printer picks it up 2 Send your job to print Guidelines for paper storage Keep paper aw...

Page 28: ...s 5 1 Memo Print Media 4 6 Overview This chapter shows how to print a file in Windows and each property you can change Selecting the Printer Printing a Document Using Features in the Printer Driver 05 M30UK 4 6 to 5 9 5 22 00 3 37 PM Page 1 ...

Page 29: ...ges to every application use Printers of the Control Pale in Windows Setting Printing Tasks 5 2 Printing Tasks 5 3 1Select Start Settings Printers from the Windows task bar 3Click Printer and select Set as Default 2Double click the SCX 1000 Series icon Setting Your Default Printer 1Start your application you are using to create the document and open the document you want to print 3After you have c...

Page 30: ...ck to print a test page Click to Cancel Print the current print job These images show the amount of ink remaining in each cartridge This tab allows you to specify the Control Program setup options Using the Options Tab Check this option to prevent the Control Program from appearing on your computer screen each time you send a job to print Check this option to close the Control Program when a job h...

Page 31: ...h cartridge For more information about the print cartridge see Chapter 9 Using Features in the Printer Driver Chapter 5 To take a full advantage of the printer features be familiar with each property that the printer provides 1Select Start Settings Printers from the Windows task bar 3Select Printer Properties The Properties dialog box allows you to access all the information you will need when usi...

Page 32: ... gives detailed information about each menu If you want to know more about each menu click on the Help button The help screen gives detailed information about each menu Paper Size Use this setting to select the paper size installed in the Paper Tray or Manual Feeder This tab allows you to specify the document type paper type and print quality Document Quality Tab You can restore all the default se...

Page 33: ...ics Line Art Generally the best choice for printed text or pen and ink drawings Fine Dither Produces fine quality printing Air Brush Produces air brush image printing If you want to know more about each menu click the Help button The help screen gives detailed information about each menu Overview This chapter contains information about copying the original selecting the special copy and changing t...

Page 34: ...utton To cancel a copy in progress press the Stop Restore button 3 Press ˆ or until the desired number appears on the display For example if you select 4 set the pages to 04 5 Start copying by doing one of the following Press the Black button to make black and white copies Press the Color button to make colour copies The printer copies the document into the memory To cancel a copy in progress pres...

Page 35: ...educes the original to 50 MIN 25 ˆ ˆ reduces the original to the lowest reduction percentage CUSTO M 100 ˆ ˆ lets you specify an exact reduction or enlargement percentage between 25 and 400 3 Press Enter Select Chapter 6 Making a Copy 6 5 Changing Copy Setup Chapter 6 Before making copies you can change the contrast resolution and scale Any change will take effective to every copy you will make To...

Page 36: ...nter Select button is pressed the printer prints page 3 page 2 page 1 page 3 page 2 page 1 When the Stop Restore button is pressed the printer prints page 1 page 2 page 3 page 1 page 2 page 3 This feature only allows you to print a document in black and white You cannot select high quality printing 3 Press ˆ or to select the clone number You may choose 4 IMAGES 9 IMAGES 16 IMAGES or AUTO 100 4 Pre...

Page 37: ...g pages The printer prints multiple page images on a single page 1 Press the Special Copy button until N UP COPY appears 3 Press ˆ or to select the number of the pages which can be divided 4 PAGES means a single page image is printed on four pages and 9 PAGES means a single page image is printed on nine pages 4 Press the Enter Select button to confirm your selection 5 Start copying by doing one of...

Page 38: ...unction is only applied to printers with the Smart Media Function SCX 1000S only This chapter provides the following information About Smart Media Card Printing Images Selecting Print Mode Deleting Images Storing Images Making a Copy 6 10 Memo 07 M30UK 6 10 to 7 7 5 22 00 3 36 PM Page 1 ...

Page 39: ...it will not be used for a long period of time Do not touch the copper contact area The card is easily damaged by static electricity Back up important data onto another medium floppy disk hard disk etc Selecting the file stored on the Smart Media Card Note that following illustration and example show when you print images captured by a Samsung digital camera Level 1 Level 2 Root Directory SAMSUNG U...

Page 40: ...ES The printer prints all of the images stored in a directory of the Smart Media Card To change the printing size see Selecting Print Mode on page 7 5 To Select the number of copies printed for each image see Selecting Print Mode on page 7 5 1 Press the Menu button 4 Press the Enter Select button to select the new setting for the printing size 6 Press the Enter Select button to select the new sett...

Page 41: ...LL IMG means all images are deleted DELETE DIR means the selected directory is deleted FORMAT means the card is to be formatted Smart Media Function Button Smart Media Slot For more information about image file selection see Selecting the file Stored on Smart Media Card on page 7 3 1 2 Press the Scan button to start scanning Scanned image is automatically stored onto the Smart Media Card Smart Med...

Page 42: ...inter Setting Overview This chapter provides the following information Selecting the Paper Size Selecting the Paper Type Changing Printer Setting 8 1 Memo Smart Media Function 7 8 08 M30UK 7 8 to 9 1 5 22 00 3 29 PM Page 1 ...

Page 43: ...talled in the Paper Input Tray 2 Press ˆ or until the desired paper size appears in the second row of the display 1 Press the Setup button repeatedly until PAPER SIZE appears 3 Press the Enter Select button For more information about paper size see Print Media in Chapter 4 3 Press the Enter Select button 1 Press the Setup button until PAPER TYPE appears 2 Press ˆ or until the desired paper type ap...

Page 44: ...ining your printer Replacing Print Cartridge Aligning Print Cartridge Cleaning Your Printer Cleaning the Print Cartridge Carrier Contacts Printing the Help List Restoring the Menu to the Default Setting Maintaining Your Printer 9 1 Changing Printer Setting 8 4 Changing Printer Setting 8 4 9 Chapter Maintaining Your Printer Memo 08 M30UK 7 8 to 9 1 5 22 00 3 29 PM Page 4 ...

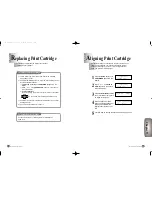
Page 45: ...splay 2 Press ˆ or until ALIGN CAR appears in the second row of the display To remove the print cartridge 1 Lift the Printer Top Cover and support it with the Cartridge Compartment Cover 2 Complete the following steps to move the Print Cartridge Carrier into the installation position a Press Setup repeatedly until CARTRIDGE appears in the display b Press ˆ or until CHANGE CAR appears in the second...

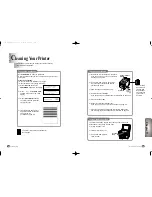
Page 46: ...ter If you need help see To Remove the Print Cartridge on page 9 2 2 Use a clean damp cloth to gently wipe the entire copper contact area and the printheads as shown 3 Allow the copper contact area to dry 4 Reinstall the print cartridges If you need help see Installing the Print Cartridges on page 2 10 5 Close the Scanner Bed 6 Repeat the cleaning printheads test If you need help see To clean the ...

Page 47: ... Use a clean dry cloth to clean the Cartridge Carrier Contacts inside the Print Cartridge Carrier Cartridge Carrier Contacts Printing the Help List Chapter 9 The Help list contains the information about all of the functions currently available 1 Press the Setup button until MAINTENANCE appears in the display 2 Press the Enter Select button when HELP LIST appears on the second line of the display T...

Page 48: ...DEFAULT appears in the second row of the display 10 Chapter Troubleshooting Overview Most printer problems can be easily solved by going through simple check lists and tests The most frequent problems have been divided into several categories as listed below Clearing paper Jams Error Messages General Printing Problems Poor Print Quality Scanning Problems OCR Problems To restore factory defaults MA...

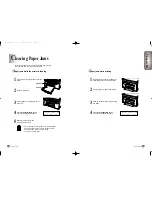
Page 49: ...to remove it from the Rear Cover See Paper jams while printing on page 10 3 for more information Paper jams while printing 1 Open the Rear Cover by pushing the metal clips at each end of the cover 2 Pull the paper out gently and slowly 3 Push on the Rear Cover until it snaps into place 4 Press the Stop Restore button The error message disappears By carefully selecting print media and loading them ...

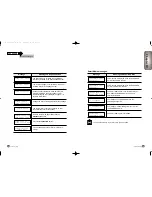
Page 50: ...er loading the paper in the Input Tray The printer lacks the memory The printer is scanning from your PC The printer is printing a job received from your PC The Black and Colour cartridges are not installed or improperly installed in the Print Cartridge Carrier The printer lacks the memory for collation To cancel the job press Enter Select To continue collating press Stop Restore The original size...

Page 51: ...tridge Carrier The system error occurs to the printer so that the printer cannot print continually Remove the jammed paper and press the Stop Restore button Press the Stop Restore button This message means the printer is returned to normal Change the Photo cartridge with the Black cartridge Check the print cartridge to make sure that it is properly installed in the print cartridge carrier See Inst...

Page 52: ...ard is not formatted the message is displayed for about 2 seconds There is no image file stored on the Smart Media card but you tried to print it The directory has a file or more To delete it you have to delete all files under that directory Check that the write protect sticker is adhered on the Smart Media Card The printer is storing the job on the Smart Media Card but the memory used to store th...

Page 53: ...r does not print Make sure the tape is removed from the printhead See Installing the Print Cartridges on page 2 10 for more information Check the print cartridges to be sure they are correctly installed See Installing the Print Cartridges on page 2 10 for more information Check to see if the print cartridge ink is low or empty Make sure print media is loaded in the printer Printer prints but no ch...

Page 54: ...l contains broken lines clean the Print Cartridge Carrier Contacts Characters print with White lines This printer is not selected as the default Check the default printer Make sure you are using the correct cable Use IEEE 1284 compliant parallel cable Incorrect character print Print Quality Problems Chapter 10 The page layout is too complex Simplify the page layout Delete any unnecessary graphics ...

Page 55: ... and try again message appears on the screen Troubleshooting 10 14 Problem Cause Solution File setting required for I O may not be proper Follow the instructions below 1 Start your windows 2 Select Run from Start menu 3 Type sysedit then click OK 4 Select SYSTEM INI file and set the file as shown below 386 Enh device vecp 386 LPT1TurnAroundDelay 50 5 Restart your Windows The scanner driver is not ...

Page 56: ...AnyPage Lite system automatically But if you have to recognize typewritten or matrix printer texts set the corresponding text type to increase recognition accuracy Do not forget to set the switch back to Auto position if you are recognizing text which are neither typed on a typewriter nor printed on matrix printer in draft mode The recognized page contains many unrecognized words In most cases the...

Page 57: ...t 7 8 kg Operating Condition General Specifications Under 15W Standby Under 35W Operation Mode Temperature 5 40 C 40 104 F Humidity 20 RH 80 RH Recommended Operating Condition Temperature 16 32 C 60 90 F Humidity 40 RH 70 RH Ink Cartridge See page 2 15 for part numbers Specifications Troubleshooting 10 18 Memo 11 M30UK 10 18 to A 9 5 22 00 3 27 PM Page 1 ...

Page 58: ...raft 2 ppm normal Print Resolution H x V Draft 300 x 600 dpi Normal 600 x 600 dpi Best 1200 x 1200 dpi Maximum Paper Size A4 210 mm x 297 mm See page 4 2 for paper sizes Effective Printing Width 203 1 mm Output Tray Capacity Maximum 50 sheets Input Paper Capacity Maximum 150 sheets Maximum Printer Cable Length 6 ft 1 8 m Item specification Copy Mode Black and Colour Scanner Type Flat bed Maximum O...

Page 59: ...d with the letter L or coloured red You must have a 13 amp fuse in the plug adaptor or at the distribution board Guarantee Limited Guarantee We guarantee that this product has no faulty parts If the machine breaks down during the guarantee period and this is caused by improper workmanship or a fault we will repair or replace the machine All repairs done under the guarantee must be done by a servic...

Page 60: ... A 2 Diskettes 2 26 Display 3 4 Document Tab 5 9 Type 10 13 Draft 3 3 6 4 E ECP 10 14 Emulation A 2 Engine Type A 2 Enlargement 3 3 A 3 Envelope 4 2 4 5 Error Messages 10 5 Executive 4 2 E mail 2 17 2 23 F Fax Modem 2 22 Fax Message 2 17 Feature 5 7 File format 10 9 Fine Dither 5 10 H Hagaki 4 2 Halftone 5 10 Handle 1 4 Hardware Requirements 2 18 Help List 9 7 Humidity A 1 I Image 5 10 7 5 Deletin...

Page 61: ...ver 1 5 Reduction 3 3 A 3 Remove Paper Jam 10 2 10 5 Smart Media Card 10 7 7 2 Restore Default 9 8 Root Directory 7 3 S Safety Information i Scan Button 3 3 Scan to E mail 1 3 Scan to FAX 1 3 Scan to OCR 1 3 Scan to Smart Media 1 3 Scanner Bed 1 4 Scanner Type A 3 Scanning Area A 2 Self test 2 16 Single Copy 6 2 Smart Media Card 7 2 10 9 2 17 Function Button 1 4 Memory full 10 8 Slot 1 4 SmarThru ...

Reviews: