11
Samsung Electronics
Disassembly and Reassembly
No
Parts
Procedure
Remark
2
3
4
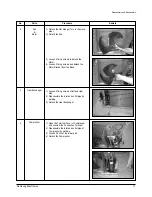
Fan
&
Motor
Heat Exchanger
Compressor
1) Detach the Nut Flange (Turn to the clock-
wise).
2) Detach the Fan.
3) Loosen 4 fixing screws to detach the
Motor.
4) Loosen 5 fixing screws and detach the
Motor Bracket from the Base.
1) Loosen 2 fixing screws of left and right
side.
2) Disassemble the inlet and outlet pipe by
welding.
3) Detach the Heat Exchanger.
1) Open the Terminal Cover of Compressor
and unscrew the Connection Terminal.
2) Disassemble the inlet and outlet pipe of
Compressor by welding.
3) Loosen 3 bolts of the lower part.
4) Detach the Compressor.
DB98_16999A(2)_1 04/3/12 10:25 AM Page 11
Summary of Contents for SC07AS2
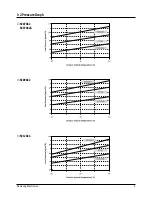
Page 4: ...3 Samsung Electronics 1 2 Pressure Graph SC07AS2 SC07AS2A SC09AS2 SC12AS4...
Page 26: ...MEMO 25 Samsung Electronics...
Page 31: ...Samsung Electronics 30 7 3 Ass y Control In Indoor Unit SC07AS2 SC07AS2A SC09AS2 DB93 02524B...
Page 33: ...Samsung Electronics 32 Exploded Views and Parts List SC12AS4 DB93 02539B...
Page 36: ...35 Samsung Electronics 9 PCB Diagram 9 1 ASS Y MAIN PCB 7K 9K 12K DB93 02447B TOP...
Page 37: ...Samsung Electronics 36 PCB Diagram BOTTOM...
Page 44: ...MEMO 43 Samsung Electronics...
Page 45: ...MEMO Samsung Electronics 44...


