73
Start Setup
m
MENU
→
System
→
Start Setup
→
E
Go through the initial setup steps like you did the first time you used this product.
―
Enter your 4 digit PIN number. The default PIN number is “0-0-0-0".
If you want to change the PIN number, use the
Change PIN
function.
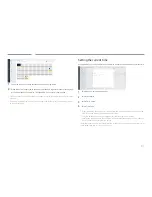
Time
m
MENU
→
System
→
Time
→
E
You can configure
Clock Set
or
Sleep Timer
. You can also set the product to automatically turn
on or off at a specified time using the
Timer
function.
―
Press the
INFO
button if you want to view the current time.
Clock Set
Select
Clock Set
. Select
Date
or
Time
, and then press
E
.
Use the number buttons to enter numbers or press the up and down arrow buttons. Use the left
and right arrow buttons to move from one entry field to the next. Press
E
when done.
―
You can set the
Date
and
Time
directly by pressing the number buttons on the remote
control.
DST
Switches the DST (Daylight Saving Time) function on or off.
Off
/
On
•
Start Date
: Set the start date of Daylight Saving Time.
•
End Date
: Set the end date of Daylight Saving Time.
•
Time Offset
: Select the correct time offset your timezone.
―
Start Date
,
End Date
and
Time Offset
are enabled only when
DST
is set to
On
.
Sleep Timer
Automatically shuts off the product after a preset period of time.
(
Off
/
30 min
/
60 min
/
90 min
/
120 min
/
150 min
/
180 min
)
―
Use the up and down arrows to select a period of time, and then press
E
. To cancel
Sleep
Timer
, select
Off
.
Power On Delay
When connecting multiple products, adjust the power-on time for each product to prevent
power overload (within the range 0–50 seconds).


