background image

1

English

M

edia P

la

y

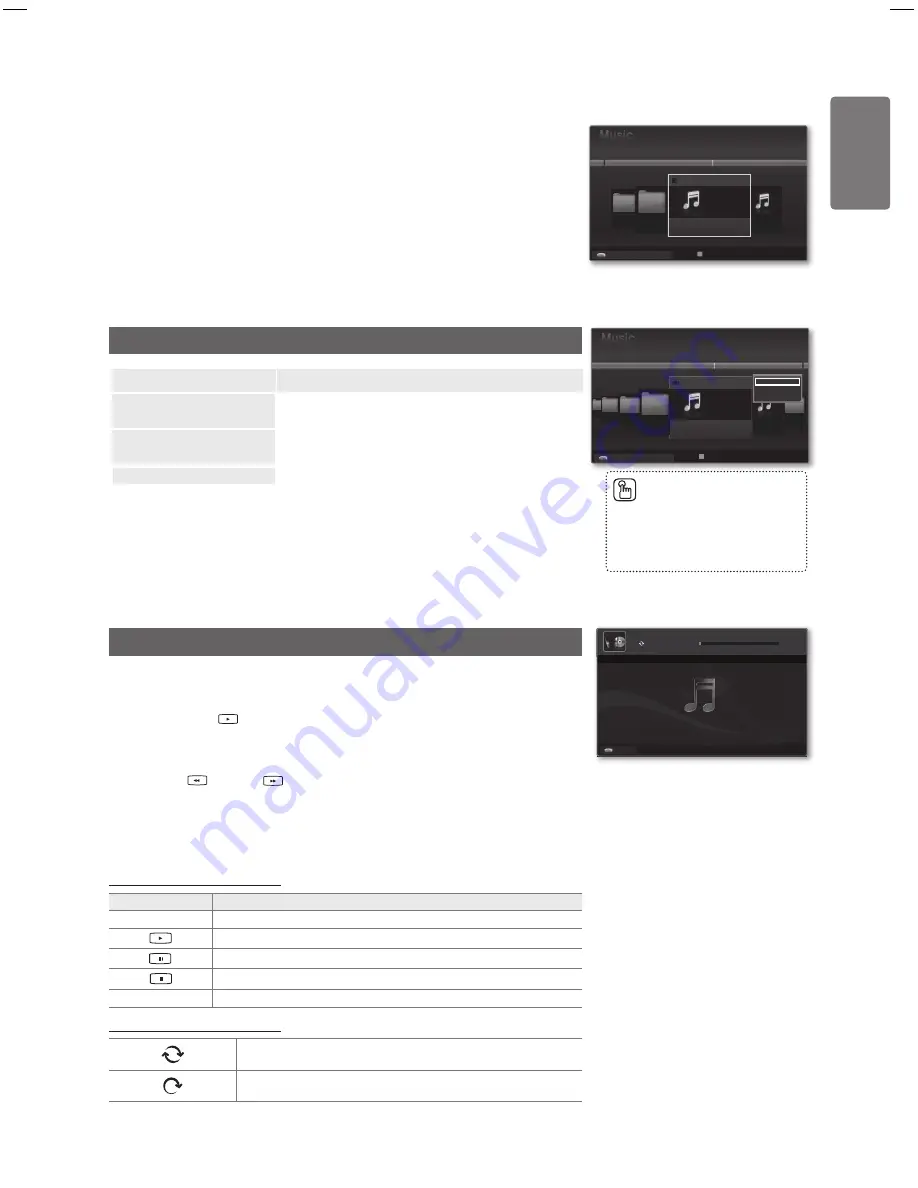
Using the Music List

1

  Press the 

MEDIA.P

 button on the remote control to display the 

Media Play


menu.

2

  Press the ◄ or ► button to select 

Music

, then press the 

ENTER

E

 button.

3

  Press the 

ENTER

E

 button to start playing music in the order selected by the 

user.

The information of the music files is automatically set.

Music files for which information cannot be displayed are set to Unclassified.

If there is no title information for a music file, the filename is displayed.

Music List Tools Menu

Option

Description

Play Current Group

You can only play music files in the currently selected 

sorting group.

Information

The music file information including the name, the size, 

the date modified and the path is displayed.

Remove Safely

You can remove the device safely from the TV.

Playing a Music

Playing a music file

1

  Pressing the ◄ or ► button to select a music file to be played.

2

  Press the 

 (Play)/

ENTER

E

 button.

This menu only shows files with the MP3 file extension. Files with other 

file extensions are not displayed, even if they are saved on the same USB 

device.

(REW) or 

(FF) buttons do not function during play.

The selected file is displayed at the top with its playing time.

To adjust the music volume, press the volume button on the remote control. 

To mute the sound, press the 

M

MUTE

 button on the remote control.

The playing duration of a music file may be displayed as ‘00:00:00’ if its 

playing time information is not found at the start of the file.

Music Play Control Buttons

Button

Operations

ENTER

E

Play/Pauses the music file.
Play the music file
Pause the music file
Exit play mode and return to the music list.

TOOLS

Run various functions from the Music menus.

Music Play Control Buttons

When all music files in the folder (or the selected file) are 

repeated. 

Repeat Mode

 is 

On

.

When all music files in the folder (or the selected file) are played 

once. 

Repeat Mode

 is Off.

Alternatively, select a music file 

from the music list and press 

the 

INFO

 button to view the 

information.

T


Tools


R

 U p p e r 

Select

1

1

USB

Sky

When I Dream 

3/4

Energetic

Carol kidd
Mr A-Z
2005
Pop

NPKI

Heaven

usermanual

NPKI

Play Current Group
Information
Remove Safely

USB    

 Device

 Select


Tools 

R

 Upper Folder

1

When I Dream 

3/4

Energetic

Carol kidd

Mr A-Z
2005
Pop

Heaven

usermanual

NPKI

1

USB

USB    

 Device

 Select


Tools 

R

 Upper Folder

r

00:00:02 / 00:04:55

r

1/2

When I Dream

r

r

Heaven

Geek In The Pink

USB   

E

 Pause 

lr


Previous/Next 

Tools 

R

 Return

BN68-02119C_Eng.indb   41

2009-04-09   오후 3:18:07

Summary of Contents for PS50B560

Page 1: ...del Serial No BN68 02119C 01 BN68 02119C Plasma TV user manual Contact SAMSUNG WORLD WIDE If you have any questions or comments relating to Samsung products please contact the SAMSUNG customer care centre Country Customer Care Centre Web Site EIRE 0818 717 100 www samsung com ie U K 0845 SAMSUNG 7267864 www samsung com uk BN68 02119C_Eng indb 1 2009 04 09 오후 3 17 ...

Page 2: ...terimage on the Screen Displaying still images from Video games and PC for longer than a certain period of time may produce partial afterimages To prevent this effect reduce the brightness and contrast when displaying still images Warranty Warranty does not cover any damage caused by image retention Burn in is not covered by the warranty Installation Be sure to contact an authorized service centre...

Page 3: ...Labs Inc TruSurround HD technology is incorporated under license from SRS Labs Inc Manufactured under license from Dolby Laboratories Dolby and the double D symbol are trademarks of Dolby Laboratories Symbol Press Note One Touch Button TOOLS 2009 Samsung Electronics Co Ltd All rights reserved ...

Page 4: ...t Auto Adjustment Screen 25 PC Display 27 Sound Menu 27 Mode Equalizer SRS TruSurround HD Audio Language Audio Format Audio Description 27 Auto Volume 28 Speaker Select Sound Reset 29 Setup Menu 29 Language Time 30 Game Mode 32 Melody Energy Saving 33 Input Menu 33 Source List Edit Name 34 Support menu 34 Self Diagnosis 35 HD Connection Guide Contact Samsung Media Play 36 Connecting a USB Device 3...

Page 5: ...eld the cable from interference When connecting a cable open the ferrite core and clip it around the cable near the plug Using the Stand Base Two or more people should carry the PDP Never lay the PDP on the floor because of possible damage to the screen Always keep the PDP upright The PDP can rotate 20 degrees in right and left directions 20 20 Assembling the Cables Enclose the cables in the Holde...

Page 6: ...trol How to assemble the Stand Base depending on the model Using the 4 screws for securing the stand base and the monitor firmly attach the monitor to the stand base The exterior of the set may be different than the picture 경고 주의 경고 주의 Firmly secure the stand to the TV before moving it as the stand may fall and could cause serious injury Two or more people should carry the TV Never lay the TV on t...

Page 7: ...e with the appropriate cable not supplied The difference between HDMI and DVI is that the HDMI device is smaller in size has the HDCP High Bandwidth Digital Copy Protection coding feature installed and supports multi channel digital audio DVI AUDIO IN DVI audio outputs for external devices Supported modes for HDMI DVI and Component 480i 480p 576i 576p 720p 1080i 1080p HDMI DVI 50Hz X X X O O O O H...

Page 8: ... R EXT 1 Only TV or DTV output is available EXT 2 Output you can choose 9 PC IN PC AUDIO Connect to the video and audio output jack on your PC 0 COMMON INTERFACE Slot Insert CI Common Interface card into the slot When not inserting CI CARD in some channels Scramble Signal is displayed on the screen The pairing information containing a telephone number CI CARD ID Host ID and other information will ...

Page 9: ...DVI OUT HD connection DVD Blu Ray player HD Cable Box HD Satellite receiver STB Using an HDMI Cable HDMI OUT Audio Video connection VCR Using an Audio Video Cable AUDIO OUT VIDEO OUT Component connection DVD Blu Ray player Cable Box Satellite receiver Using a Component Cable AUDIO OUT COMPONENT OUT HDMI DVI PC COMPONENT EXT VIDEO Best Normal VCR DVD Using a Scart Cable EXT ...

Page 10: ...l Cable OPTICAL Analog Audio connection Amplifier DVD Home Theater Using a Audio Cable AUDIO IN HD connection Using a D Sub Cable Using an HDMI Cable HDMI OUT OPTICAL Digital AUDIO Analog Best Normal Using a D Sub Cable Using a D Sub Cable PC OUT AUDIO OUT HD connection Using a D Sub Cable Using an HDMI DVI Cable DVI OUT AUDIO OUT ...

Page 11: ...screen menu Displays the favourites channel list p 19 Returns to the previous menu Exit the on screen menu This function enables you to view and play the photo JPEG and music MP3 files from an external devices p 37 Picture size selection p 23 Digital subtitle display Electronic Program Guide EPG display p 17 11 English Getting Started Teletext Functions p 50 0 Teletext mode selection LIST FLOF 5 T...

Page 12: ...set You also can press the POWERP button or the TV button on the remote control to turn the TV on The programme that you were watching last is reselected automatically 3 Press the numeric button 0 9 or channel up down button on the remote control or CH button on your set When you switch the set on for the very first time you will be asked to choose language in which the menus are to be displayed 4...

Page 13: ...selecting Cable mode refer to page 13 The channel search will start and end automatically 6 The message Set the Clock Mode is displayed Press the ENTERE button Press the or button to select Auto then Press the ENTERE button If you select Manual Set current date and time is displayed If you have received a digital signal the time will be set automatically 7 The brief instruction on How to get the b...

Page 14: ...tton to select your frequently used functions quickly and easily The Tools menu changes depending on which external input mode you are viewing 1 Press the TOOLS button The Tools menu will appear 2 Press the or button to select a menu then press the ENTERE button 3 Press the ENTERE buttons to display change or use the selected items For a more detailed description of each function refer to the corr...

Page 15: ...on code Frequency Displays the frequency for the channel Modulation Displays available modulation values Symbol Rate Displays available symbol rates Search Mode Full Network Start Frequency Displays the frequency start values End Frequency Displays the frequency stop values Modulation Displays available modulation values Symbol Rate Displays available symbol rates You can memorize the Channel sour...

Page 16: ...n Channel When you know the number of the channel to be stored Press the or button to select C Air channel or S Cable channel Press the button then press the or number 0 9 buttons to select the required number If there is abnormal sound or no sound reselect the sound standard required Search When you do not know the channel numbers Press the or button to start the search The tuner scans the freque...

Page 17: ...hich may be scrolled forwards or backwards in time Mini Guide The information of each programme is displayed by each line on the current channel Mini Guide screen from the current programme onwards according to the programme starting time order Default Guide Full Guide Mini Guide You can decide whether to display either the Full Guide or the Mini Guide when the GUIDE button on the remote control i...

Page 18: ...nnel selected by pressing the A programme currently being broadcast A reserved programme Channel List Tools Menu in All Channels Added Channels Favourites Press the TOOLS button to use the Tools menu Tools menu items may differ depending on the channel status Add Delete You can delete or add a channel to display the channels you want All deleted channels will be shown on All Channels menu You can ...

Page 19: ...n the remote control Reserving a programme will be shown on Programmed menu Digital Programme Guide and Viewing Reservation When a digital channel is selected and you press the button the Programme Guide for the channel appears You can reserve a programme according to the procedures described above Edit Channel Name only analogue channel Channels can labeled so that their call letters appear whene...

Page 20: ...l Select or deselect all reserved programmes Channel Mode When the press the P button Channels will be switched within the selected channel list Added Ch Channels will be switched within the memorized channel list Favourite Ch Channels will be switched within the favourite channel list Fine Tune If the reception is clear you do not have to fine tune the channel as this is done automatically during...

Page 21: ...make changes to Cell Light Contrast Brightness Sharpness Colour or Tint G R the OSD will be adjusted accordingly The adjusted values are saved for each picture mode In Analogue TV Ext AV modes of the PAL system you cannot use the Tint Function In PC mode you can only make changes to Cell Light Contrast and Brightness Each adjusted setting will be stored separately according to its input mode The e...

Page 22: ... to Custom Colour Red Green Blue Yellow Cyan Magenta Red Green Blue In Colour you can adjust the RGB values for the selected colour Reset Resets the colour space to the default values White Balance You can adjust the colour temperature for more natural picture colours R Offset G Offset B Offset R Gain G Gain B Gain Changing the adjustment value will refresh the adjusted screen Reset Resets the def...

Page 23: ...alize the setting If you use the Screen Fit function with HDMI 720p input 1 line will be cut at the top bottom left and right as in the overscan function Screen Mode 16 9 Wide Zoom Zoom 4 3 When setting the picture size to Auto Wide in a 16 9 wide TV you can determine the picture size you want to see the 4 3 WSS Wide Screen Service image or nothing Each individual European country requires differe...

Page 24: ...experts This function displays the blue signal only by removing the red and green signals from the video signal so as to provide a Blue Filter effect that is used to adjust the Colour and Tint of video equipment such as DVD players Home Theaters etc Blue Only Mode is available when the picture mode is set to Movie or Standard Screen Burn Protection To reduce the possibility of screen burn this uni...

Page 25: ...ng Up Your PC Software Based on Windows XP The Windows display settings for a typical computer are shown below The actual screens on your PC will probably be different depending upon your particular version of Windows and your particular video card However even if your actual screens look different the same basic set up information will apply in almost all cases If not contact your computer manufa...

Page 26: ...0 800 x 600 37 879 60 317 40 000 48 077 72 188 50 000 46 875 75 000 49 500 1024 x 768 48 363 60 004 65 000 56 476 70 069 75 000 60 023 75 029 78 750 1152 x 864 67 500 75 000 108 000 1280 x 800 49 702 59 810 83 500 62 795 74 934 106 500 1280 x 960 60 000 60 000 108 000 1280 x 1024 63 981 60 020 108 000 79 976 75 025 135 000 1360 x 768 47 712 60 015 85 500 1440 x 900 55 935 59 887 106 500 70 635 74 ...

Page 27: ...und is emitted from both the main speaker and the audio receiver a sound echo may occur due to the decoding speed difference between the main speaker and the audio receiver In this case use the TV Speaker function You can only select the language among the actual languages being broadcast Audio Description This is an auxiliary audio function that provides an additional audio track for visually cha...

Page 28: ...ngs to the factory defaults Selecting the Sound Mode When you set to Dual l ll the current sound mode is displayed on the screen Type of broadcast On screen indication NICAM Stereo Regular broadcast Standard audio Mono Normal use Regular NICAM Mono NICAM Mono Normal NICAM Stereo NICAM Stereo zMono Normal NICAM Dual I II NICAM Dual 1 NICAM Dual 2 Mono Normal A2 Stereo Regular broadcast Standard aud...

Page 29: ...lume Set the required volume level Source Selects TV or USB device When you select the TV you can set the Antenna and Channel Antenna You can select either DTV or ATV when the TV turns on automatically Channel Select the desired channel When you select the USB you can set the Contents Contents Selects the desired contents on the USB Repeat Select Once Everyday Mon Fri Mon Sat Sat Sun or Manual Whe...

Page 30: ...ammes by muting out video and audio Before the setup screen appears the PIN number input screen appears Enter your 4 digit PIN number The default PIN number of a new TV set is 0 0 0 0 You can change the PIN by selecting Change PIN from the menu You can lock some channels in Channel List Change PIN You can change your personal ID number that is required to set up the TV Before the setup screen appe...

Page 31: ... Language Audio Language and the Teletext Language of the Language menu show a list of languages supported by the current channel and the selection is highlighted If you change this language setting the new selection is only valid for the current channel The changed setting does not change the setting of the Primary Subtitle Language Primary Audio Language or the Primary Teletext Language of the P...

Page 32: ...e CI CAM module by visiting your nearest dealer or by phone 2 Insert the CI CARD into the CAM in the direction of the arrow until it fits 3 Insert the CAM with the CI CARD installed into the common interface slot Insert the CAM in the direction of the arrow right up to the end so that it is parallel with the slot 4 Check if you can see a picture on a scrambled signal channel CI Menu This enables t...

Page 33: ...n the remote with the Source list Red Refresh Refreshes the connecting external devices TTOOLS Tools Displays the Edit Name and Information menus Edit Name You can name the device connected to the input jacks to make your input source selection easier VCR DVD Cable STB Satellite STB PVR STB AV Receiver Game Camcorder PC DVI PC DVI TV IPTV Blu ray HD DVD DMA When a PC with a resolution of 1920 x 10...

Page 34: ...s on the screen If during the sound test you can hear sound only from one speaker or not at all select Yes If you can hear sound from the speakers select No Yes There may be a problem with the TV Contact Samsung s Call Center for assistance No There may be a problem with your external equipment Please check your connections If the problem still persists refer to the external device s user manual I...

Page 35: ... signal If the function is selected during the software transmission period this function searches for available software and downloads the software The time required to download the software is determined by the signal status Standby Mode Upgrade To continue software upgrade with master power on Select On by pressing the or button 45 minutes after entering standby mode a manual upgrade is automat...

Page 36: ...rts FAT16 32 The NTFS file system is not supported Certain types of USB Digital camera and audio devices may not be compatible with this TV Please connect directly to the USB port of your TV If you are using a separate cable connection there may be a USB compatibility problem Before connecting your device to the TV please back up your files to prevent them from damage or loss of data SAMSUNG is no...

Page 37: ...rough a hub Press the ENTERE button This function differs depending on the USB Memory Device connected to TV The selected USB device name appears at the bottom left of the screen 4 Press the or button to select an icon Photo Music Setup then press the ENTERE button To exit Media Play mode press the MEDIA P button on the remote control Removing a USB Memory Device Safely You can remove the device s...

Page 38: ...Information Shows the number of photos that are selected by pressing the Yellow button 5 Help Items Yellow Select button Selects file from the file list Selected files are marked with a symbol c Press the yellow button again to cancel a file selection T TOOLS Tools button Displays the option menus The tools menu changes according to the current status R RETURN Return button Return to previous menu...

Page 39: ...esired photo in the Photo list 2 Press the TOOLS button 3 Press the or button to select Slide Show then press the ENTERE button All files in the photo list will be used for the Slide Show During the slide show files are displayed in order from the currently shown file The Slide Show progresses in the order sorted in the Photo list Music files can be automatically played during the Slide Show if th...

Page 40: ...s not saved Zoom x1 x2 x4 You can magnify photos saved on a USB memory device To move the enlarged photo image press the ENTERE button then press the buttons Note that when the enlarged picture is smaller than the original screen size the location change function doesn t work The enlarged file is not saved Background Music You can set and select background music when watching a Slide Show Backgrou...

Page 41: ...ay The selected file is displayed at the top with its playing time To adjust the music volume press the volume button on the remote control To mute the sound press the MMUTE button on the remote control The playing duration of a music file may be displayed as 00 00 00 if its playing time information is not found at the start of the file Music Play Control Buttons Button Operations ENTERE Play Paus...

Page 42: ... safely from the TV Picture Music Settings Using Media Play When watching a Slide Show or listening to music using Media Play you can set the picture and sound Picture Setting 1 Press the TOOLS button during a Slide Show or while music is playing 2 Press the or button to select Picture Setting 3 Press the or button to select the Picture Mode Dynamic Standard Eco or Movie When selecting Dynamic Eco...

Page 43: ...up then press the ENTERE button 3 Press the or button to select the desired option 4 Press the or button to select the option To exit Media Play mode press the MEDIA P button on the remote control Option Description Music Repeat Mode Select to repeatedly play music files Screen Saver Run Time 10 min 20 min 1 hour Select to set the waiting time before the screen saver appears Information Select to ...

Page 44: ... used only with Samsung devices that have the Anynet feature To be sure your Samsung device has this feature check if there is an Anynet logo on it To connect to a TV Connect the HDMI IN 1 2 DVI 3 or 4 jack on the TV and the HDMI OUT jack of the corresponding Anynet device using an HDMI cable Anynet Device 1 Anynet Device 2 Anynet Device 3 TV HDMI 1 3 Cable HDMI 1 3 Cable HDMI 1 3 Cable Anynet Dev...

Page 45: ...d Right speakers and the subwoofer If you want to hear 5 1 channel audio connect the DIGITAL AUDIO OUT OPTICAL jack on the DVD player or Cable Satellite Box ie Anynet Device 1 or 2 directly to the Amplifier or Home Theater not the TV Connect only one Home Theater You can connect an Anynet device using the HDMI 1 3 cable Some HDMI cables may not support Anynet functions Anynet works when the AV dev...

Page 46: ...vices connected to the TV are listed If you cannot find a device you want press the red button to scan for devices Only when you set Anynet HDMI CEC to On in the Setup menu the Device List menu appears 3 Press the or button to select to a particular device and press the ENTERE button It is switched to the selected device Switching to the selected devices may take up to 2 minutes You cannot cancel ...

Page 47: ...Mode Device Type Operating Status Available Buttons Anynet Device After switching to the device when the menu of the corresponding device is displayed on the screen Numeric buttons ENTERE buttons Colour buttons EXIT button After switching to the device while playing a file Backward search Forward search Stop Play Pause Device with built in Tuner After switching to the device when you are watching ...

Page 48: ...nstead of the TV speaker 1 Press the TOOLS button Press the ENTERE button to select Anynet HDMI CEC 2 Press the or button to select Receiver Press the or button to select On or Off 3 Press the EXIT button to exit If your receiver supports audio only it may not appear in the device list The receiver will work when you have properly connected the Optical IN jack of the receiver to the Optical Out ja...

Page 49: ...et Select View TV in the Anynet menu Press the SOURCE button on the TV remote control and select a device other than Anynet devices Note that the channel button operates only when a tuner embedded Anynet device is not connected The message Connecting to Anynet device appears on the screen You cannot use the remote control when you are configuring Anynet or switching to a view mode Use the remote c...

Page 50: ...to display the previous teletext page 0 0 mode Press to select the teletext mode LIST FLOF If you press it in the LIST mode it switches into the List save mode In the List save mode you can save teletext page into list using the 8 store button 9 hold Used to hold the display on a given page if the selected page is linked with several secondary pages which follow on automatically To resume press it...

Page 51: ... damage to the inside of the TV set For wall mounts that do not comply with the VESA standard screw specifications the length of the screws may differ depending on their specifications Do not use screws that do not comply with the VESA standard screw specifications Do not use fasten the screws too strongly this may damage the product or cause the product to fall leading to personal injury Samsung ...

Page 52: ...o avoid the TV from falling 1 Put the screws into the clamps and firmly fasten them onto the wall Confirm that the screws have been firmly installed onto the wall You may need additional material such as an anchor depending on the type of wall Since the necessary clamps screws and string are not supplied please purchase these additionally 2 Remove the screws from the center back of the TV put the ...

Page 53: ...cket Blurred or snowy picture distorted sound Check the direction location and connections of your aerial This interference often occurs due to the use of an indoor aerial Remote control malfunctions Replace the remote control batteries Clean the upper edge of the remote control transmission window Check that the and ends of the batteries are inserted correctly Check that the batteries are drained...

Page 54: ...mension WxHxD Body With stand 1240 x 74 x 766 mm 1240 x 290 x 822 mm Weight Body With stand 33 kg 38 kg Environmental Considerations Operating Temperature Operating Humidity Storage Temperature Storage Humidity 50 F to 104 F 10 C to 40 C 10 to 80 non condensing 4 F to 113 F 20 C to 45 C 5 to 95 non condensing This device is a Class B digital apparatus Design and specifications are subject to chang...

Page 55: ...is the GPL assures that patents cannot be used to render the program non free The precise terms and conditions for copying distribution and modification follow TERMS AND CONDITIONS 0 Definitions This License refers to version 3 of the GNU General Public License Copyright also means copyright like laws that apply to other kinds of works such as semiconductor masks The Program refers to any copyrigh...

Page 56: ...s resulting copyright are not used to limit the access or legal rights of the compilation s users beyond what the individual works permit Inclusion of a covered work in an aggregate does not cause this License to apply to the other parts of the aggregate 6 Conveying Non Source Forms You may convey a covered work in object code form under the terms of sections 4 and 5 provided that you also convey ...

Page 57: ...arately written license or stated as exceptions the above requirements apply either way 8 Termination You may not propagate or modify a covered work except as expressly provided under this License Any attempt otherwise to propagate or modify it is void and will automatically terminate your rights under this License including any patent licenses granted under the third paragraph of section 11 Howev...

Page 58: ...eneral Public License section 13 concerning interaction through a network will apply to the combination as such 14 Revised Versions of this License The Free Software Foundation may publish revised and or new versions of the GNU General Public License from time to time Such new versions will be similar in spirit to the present version but may differ in detail to address new problems or concerns Eac...

Page 59: ...tware The systematic pattern of such abuse occurs in the area of products for individuals to use which is precisely where it is most unacceptable Therefore we have designed this version of the GPL to prohibit the practice for those products If such problems arise substantially in other domains we stand ready to extend this provision to those domains in future versions of the GPL as needed to prote...

Page 60: ...e Legal Notices however if the Program has interactive interfaces that do not display Appropriate Legal Notices your work need not make them do so A compilation of a covered work with other separate and independent works which are not by their nature extensions of the covered work and which are not combined with it such as to form a larger program in or on a volume of a storage or distribution med...

Page 61: ...e terms Additional terms permissive or non permissive may be stated in the form of a separately written license or stated as exceptions the above requirements apply either way 8 Termination You may not propagate or modify a covered work except as expressly provided under this License Any attempt otherwise to propagate or modify it is void and will automatically terminate your rights under this Lic...

Page 62: ...e special requirements of the GNU Affero General Public License section 13 concerning interaction through a network will apply to the combination as such 14 Revised Versions of this License The Free Software Foundation may publish revised and or new versions of the GNU General Public License from time to time Such new versions will be similar in spirit to the present version but may differ in deta...

Page 63: ...CULAR PURPOSE ARE DISCLAIMED IN NO EVENT SHALL THE OpenSSL PROJECT OR ITS CONTRIBUTORS BE LIABLE FOR ANY DIRECT INDIRECT INCIDENTAL SPECIAL EXEMPLARY OR CONSEQUENTIAL DAMAGES INCLUDING BUT NOT LIMITED TO PROCUREMENT OF SUBSTITUTE GOODS OR SERVICES LOSS OF USE DATA OR PROFITS OR BUSINESS INTERRUPTION HOWEVER CAUSED AND ON ANY THEORY OF LIABILITY WHETHER IN CONTRACT STRICT LIABILITY OR TORT INCLUDIN...

Page 64: ...k To avoid electric shock never touch the inside of this apparatus Only a qualified technician should open this apparatus Make sure to plug the power cord in until it is firmly inserted When removing the power cord make sure to hold the power plug when pulling the plug from the outlet Do not touch the power cord with wet hands If this apparatus does not operate normally in particular if there are ...

Page 65: ... UK Only United Kingdom This Samsung product is warranted for a period of twelve 12 months from the original date of purchase against defective materials and workmanship In the event that warranty service is required you should return the product to the retailer from whom it was purchased However Samsung Authorised Dealers and Authorised Service Centres in other EC Countries will comply with the w...

Page 66: ... the environment or human health from uncontrolled waste disposal please separate these items from other types of waste and recycle them responsibly to promote the sustainable reuse of material resources Household users should contact either the retailer where they purchased this product or their local government office for details of where and how they can take these items for environmentally saf...

Reviews: