background image


1


SAFETY CONCERNS 

For product safety and correct operation, the following 
information must be given to the operator/user and shall 
be read before the installation and operation. 
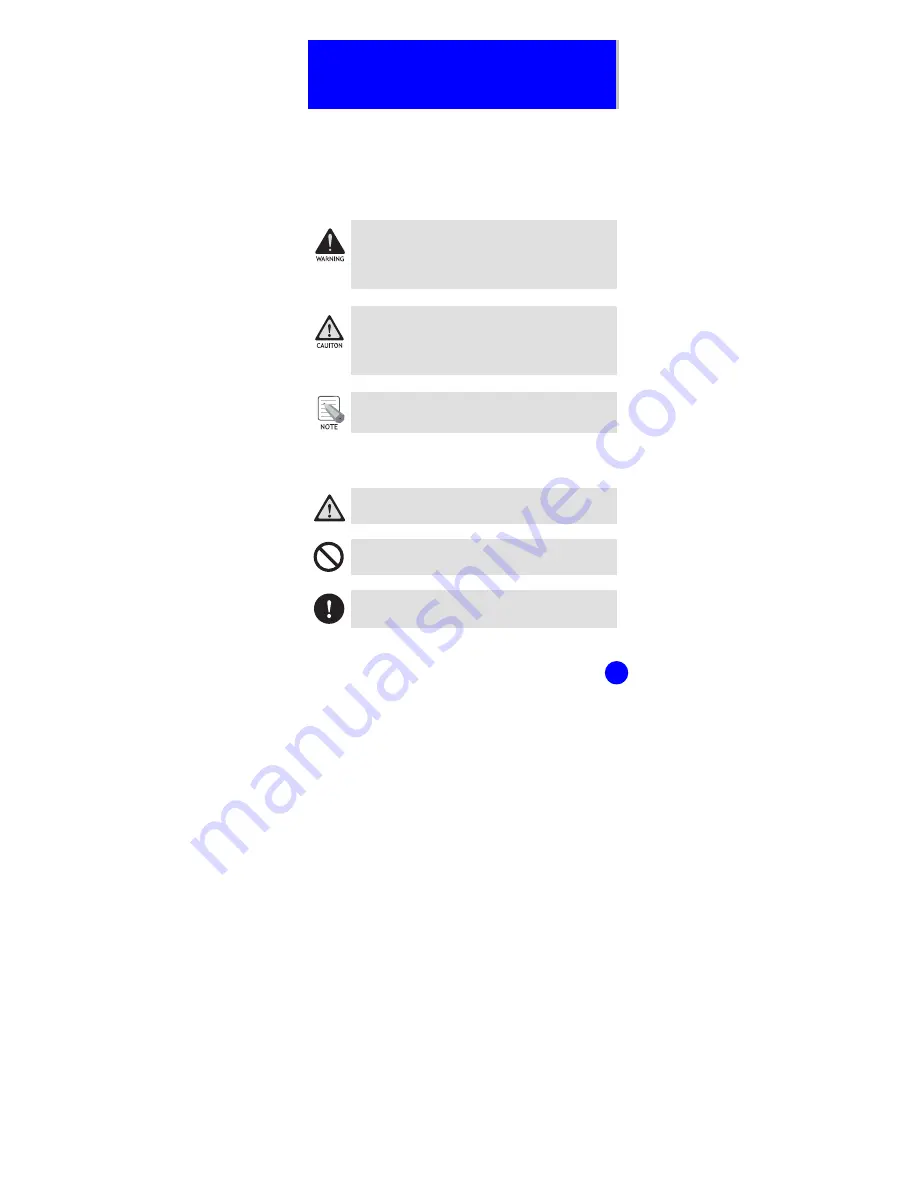
 

Conventions 


WARNING 
Provides information or instructions that the reader 
should follow in order to avoid personal injury or 
fatality. 


CAUTION


Provides information or instructions that the reader 
should follow in order to avoid a service failure or 
damage to the system. 


NOTE 
Indicates additional information as a reference. 


Symbols 


Indication of a general caution 


Indication for prohibiting an action for a product 


Indication for commanding a specifically required 
action 

Summary of Contents for OfficeServ WIP-5000M

Page 1: ...structions that the reader should follow in order to avoid personal injury or fatality CAUTION Provides information or instructions that the reader should follow in order to avoid a service failure or...

Page 2: ...ded with the WIP 5000M phone Using other chargers can result in overheating or explosion and may cause malfunction The battery shall be used only for the WIP 5000M phone Using the battery for other pu...

Page 3: ...he phone near a heater cigarette lighter heating apparatus etc It may cause a fire or electric shocks Do not use inflammable solvent or material near the phone Do not store them near the phone It may...

Page 4: ...wax benzene alcohol thinner mosquito spray aerosol lubricant or detergent The use of chemicals on the phone may cause fading discoloring or damage to the parts Do not install the phone on an unstable...

Page 5: ...alling the Battery 11 Installing the Battery 12 Removing the Battery 12 Charging the Battery 13 Checking the Battery Status 14 BASIC FEATURES 15 To Turn the Power On 15 To Turn the Power Off 21 Making...

Page 6: ...Failure 34 Features Used During a Call 35 Dialling using the Service key 44 APPLICATION MENUS 47 Menu Structure 47 Phone Book 55 Utilities 65 Message 71 Soft Keys 80 Volume Ring 87 Phone Settings 90...

Page 7: ...k up instructions for infrequently used features Overview of WIP 5000M The WIP 5000M Wireless IP Phone Mobile type is the wireless mobile phone that allows a voice communication through IEEE 802 11b w...

Page 8: ...s the main elements of your phone Menu Button Send Button Hold Button Transfer Button Navigation Buttons Cancel Mute Button End Power Button Conference Button Dial Buttons Microphone Speaker LCD Scree...

Page 9: ...direction Directory Call on Hold Used when moving the menu bar to the left direction Message Conference call Used when selecting or saving the selected item for function settings Used when erasing let...

Page 10: ...s not available Blinks when trying to make a call and turns on when a call is connected The status that indicates an alarm is set When a message is received Etiquette function or vibration function is...

Page 11: ...Unpacking After purchasing the WIP 5000M phone you have to check that the following items have been packed in the box WIP 5000M Battery 1 standard type Charger User Guide Hand holder Leather case for...

Page 12: ...recess compartment area of the back of the WIP 5000M phone 2 Press it in the direction of the arrow until it clicks into place Removing the Battery In order to take out the battery from the WIP 5000M...

Page 13: ...WIP 5000M User Guide 13 Charging the Battery After checking each component of the phone charge the battery as shown in the figure below Charging the battery Charging the battery with phone...

Page 14: ...since the battery may be discharged Low Battery Indication When the battery energy is completely discharged the phone makes a warning sound and the battery icon starts to blink It is recommended to ch...

Page 15: ...ing to the following procedure Easy Registration 1 Press and hold the button and turn on the power of the phone 2 Enter the SSID and press the OK button y SSID Enter the ESSID set in the WLAN connecti...

Page 16: ...ey 5 Enter the WEP key and press the OK button y WEP Enter the WEP key into the WLAN connection device See the section Installation of the OfficeServ SOHO or refer to your system administrator to veri...

Page 17: ...generally used with the OfficeServ SOHO From the OfficeServ SOHO press MENU Phone Setup 4 Network Setup 3 Wireless LAN Setup 1 SSID to verify the SSID SSID is the name of a radio network required for...

Page 18: ...following cases Mobile phone is set to Static IP mode The WEP key set in the system must be set and registered to the mobile phone 1 Press and hold the button and turn on the power of the phone 2 Pres...

Page 19: ...en appears 5 Next Steps are as same as steps from 3 to 5 in Easy Installation The screen below appears if the registration fails Enter the SSID again and press the OK button Registration 1 Previous 2...

Page 20: ...the problem is still not solved contact the system administrator reseller or the service center y For the initial screen one display can be selected from 3 displays shown as follows Refer to 6 Phone S...

Page 21: ...ithout entering the SSID The screen shown below appears Select 3 Language 2 Select the language you wish to use To Turn the Power Off Press the button for more than 2 seconds And then the phone automa...

Page 22: ...latest called number directory or abbreviated dial numbers Using the Dial Keypad 1 Press the phone number y Use the dialing pad to enter the required number The telephone number will appear on the dis...

Page 23: ...number for information or to make a call 1 Press the button 2 Using the buttons to view the call history Latest received number Latest called number 3 Select the phone number and press the button The...

Page 24: ...nswering a Call Press any button except Volume button or button to start a conversation while the phone is ringing You can set how to answer the incoming call 6 Phone Settings from Application Menu in...

Page 25: ...l 1 When Your handset is ringing Press the MENU button 2 Press the button and select the required function y 1 Call Refusal The connection will then be terminated y 2 Call Deflect If you enter the tel...

Page 26: ...ume key button volume and voice volume from the other party Bell Volume Adjustment You can adjust the bell volume while the phone is ringing by pressing the MENU button Refer to Volume section in Appl...

Page 27: ...utton in the initial screen If a key is pressed during a call the key tone will not be played unless when using an earphone Voice Volume Adjustment While having a conversation on the phone you can adj...

Page 28: ...ette Mode Press the button for more than 2 seconds on the initial screen Then the etiquette mode icon will be displayed on the top of phone screen and the phone will vibrate instead of ringing if ther...

Page 29: ...functions other than answering a call cannot be used until you disable the Automatic Key Lock To Set up the Automatic Key Lock Press the button for more than 2 seconds on the initial screen Then the s...

Page 30: ...ttons Used for Entering Characters The buttons used for entering the characters are as follows y MENU button Screen for entering ENG uppercase appears first and a menu bar prompting you to select eng...

Page 31: ...provide an input field for the character type you selected and the other two character types will appear on the menu bar For example if eng is selected ENG eng Sym will appear on the menu bar Press t...

Page 32: ...S 8 T U V 9 W X Y Z y To enter characters press the button where a desired character is displayed repetitively to display the next character e g If the number 5 button is pressed the character J is en...

Page 33: ...displayed in the same order Select desired special characters using the buttons and press the OK button to enter the character on the screen How to Enter Numbers Press the dial button for more than 2...

Page 34: ...all Back If an internal call cannot be connected you can reserve the call 1 If the other party does not answer your call or if he or she is in Busy or in Do Not Disturb status press MENU button 2 Pres...

Page 35: ...2 Press the MUTE button again to resume your voice Malicious call tracing malicious call identification IDSN Only If you receive malicious phone calls and the caller s number is not shown on the disp...

Page 36: ...tching centre And then continue your call as normally as possible If you receive an error message you may have to apply for this service from your network operator and this might incur additional char...

Page 37: ...ove to 2 PARK 3 Press the OK button 4 Your request to establish the number of the caller will then be sent to the switching centre 5 After you have entered the parking code orbit number the call will...

Page 38: ...l a further subscriber Putting a call on hold resuming the call This is used to hold a call for a while during a phone conversation 1 Press the R button during a phone conversation The call will be pu...

Page 39: ...on hold and the other party can hear a melody 2 Enter the telephone number of the external subscriber 3 To switch from one caller to another call waiting press the R button 4 Press the MENU and Press...

Page 40: ...The call will be put on hold and the other subscriber hears that the call is on hold 2 Enter the telephone number of the extension Press the SEND button If the extension answers the call inform the p...

Page 41: ...party can hear a melody 2 Enter the telephone number of the external or internal participant and Press the SEND button If you switch from one caller to another press the R button 3 Press the MENU and...

Page 42: ...rrow key during a call a menu will appear allowing you to save telephone numbers y You can save the telephone number of the present caller y You can dial a number using the Phonebook y You can dial a...

Page 43: ...h are interpreted by the remote station as a control signal 1 When You are holding an external call Press the MENU button 2 Press the button and move to 1 Keypad 3 Press the OK button 4 Presses of the...

Page 44: ...atest missed phone number select the desired phone number and make a call y The maximum of up to 32 phone numbers can be saved in the list If they are all filled up the oldest phone number is erased w...

Page 45: ...e service button 2 Press the MENU and press the button and move to 3 TI Services 3 Press the OK button 4 You selected for example the menu option 1 User Info Service 1 Missed Calls 2 Conference 3 TI S...

Page 46: ...l be dialled y 2 Edit You can replace the stored telephone number with one of your own You can change the number of a TI service and use it for a telephone number of your own but you cannot change the...

Page 47: ...e main application menu will appear on the screen The Menu screen displays the functions PhoneBook Utilities Message Soft Menu Volume Ring PhoneSettings and System as icons 1 Find Number 2 Outgoing Ca...

Page 48: ...WIP 5000M User Guide 48 PSTN Type Model SIT200EM 1 Alarm 2 Scheduler 3 Calculator 4 World Time ISDN Type Model SIT200EI 1 Alarm 2 Scheduler 3 Call Charge 4 Calculator 5 World Time Utilities...

Page 49: ...WIP 5000M User Guide 49 1 Incoming 1 Msg Charge 2 Alert Type 1 No Tone 2 Once 3 Every 2 minute 2 Outgoing 1 Write 2 Sent Msgs 3 Message Box 1 New Message 2 Search Message 4 4 Callback Num Message...

Page 50: ...WIP 5000M User Guide 50 PSTN Type Model SIT200EM 1 Pick Up 2 Conference 3 DoNotDisturb ISDN Type Model SIT200EI 1 Pick Up 2 CLIR 3 Conference 4 DoNotDisturb 5 Park Soft Menu...

Page 51: ...WIP 5000M User Guide 51 1 Ring Type 1 Ring 2 Vibrate 3 Vibrate Ring 2 Ring Tone 3 Ring Volume 4 Warning Tone Volume Ring...

Page 52: ...Logo 2 Display Name 3 Display Time 3 Password 4 Language 1 English 2 Italiano 5 Back Light 1 Light Time 1 8 sec 2 20 sec 3 Always Off 2 Light on off 6 Call Forward PSTN Type Model SIT200EM 1 Disable...

Page 53: ...ISDN Type Model SIT200EI 1 By Internal 1 Disable 2 Always 3 Busy 4 No Answer 5 Busy No Answer 2 By Network 1 Always 2 Busy 3 No Answer 3 Clear CF 7 LCD Constrast 8 Station number 9 Reset 0 Version Inf...

Page 54: ...WIP 5000M User Guide 54 1 Search Base 2 WEP key 1 Enable 2 Disable 3 Register Newly System...

Page 55: ...you to search a registered phone number in the local global phonebook Finding Number at Local phonebook MENU 1 Phone book OK 1 Find Number 1 Local 1 By Name 2 By Number 3 By Location Enter Name Phone...

Page 56: ...st letter of that name and hit the OK button Then the numbers of all the phone numbers starting with that letter will be displayed and the related phone number list will show up automatically e g Ente...

Page 57: ...ress the OK button without entering a number all the numbers in the list saved will be displayed y The phone number list including the related phone number will be displayed in the order of addresses...

Page 58: ...all the numbers in the list saved will be displayed y This function allows you to make a call to the desired party by simply pressing a speed dial number for longer than 2 seconds For example if the...

Page 59: ...number MENU 1 Phone book OK 1 Find Number 1 Local 2 global 1 2 3 Enter Name Phone number Speed dial number OK MENU 1 Edit Modify phone number OK To delete the phone number select 2 Delete y Using the...

Page 60: ...make a call Latest dialed number Failed call MENU 1 Phone book OK 2 Outgoing Calls Select the phone number OK or y The maximum of up to 32 phone numbers can be saved in the list If they are all fille...

Page 61: ...ke a call Latest called number Failed call MENU 1 Phone book OK 3 Incoming Calls Select the phone number OK or y The maximum of up to 32 phone numbers can be saved in the list If they are all filled u...

Page 62: ...ne number and make a call MENU 1 Phone book OK 4 Missed Calls Select the phone number OK or y The maximum of up to 32 phone numbers can be saved in the list If they are all filled up the oldest phone...

Page 63: ...r name phone number home station mobile speed dial number OK y You can directly enter the phone number on the idle mode and save that number using the button y Enter the name that you want to save by...

Page 64: ...Del Phone Book Enter a Password Yes No OK To delete the list of calling numbers saved in the phone book select 2 Del Outgoing To delete the list of called numbers saved in the phone book select 3 Del...

Page 65: ...the alarm MENU 2 Utilities OK 1 Alarm OK 1 Set Alarm OK Select alarm interval OK Enter alarm time OK To disable the alarm select 2 Reset Alarm To change the alarm melody select 3 Alarm Melody You can...

Page 66: ...can easily use this function to manage a personal schedule If the alarm is set up as mute you can directly check what the schedule is on the screen MENU 2 Utilities OK 2 Schedule OK Select dates OK En...

Page 67: ...difying Deleting Schedule This function allows you to modify or delete the registered schedule MENU 2 Utilities OK 2 Schedule OK Select dates OK MENU 1 Modify Modify Time contents melody OK To delete...

Page 68: ...y Total All the call units which have accumulated since the last reset Last The call units for the last outgoing call y To set the call units back to zero press the Menu key On the display you can see...

Page 69: ...y MENU 2 Utilities OK 3 Calculator OK Enter numbers Select arithmetical operation symbol Enter numbers OK The result is displayed When entering negative numbers press button When incorrect numbers are...

Page 70: ...2 Utilities OK 4 World Clock OK Move the meridian line the corresponding time of each capital name will be shown Time and date of other cities Move the meridian line to the city where you are located...

Page 71: ...ng to the country Incoming This function allows you to check an incoming message or to set message reception status Up to 30 incoming messages can be saved Menu 3 Message OK 1 Incoming y If there are...

Page 72: ...s selected Press the MENU button to reply or to delete selected message y Press the Send button to make a call to the person who left the selected message However if the message does not include the p...

Page 73: ...age arrives MENU 3 Message OK 1 Incoming OK 2 Alert Type OK select the alert type OK y No Tone Alarm does not ring even if a new message arrives y Once Alarm rings once when a message arrives y Every...

Page 74: ...text message by using the writing or outgoing message box function Up to 10 outgoing messages can be saved MENU 3 Message OK 2 Outgoing OK y If there are stored messages the number of outgoing messag...

Page 75: ...mber OK You can directly enter the character on the idle mode Press the MENU button to enter the uppercase or lowercase in English or Special characters Send the message in the Message Box Select the...

Page 76: ...Message OK 2 Outgoing OK 2 Sent Msgs select the sent message y Select the message and Press the MENU button to check the sent message y After the message is selected Press the MENU button to resend o...

Page 77: ...age Box This function allows you to write edit send and delete a message saved in the message box and to delete all messages saved in the message box MENU 3 Message OK 3 Message Box OK Message Box 1 N...

Page 78: ...ssage box MENU 3 Message OK 3 Message Box OK 1 New Mesage OK Enter the character OK y Up to 5 messages can be saved in the message box y You can directly enter the character on the idle mode y Press t...

Page 79: ...Box OK 2 Search Message OK select the message y Press the MENU button to delete seleceted message or to delete all messages y After the message is selected Press the MENU button to send edit delete th...

Page 80: ...device You can take over this call MENU 4 Soft Keys OK 1 Pick up OK Your handset will then take over the call Facsimile connection If you establish that the call was a facsimile message which was inte...

Page 81: ...d the function The remote station does not know your number but recognizes your intention This setting only applies for one call MENU 4 Soft Keys OK 2 CLIR OK CLIR Service If the network of the remote...

Page 82: ...call Loading Conference Group You can load a conference group from the system and have a conference with the group MENU 4 Soft Keys OK 2 Conference ISDN Type 3 Conference OK 1 Group Conf OK 1 Load OK...

Page 83: ...be saved to the system as a group A group saved to the system can be conveniently used later by selecting Group Conference MENU 4 Soft Keys OK 2 Conference ISDN Type 3 Conference OK 1 Group Conf OK 2...

Page 84: ...K Enter phone number of member OK Enter phone number of next member OK y The mark means that you have completed entering the phone number y The mark means that you have failed the call connection y Th...

Page 85: ...s anytime you want to MENU 4 Soft Keys OK 3 DoNotDisturb ISDN Type 4 DoNotDisturb OK 1 On DND mode is set up To disable DND mode select 2 Off y When DND Do Not Disturb mode is set up the DND message a...

Page 86: ...u now have approximately three minutes to unpark the call y You can unpark the call at the base or with another handset by entering the parking code orbit number You can unpark the call using the hand...

Page 87: ...function Ring Type You can select the modes of call sound such as the ring vibration ring after vibration MENU 5 Volume Ring OK 1 Ring Type OK Ring Vibrate Ring Vibrate OK For information about how to...

Page 88: ...ing Tone OK External calls Internal calls Door bell Select the source of the call OK Select Melody OK Ring Volume This function enables you to adjust the bell volume MENU 5 Volume Ring OK 3 Ring Volum...

Page 89: ...WIP 5000M User Guide 89 Warning This function enables you to hear a warning tone when you move to a shadow zone during a call MENU 5 Volume Ring OK 4 Warning OK Select On Off OK Warning On 1 On 2 Off...

Page 90: ...isplayed on the initial screen MENU 6 Phone Settings OK Enter a Password 1 Phone Name OK Enter your name OK y Refer to Entering Characters section in Basic Features of this guide for entering characte...

Page 91: ...This function enables you to select the background of the initial screen that appears when power on MENU 6 Phone Settings OK Enter a Password 2 Background OK Select a screen OK 1 Samsung Logo 2 Displ...

Page 92: ...he initial password is set to 1234 MENU 6 Phone Settings OK Enter a Password 3 Password OK Enter new password OK Enter new password again OK Language This feature enables you to set the language displ...

Page 93: ...en the keys are pressed or a messages appears MENU 6 Phone Settings OK Enter a Password 5 Back Light OK 1 Light Time OK Select light time OK y The lighting of the LCD screen turns off automatically un...

Page 94: ...ide 94 Power Save You can set the mode of the energy saving lighting MENU 6 Phone Settings OK Enter a Password 5 Back Light OK 2 Light on off OK 1 On OK To disable the Power Save mode select 2 Off 1 O...

Page 95: ...d your incoming calls to a specific extension group of extensions or external number when you are unable to receive an incoming call PSTN Type MENU 6 Phone Settings OK Enter a password 6 Call Forward...

Page 96: ...n additional charge for this service select 3 Clear CF All call forwarding settings are cancelled Forward type To disable the forward mode select 1 Disable To forward all incoming calls select 2 Alway...

Page 97: ...must be set If 2 By Network is set as Function Type it can be set only 1 Always 2 Busy 3 No Answer ISDN Type LCD Contrast This feature support to set the LCD contrast if you want to change it MENU 6 P...

Page 98: ...tation Number This feature enables you to view your extension phone number on the screen of the phone MENU 6 Phone Settings OK Enter a password 8 Station Number OK My phone number is displayed on the...

Page 99: ...one MENU 6 Phone Settings OK Enter a password 9 Reset OK Select reset option OK Enter a password Yes No OK To reset the status of a phone select 1 Reset All All the saved records as well as the phone...

Page 100: ...ing the Software y If there is a newer version of the software on the base station the update will start automatically y You can follow the progress of the update on the display Do not take the rechar...

Page 101: ...the password is entered the phone displays PhoneLock is released and then returns to the initial screen Call Answer This function enables you to select the Call Answer Mode for how to answer the incom...

Page 102: ...ored on the handset MENU 7 System OK 1 Search Base OK y If a corresponding base station is found the mobile handset will be automatically registered and the number of the extension will be shown on th...

Page 103: ...OK 2 WEP Key OK 1 Enable OK 1 ASCII Mode 2 HEX mode Enter encryption key OK To disable the encryption key select 2 Disable This is a 128 bit WEP key for security Consult the system administrator and...

Page 104: ...is within radio range MENU 7 System OK 3 Register newly OK y The menu options which are necessary to register the mobile handset to a new base station will then be displayed y If you enter the network...

Page 105: ...e phone on again The bell does not ring or the ring sound is too small Check if the phone is set to etiquette mode Adjust the volume at MENU 4 Volume Ring 3 Ring Volume The lamp on the charger flashes...

Page 106: ...indicator appears on screen and calls cannot be made Your phone may not be registered on the system Use the phone after registration Move to an area where service can be provided Check if the power of...

Page 107: ...is unstable If calls are still disconnected frequently contact the Samsung Electronics service center The phone operates abnormally or does not operate at all Take the battery out and insert it again...

Page 108: ...as follows Items Specification Model Name WIP 5000M Frequency 2400 2483 5 MHz Size mm 43 width x 126 length x 19 height Operating Temperature 0 45 C Operating Humidity 0 90 Weight 95 g Battery Charge...

Reviews: