English 11
Maint
enanc
e
3.
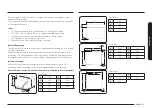
Fasten the oven using the two screws
(4 x 25 mm) provided.
4.
Make the electrical connection. Check
that the appliance works.
02
02
01
01
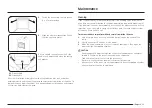
Door handle
02
Side handle
Be sure to hold the appliance with 2 side
handles and door handle when unpacking
the product.
After the installation is complete, remove the protective film, tape, and other
packing material, and take out the provided accessories from inside of the oven. To
remove the oven from the cabinet, first disconnect power to the oven and remove
2 screws on both sides of the oven.
Maintenance
Cleaning
Clean the oven regularly to prevent impurities from building up on or inside the
oven. Also pay special attention to the door, door sealing (applicable models only).
If the door won’t open or close smoothly, first check if the door seals have built up
impurities. Use a soft cloth in soapy water to clean both the inner and outer sides
of the oven. Rinse and dry well.
To remove stubborn impurities with bad smells from inside the oven
1.
With an empty oven, put a cup of diluted lemon juice on the centre of the
cavity.
2.
Heat the oven for 10 minutes at max power.
3.
When the cycle is complete, wait until the oven cools down. Then, open the
door and clean the cooking chamber.
CAUTION
•
Keep the door and door sealing clean and ensure the door opens and closes
smoothly. Otherwise, the oven’s lifecycle may be shortened.
•
Take caution not to spill water into the oven vents.
•
Do not use any abrasive or chemical substances for cleaning.
•
After each use of the oven, use a mild detergent to clean the cooking chamber
after waiting for the oven to cool down.


