background image

8


English

English


8

English


9

3. 

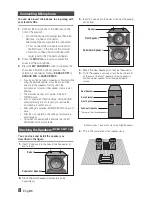
Insert 2 spac

ers into the holes of the Front Speaker(L) 

and fix them.

4. 

Stack the 

Rear Speaker(L) on the Front Speaker (L).

5. 

 To fix the

 speakers securely, attach the back bracket 

on the rear of the Front speaker(L), Rear speaker (L) 
and Subwoofer speaker by fastening provided 8 
screws.


Follow steps 1-5 above to stack the Right Speakers.

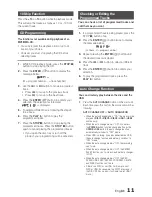
You can also insert microphone to sing along with 

your favorite CDs.

1. 

Connect the microphone to the MIC jack on the 
front of the product.


`

If your microphone with a larger jack than 3.5ø 
MIC jack, you need a Connector-
Adaptor(optional) to complete the connection.

• 

First, connect the Connector-Adaptor to 
the MIC jack on the front of the product, 

• 

Second, connect the microphone (with 
larger jack) to the Connector-Adaptor.

2. 

Press the 

MIC VOL-, +

 button to adjust the 

volume of the microphone.

3. 

Press the 

MY KARAOKE

 button to suppress the 

Vocal. Each time the button is pressed, the 
selection is changed as follows: 

KARAOK OFF


KARAOK MIN


KARAOK MAX

.


`

If you hear strange noises (squealing or howling) while 

using the Karaoke feature, move the microphone 

away from the speakers. Turning down the 

microphone's volume or the speaker volume is also 

effective.


`

The microphone does not operate in the AUX, 

TUNER mode.


`

If you connect with the Microphone, GIGA SOUND 

will automatically turn off.  Even if you remove the 

microphone, it will not turn on.


`

After setting my karaoke, EQ/GIGA SOUND does not 

work.


`

After the stop operation, the setting of my karaoke 

will disappear.


`

Only when connected with a Microphone, the MY 

KARAOKE function is available.

Connecting Microphone

Rear Speaker

Front Speaker

Back bracket

Subwoofer Speaker

The rear of the stacked speakers

Spacer

Front Speaker

Subwoofer Speaker

You can stack and install the speakers as 
described in the figure.

1. 

Insert 2 spa

cers into the holes of the Subwoofer (L) 

and fix them.

2. 

Stack the F

ront Speaker(L) horizontally on the 

Subwoofer(L).

Stacking the Speakers

 (MX-E870/E871 Only)

Spacer

Subwoofer Speaker

6. 

This is the

 completion of the speaker stack.

Summary of Contents for MX-E850

Page 1: ... MP3 CD WMA CD CD R RW Playback user manual Imagine the possibilities Thank you for purchasing this Samsung product To receive more complete service please register your product at www samsung com register MX E850 MX E851 MX E870 MX E871 ...

Page 2: ...and may differ from actual product appearance An administration fee may be charged if either a an engineer is called out at your request and there is no defect in the product i e where you have failed to read this user manual b you bring the unit to a repair centre and there is no defect in the product i e where you have failed to read this user manual The amount of such administration charge will...

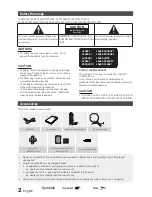
Page 3: ...rder or PC and the condition of the disc Use a 650MB 74 minute CD R disc Do not use CD R discs over 700MB 80 minutes as they may not be played back Some CD RW Rewritable media may not be playable Only CD Rs that are properly closed can be fully played If the session is closed but the disc is left open you may not be able to fully play the disc CD R MP3 Discs Only CD R discs with MP3 files in ISO 9...

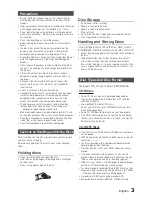
Page 4: ...y 10 Searching for a Specific Music Passage on a CD 10 Repeat One or All Tracks on the Compact Discs 10 A B Repeat Playback 10 10 Skip Function 11 CD Programming 11 Checking or Editing the Programmed Tracks 11 Auto Change function 11 Playing USB 12 To Select a Track from USB Device 12 To Search a Folder Quickly 12 To repeat 12 To Use High Speed Search 12 To delete a file 12 To skip next 10 tracks ...

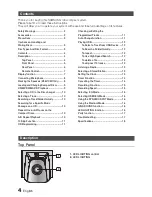
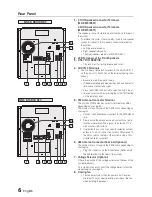
Page 5: ...AUX button to select the AUX 1 input You can select AUX 1 by pressing the FUNCTION button on the remote control 20 PHONE jack Plug a headphones with a 3 5ø jack into the PHONE jack The speakers are no longer used to output the sound Prolonged use of headphones at a high volume may damage your hearing If you use the headphones GIGA SOUND will automatically turn off Even if you remove the headphones...

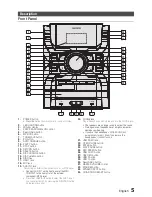
Page 6: ...e position of FM antenna connector terminal may differ depending on your region This product may not support the AM function depending on your region 1 Connect the FM antenna supplied to the FM Antenna jack 2 Slowly move the antenna wire around until you find a location where reception is good then fasten it to a wall or other rigid surface 3 If reception is poor you may need to install an outdoor...

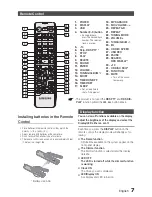
Page 7: ...ess the desired track number The selected track is played 5 10 6 Skip RDS PTY 7 STOP 8 PLAY 9 DELETE 10 SOUND 11 ENTER 12 VOLUME 13 TUNING ALBUM 14 MO ST 15 TIMER ON OFF 16 TIMER SET 17 SLEEP Set a sleep time to shut off the product 18 MY KARAOKE 19 MIC VOLUME 20 REPEAT A B 21 REPEAT 22 TUNING MODE 23 VOLUME 24 TUNING ALBUM 25 EQ 26 CD REC SPEED 27 USB REC 28 PAUSE 29 SEARCH RDS DISPLAY 30 10 31 C...

Page 8: ... the selection is changed as follows KARAOK OFF KARAOK MIN KARAOK MAX If you hear strange noises squealing or howling while using the Karaoke feature move the microphone away from the speakers Turning down the microphone s volume or the speaker volume is also effective The microphone does not operate in the AUX TUNER mode If you connect with the Microphone GIGA SOUND will automatically turn off Ev...

Page 9: ...out of spec shape of CD such as a heart or octangle shaped CD Otherwise the product may be damaged Care must be taken about maintenance of the compact discs At least more than one CD should be inserted for playbacks 1 Press the OPEN CLOSE button to open the disc tray 2 Place a disc gently into the tray with the disc s label facing up 3 Press the OPEN CLOSE button to close the disc tray the disc wi...

Page 10: ...rds You can also press and hold the button on the main unit to automatically scan for a track You can repeat playing CD unlimitedly CD containing a specific track Whole tracks of a selected CD 1 Press the REPEAT button Each time you press the REPEAT button the repeat mode will change as following MP3 OFF TRACK DIRECTORY ALL RANDOM ALL DISCS CD OFF TRACK ALL RANDOM ALL DISCS 2 When you wish to stop...

Page 11: ...t pressing the ENTER button until the desired track is displayed 4 Press the or button to select a different track 5 Press the ENTER button to confirm your selection 6 To play the programmed tracks press the PLAY button You can circularly play between the disc and the USB 1 Press the AUTO CHANGE button on the main unit Each time press this button the mode will switch as following AUTO CHANGE OFF A...

Page 12: ...RANDOM Plays tracks in random order To Use High Speed Search You can search the desired section quickly during the play Press the button Each time you press the button you will move forward backward fast The sound will not output in fast playback mode To delete a file You can delete a file on your USB device 1 Play a file you want to delete 2 Press the DELETE button 3 Turn the EASY SEARCHING JOG co...

Page 13: ...teps 3 to 4 In Tuner mode In the Manual mode you can use or button on the main unit to manual search a radio station In the Preset mode you can use or button or the EASY SEARCHING JOG control on the main unit to search a stored radio station You can listen to a stored radio station as following 1 Select FM or AM by pressing the TUNER AUX button on the main unit You can select FM or AM by pressing ...

Page 14: ...onds you can now set the timer switch off time 5 Set the timer switch off time a Press the TUNING ALBUM or button to set the hours b Press the ENTER button Result The minutes flash c Press the TUNING ALBUM or button to set the minutes d Press the ENTER button Result VOLUME XX is displayed where XX cor responds to the volume already set 6 Press the TUNING ALBUM or button to adjust the volume level ...

Page 15: ...ctory named RECORDING CD CD COPY MP3 CD TUNER RECORDING or AUX RECORDING will be created in your device Do not disconnect the USB or the AC Cord during the recording as this may cause file damage If you disconnected USB device during the recording the main unit will be power off and you may not delete the recorded file In this case please connect the USB device to the PC and backup the USB data on...

Page 16: ...rectly select the Dynamic spot mode for listening music 1 Press the DYNAMIC SPOT button on the main unit Each time you press this button the sound mode will switch as following DYNAMIC S OFF The DYNAMIC SPOT mode may be different depending on your region Using the Dynamic Spot Mode You can directly select the Stadium mode for listening music 1 Press the STADIUM button on the main unit Each time yo...

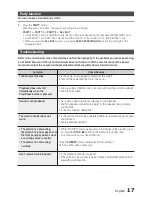
Page 17: ... of angle and distance Are the batteries drained The product is not working Example The power goes out or the front panel key doesn t work or a strange noise is heard The product is not working normally While NO DISC message appears on the display of the product press and hold the STOP button on the main unit for longer than 5 seconds with no disc reset function Using the RESET function will erase...

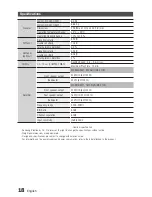
Page 18: ... Amplifier MX E850 E851 900 Watts MAX THD Front speaker output 300 W CH 6 Ω 100 Hz Subwoofer 300 W 6 Ω 100 Hz MX E870 E871 1600 Watts MAX THD Front speaker output 320 W CH 6 Ω 100 Hz Rear speaker output 160 W CH 12 Ω 100 Hz Subwoofer 320 W CH 6 Ω 100 Hz Frequency range 20Hz 20KHz S N Ratio 80dB Channel separation 60dB Input sensitivity AUX 800mV Nominal specification Samsung Electronics Co Ltd res...

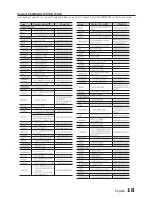
Page 19: ...IDE If you have any questions or comments relating to Samsung products please contact the SAMSUNG customer care centre 0 800 555 555 0 88 555 55 55 8 10 800 500 55 500 0 800 61440 Area Contact Center WebSite Area Contact Center WebSite ...

Page 20: ...Code No AH68 02452B Rev 0 0 ...

Reviews: