background image

50 

English

Cookw

ar

e guide

Cookware guide

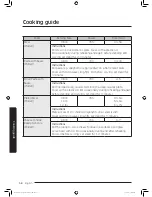
Cookware

Microwave-safe

Comments

Paper

• 

Plates, cups, 
napkins and 
kitchen paper

For short cooking times and warming. Also to 
absorb excess moisture.

• 

Recycled paper

May cause arcing.

Plastic

• 

Containers

Particularly if heat-resistant thermoplastic. 
Some other plastics may warp or discolour 
at high temperatures. Do not use Melamine 
plastic.

• 

Cling film

Can be used to retain moisture. Should not 
touch the food. Take care when removing the 
film as hot steam will escape.

• 

Freezer bags

✓✗

Only if boilable or oven-proof. Should not be 
airtight. Prick with a fork, if necessary.

Wax or grease-proof 
paper

Can be used to retain moisture and prevent 
spattering.

: Recommended

✓✗

: Use caution

: Unsafe

MC11J7033CT_AC_DE68-04334R-01_EN.indd   50

6/25/2015   3:44:42 PM

Summary of Contents for MC11J7033CT

Page 1: ...Microwave Oven User manual MC11J7033C MC11J7033CT_AC_DE68 04334R 01_EN indd 1 6 25 2015 3 44 33 PM ...

Page 2: ...wer levels and time variations 28 Adjusting the cooking time 29 Stopping the cooking 29 Setting the energy save mode 30 Using the popcorn feature 31 Using the slim fry cook features 32 Slim fry guide 33 Using the defrost features 35 Defrost guide 36 Using the auto reheat cook features 37 Auto reheat cook guide 38 Convection 41 Grilling 42 Choosing the accessories 43 Combining microwaves and grill ...

Page 3: ... liquids 56 Reheating baby food 57 Remark 57 Defrosting 60 Grill 62 Microwave Grill 62 Convection 64 Microwave Convection 64 Tips and tricks 66 Troubleshooting 67 Troubleshooting 67 Information codes 73 Technical specifications 74 Warranty 75 MC11J7033CT_AC_DE68 04334R 01_EN indd 3 6 25 2015 3 44 33 PM ...

Page 4: ...perating your microwave oven PRECAUTIONS TO AVOID POSSIBLE EXPOSURE TO EXCESSIVE MICROWAVE ENERGY A Do not attempt to operate this oven with the door open since open door operation can result in harmful exposure to microwave energy It is important not to defeat or tamper with the safety interlocks B Do not place any object between the oven front face and the door or allow soil or cleaner residue t...

Page 5: ... of fire explosion electric shock or personal injury when using your microwave oven follow these basic safety precautions Do NOT attempt Unplug the power plug from the wall socket Do NOT disassemble Make sure the machine is grounded to prevent electric shock Do NOT touch Call the service center for help Follow directions explicitly Note These warning signs are here to prevent injury to you and oth...

Page 6: ... type of oven is specifically designed to heat cook or dry food It is not designed for industrial or laboratory use 7 As with any appliance close supervision is necessary when it is used by children Keep children away from the door when opening or closing it as they may bump themselves on the door or catch their fingers in the door 8 Do not operate this appliance if it has a damaged cord or plug i...

Page 7: ...he container is removed from the microwave oven is not always present THIS COULD RESULT IN VERY HOT LIQUIDS SUDDENLY BOILING OVER WHEN THE CONTAINER IS DISTURBED OR A SPOON OR OTHER UTENSIL IS INSERTED INTO THE LIQUID To reduce the risk of injury a Do not overheat liquid b Stir liquid both before and halfway through heating it c Do not use straight sided containers with narrow necks d After heatin...

Page 8: ...ock by providing an escape wire for the electrical current This appliance is equipped with a cord that includes a grounding wire and a grounding plug The plug must be plugged into an outlet that is properly installed and grounded WARNING Improper use of the grounding plug can result in a risk of electric shock Plug into a grounded 3 prong outlet Do not remove the third grounding prong Do not use a...

Page 9: ...plosion problems with the product or injury Unpack the oven remove all packaging material and examine the oven for any damage such as dents on the interior or exterior of the oven broken door latches cracks in the door or a door that is not lined up correctly If there is any damage do not operate the oven and notify your dealer immediately Make sure to install your oven in a location with adequate...

Page 10: ...oily or dusty location or in a location exposed to direct sunlight or water rain drops This may result in electric shock or fire Plug the power plug into the wall socket firmly Do not use a damaged power plug damaged power cord or loose wall socket This may result in electric shock or fire Do not mount over a sink Do not pull or excessively bend the power cord Do not twist or tie the power cord Do...

Page 11: ...ing fan A spark may result in an explosion or fire Take care that the door or any of the other parts do not come into contact with your body while cooking or just after cooking Failing to do so may result in burns In the event of a grease fire on the surface units below the oven smother the flaming pan on the surface unit by covering the pan completely with a lid a cookie sheet or a flat tray Neve...

Page 12: ...to children If a child places a bag over its head the child can suffocate Do not let children or any person with reduced physical sensory or mental capabilities use this appliance unsupervised Make sure that the appliance is out of the reach of children Failing to do so may result in electric shock burns or injury Do not touch the inside of the appliance immediately after cooking The inside of the...

Page 13: ... cloth may get caught in the door This may result in electric shock fire problems with the product or injury Do not operate the appliance with wet hands This may result in electric shock Do not spray volatile material such as insecticide onto the surface of the appliance As well as being harmful to humans it may also result in electric shock fire or problems with the product Do not place the appli...

Page 14: ...ot clean the appliance by spraying water directly onto it Do not use benzene thinner or alcohol to clean the appliance This may result in discoloration deformation damage electric shock or fire Before cleaning or performing maintenance unplug the appliance from the wall socket and remove food waste from the door and cooking compartment Failing to do so may result in electric shock or fire Take car...

Page 15: ...damaged it must be replaced by the manufacturer its service agent or similarly qualified persons in order to avoid a hazard For your personal safety plug the cable into a proper AC earthed socket Do not install the microwave oven in hot or damp surroundings like next to a traditional oven or radiator The power supply specifications of the oven must be respected and any extension cable used must be...

Page 16: ...lified service technician to perform repairs If the oven is faulty and needs servicing or you are in doubt about its condition unplug the oven from the power outlet and contact your nearest service center Do not use the oven if it is damaged in particular if the door or door seals are damaged Door damage includes a broken hinge a worn out seal or distorted bent casing Do not remove the oven from i...

Page 17: ...e placed on the roller ring with the centre fitting on to the coupler Purpose The turntable serves as the main cooking surface it can be easily removed for cleaning 03 High rack Low rack to be placed on the turntable Purpose The metal racks can be used to cook two dishes at the same time A small dish may be placed on the turntable and a second dish on the rack The metal racks can be used in grill ...

Page 18: ... and pizza dough crisp IMPORTANT DO NOT operate the microwave oven without the roller ring and turntable NOTE If you need an accessory marked with an asterisk please contact the Samsung Call Center using the phone number listed on the last page of this manual or visit our on line parts web site at www samsungparts com MC11J7033CT_AC_DE68 04334R 01_EN indd 18 6 25 2015 3 44 35 PM ...

Page 19: ...the door won t open or close smoothly first check if the door seals have built up impurities Use a soft cloth in soapy water to clean both the inner and outer sides of the oven Rinse and dry well To remove stubborn impurities with bad smells from inside the oven 1 With an empty oven put a cup of diluted lemon juice on the centre of the turntable 2 Heat the oven for 10 minutes at max power 3 When t...

Page 20: ...ng element CAUTION Keep the door and door sealing clean and ensure the door opens and closes smoothly Otherwise the oven s lifecycle may be shortened Take caution not to spill water into the oven vents Do not use any abrasive or chemical substances for cleaning After each use of the oven use a mild detergent to clean the cooking chamber after waiting for the oven to cool down MC11J7033CT_AC_DE68 0...

Page 21: ...ntact a local Samsung service centre Do not replace it yourself If you encounter a problem with the outer housing of the oven first unplug the power cord from the power source and then contact a local Samsung service centre Care against an extended period of disuse If you don t use the oven for an extended period of time unplug the power cord and move the oven to a dry dust free location Dust and ...

Page 22: ...ed 1 The oven beeps 4 times 2 The end reminder signal will beep 3 times once every minute 3 The current time is displayed again 1 2 If you want to add an extra 30 seconds 1 Press START 30s button one or more times for each extra 30 seconds that you wish to add 2 By turning the Dial You can set the time as you want MC11J7033CT_AC_DE68 04334R 01_EN indd 22 6 25 2015 3 44 36 PM ...

Page 23: ...en 10 04 07 08 09 05 06 01 02 03 01 Safety interlock holes 02 Heating element 03 Light 04 Door latches 05 Turntable 06 Coupler 07 Door Handle 08 Roller Ring 09 Door 10 Control Panel MC11J7033CT_AC_DE68 04334R 01_EN indd 23 6 25 2015 3 44 36 PM ...

Page 24: ... Button 03 Defrost Button 04 Auto Reheat Cook Button 05 Convection Button 06 Grill Button 07 Microwave Button 08 Microwave Convection Button 09 Microwave Grill Button 10 Child Lock Button 11 Clock Button 12 Dial 13 Select Button 14 Stop Eco Button 15 Start 30s Button MC11J7033CT_AC_DE68 04334R 01_EN indd 24 6 25 2015 3 44 37 PM ...

Page 25: ...ves are absorbed by the food up to a depth of about 1 inch 2 5 cm Cooking then continues as the heat is dissipated within the food 3 Cooking times vary according to the container used and the properties of the food Quantity and density Water content Initial temperature refrigerated or not CAUTION As the centre of the food is cooked by heat dissipation cooking continues even when you have taken the...

Page 26: ...T 30s button and set the time to 4 or 5 minutes by pressing the START 30s button the appropriate number of times Result The oven heats the water for 4 or 5 minutes The water should then be boiling Setting the time When power is supplied 88 88 and then 12 00 is automatically displayed on the display Please set the current time The time can be displayed in either the 24 hour or 12 hour notation You ...

Page 27: ...ing the oven unattended Open the door Place the food in the centre of the turntable Close the door Never switch the microwave oven on when it is empty 1 1 Press the Microwave button Result The following indications are displayed microwave mode 100 Power Level 100 2 2 2 Turn the Dial until the appropriate power level is displayed At that time press the Select button to set the power level If don t ...

Page 28: ...les you to adapt the amount of energy dissipated and thus the time required to cook or reheat your food according to its type and quantity You can choose between ten power levels Power level Percentage Warm 10 Defrost 20 Low 30 Medium low 40 Medium 50 Simmer 60 Medium high 70 Reheat 80 Saute 90 High 100 The cooking times given in recipes and in this booklet correspond to the specific power level i...

Page 29: ...mes Method 2 Just turning Dial to adjust cooking time To increase cooking time turn to right and to decrease cooking time turn to left Stopping the cooking You can stop cooking at any time so that you can Check the food Turn the food over or stir it Leave it to stand To stop the cooking Then Temporarily Temporarily Open the door or press the STOP ECO button once Result Cooking stops To resume cook...

Page 30: ...d then display shows current time The oven is ready for use NOTE Auto energy saving function If you do not select any function when appliance is in the middle of setting or operating with temporary stop condition function is canceled and clock will be displayed after 25 minutes Oven Lamp will be turned off after 5 minutes with door open condition MC11J7033CT_AC_DE68 04334R 01_EN indd 30 6 25 2015 ...

Page 31: ...ving by turning the Dial 3 Press START 30s button Result Cooking starts The oven beeps when cooking is complete NOTE Use only containers that are microwave safe The following table displays the Popcorn program food quantities and instructions Code Food Serving Size Instructions 1 Popcorn 3 0 oz 85 g 1 package Use only one microwave popcorn bag at a time Be careful when removing the heated bag from...

Page 32: ...s or ceramic dishes are ideal as they allow the microwaves to penetrate the food evenly ALWAYS use oven gloves when touching the recipients in the oven as they will be very hot 3 2 2 4 1 1 Press the Slim Fry button 2 Select the type of food that you are cooking by turning the Dial Refer to the table on the following page for a description of the various pre programmed settings At that time press t...

Page 33: ...istribute frozen chicken nuggets evenly on the crusty plate Set plate on high rack 4 Chicken Wings 1 serving 0 3 0 4 lb 2 servings 0 5 0 6 lb Weigh chicken wings and brush with oil and spices Place them evenly on high rack Open the door and turn over the wings after beep sounds The oven will stop cooking Press START 30s to continue Let stand for 1 2 minutes 5 Homemade French Fries 2 servings 0 7 0...

Page 34: ...b Distribute frozen potato croquettes evenly on the crusty plate Set plate on high rack 8 Drumsticks 1 serving 0 5 0 6 lb 2 servings 0 7 0 8 lb 3 servings 0 9 1 0 lb Weigh drumsticks and brush with oil and spices Place them evenly on high rack Open the door and turn over the drumsticks after beep sounds The oven will stop cooking Press START 30s to continue Let stand for 1 2 minutes 9 Frozen Mini ...

Page 35: ... you are cooking by turning the Dial Refer to the table on the following page for a description of the various pre programmed settings At that time press the Select button to select the type of food 3 Select the size of the serving by turning the Dial 4 Press the START 30s button Result Defrosting begins The oven beeps through defrosting to remind you to turn the food over 5 Press the START 30s bu...

Page 36: ...Let stand for 20 60 minutes 3 Fish 0 1 3 5 lbs Shield the tail of a whole fish with aluminium foil Turn the fish over when the oven beeps This program is suitable for whole fishes as well as for fish fillets Let stand for 20 60 minutes 4 Bread Cake 0 1 2 0 lbs Put bread horizontally on a piece of kitchen paper and turn over as soon as the oven beeps Place cake on a ceramic plate and if possible tu...

Page 37: ...eat Cook button 2 Turn the Dial to select Cook category Auto Reheat or Auto Cook 3 Select the Auto Reheat by pressing the Select button 4 Select the type of food that you are cooking by turning the Dial Refer to the table on the following page for a description of the various pre programmed settings 5 Press the START 30s button Result The food is cooked according to the pre programmed setting sele...

Page 38: ... 2 Beverage 1 cup 1 3 Beverage 2 cups 1 4 Casserole 8 oz Cover the plate with a lid or vented plastic wrap Stir the food once before serving Contents Casserole refrigerated foods 1 5 Casserole 16 oz 1 6 Casserole 24 oz 1 7 Casserole 32 oz 1 8 Dinner Plate 9 12 oz Use only precooked refrigerated foods Cover the plate with vented plastic wrap or waxed paper tucked under the plate Contents 3 4 oz mea...

Page 39: ...kfast 4 6 oz Follow the package instructions for covering and letting stand Use this button for frozen sandwiches breakfast entrees pancakes waffles etc When microwave beeps stir and restart 1 14 Frozen Breakfast 7 8 oz 1 15 Frozen Dinner 8 10 oz Remove the food from its wrapping and follow the instructions on the box for covering and letting stand 1 16 Frozen Dinner 11 14 oz 1 17 Frozen Dinner 15...

Page 40: ...in a microwave safe bowl Add 1 4 tablespoons of water Cover during cooking and stir afterwards 2 6 Broccoli Florets 0 5 lb 2 7 Broccoli Florets 0 8 lb 2 8 Broccoli Florets 1 1 lbs 2 9 Peeled Potatoes 0 6 lb Weigh the peeled potatoes and cut them into similar sized halves or quarters Add 1 4 tablespoons of water Cover during cooking Let stand for 3 minutes 2 10 Peeled Potatoes 1 0 lb 2 11 Fish Fill...

Page 41: ...the low rack and set on turntable 1 3 2 4 5 1 Press the Convection button Result The following indications are displayed convection mode 350 F temperature 2 Set the temperature by turning the Dial Temperature 100 400 F 400 375 350 325 300 250 200 100 F If don t set the temperature within 5 seconds Automatically changes to the cooking time setting stage 3 Press the Select button 4 Set the cooking t...

Page 42: ...ace the food on the rack 2 2 Press the Grill button Result The following indications are displayed grill mode You cannot set the temperature of the grill 4 3 3 Set the grilling time by turning the Dial The maximum grilling time is 60 minutes 4 Press the START 30s button Result Grilling starts When it has finished 1 The oven beeps 4 times 2 The end reminder signal will beep 3 times once every minut...

Page 43: ...not usually suitable for convection cooking don t use plastic containers dishes paper cups towels etc If you wish to select a combined cooking mode microwave and grill or convection use only recipients that are microwave safe and oven proof CAUTION For further details on suitable cookware and utensils refer to the Cookware Guide on page 49 50 MC11J7033CT_AC_DE68 04334R 01_EN indd 43 6 25 2015 3 44...

Page 44: ...grilling if you use the high rack Open the door Place the food on the rack best suited to the type of food to be cooked Place the rack on the turntable Close the door 1 1 Press the Microwave Grill button Result The following indications are displayed microwave grill combi mode 3 2 2 Set the cooking time by turning the Dial The maximum cooking time is 60 minutes 3 Press the START 30s button Result ...

Page 45: ...use microwave safe and oven proof cookware Glass or ceramic dishes are ideal as they allow the microwaves to penetrate the food evenly CAUTION ALWAYS use oven gloves when touching the recipients in the oven as they will be very hot You can get better cooking and browning if you use the low rack Open the door Place the food on the turntable or on the low rack which should then be placed on the turn...

Page 46: ...microwave convection combi mode 350 F temperature 3 Press the Select button 4 Set the cooking time by turning the Dial The maximum cooking time is 60 minutes 5 Press the START 30s button Result Combination cooking starts The oven is heated to the required temperature and then microwave cooking continues until the cooking time is over When it has finished 1 The oven beeps 4 times 2 The end reminder...

Page 47: ...t The oven operates normally Using the child lock features Your microwave oven is fitted with a special child lock programme which enables the oven to be locked so that children or anyone unfamiliar with it cannot operate it accidentally 1 2 1 Press the Child Lock button for 3 second Result The oven is locked no functions can be selected The display shows L 2 To unlock the oven press the Child Loc...

Page 48: ...en operates without the oven heating 1 1 2 1 Press the Select and Child Lock button for 1 second Result The display shows On 2 Press the START 30s button Now Demonstration mode is on NOTE To turn demo mode off repeat 1 2 step It will be displayed OFF MC11J7033CT_AC_DE68 04334R 01_EN indd 48 6 25 2015 3 44 41 PM ...

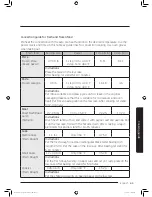
Page 49: ...rust plate Do not preheat for more than 8 minutes China and earthenware Porcelain pottery glazed earthenware and bone china are usually suitable unless decorated with a metal trim Disposable polyester cardboard dishes Some frozen foods are packaged in these dishes Fast food packaging Polystyrene cups containers Can be used to warm food Overheating may cause the polystyrene to melt Paper bags or ne...

Page 50: ...me other plastics may warp or discolour at high temperatures Do not use Melamine plastic Cling film Can be used to retain moisture Should not touch the food Take care when removing the film as hot steam will escape Freezer bags Only if boilable or oven proof Should not be airtight Prick with a fork if necessary Wax or grease proof paper Can be used to retain moisture and prevent spattering Recomme...

Page 51: ...ooking Many kinds of food are suitable for microwave cooking including fresh or frozen vegetables fruit pasta rice grains beans fish and meat Sauces custard soups steamed puddings preserves and chutneys can also be cooked in a microwave oven Generally speaking microwave cooking is ideal for any food that would normally be prepared on a hob Melting butter or chocolate for example see the chapter wi...

Page 52: ... tbsp cold water Let stand for 2 3 minutes Broccoli 0 7 lb 70 8 9 Instructions Add 30 ml 2 tbsp cold water Let stand for 2 3 minutes Peas 0 7 lb 70 7 8 Instructions Add 15 ml 1 tbsp cold water Let stand for 2 3 minutes Green Beans 0 7 lb 70 7 8 Instructions Add 30 ml 2 tbsp cold water Let stand for 2 3 minutes Mixed Vegetables Carrots Peas Corn 0 7 lb 70 7 8 Instructions Add 15 ml 1 tbsp cold wate...

Page 53: ...o they point to the center Let stand for 3 minutes Brussels Sprouts 1 0 lb 100 4 5 Instructions Let stand 60 75 ml 5 6 tbsp water Let stand for 3 minutes Carrots 1 0 lb 100 6 7 Instructions Cut carrots into even sized slices Let stand for 3 minutes Cauliflower 0 6 lb 1 0 lb 100 3 4 6 7 Instructions Prepare even sized florets Cut big florets in half Arrange stems so they point to the center Let sta...

Page 54: ...00 5 6 Instructions Cut onions into slices or halves Add only 15 ml 1 tbsp water Let stand for 3 minutes Pepper 0 6 lb 100 5 6 Instructions Cut pepper into small slices Let stand for 3 minutes Potatoes 0 6 lb 1 0 lb 100 5 6 8 9 Instructions Weigh the peeled potatoes and cut them into similar sized halves or quarters Let stand for 3 minutes Turnip Cabbage 0 6 lb 100 6 7 Instructions Cut turnip into...

Page 55: ...ups 50 23 25 26 28 Instructions Add 2 cups of cold water for 1 cup of rice Let stand for 5 minutes Add 3 cups of cold water for 1 cups of rice Let stand for 5 minutes Brown Rice Parboiled 1 cup 1 cups 50 25 27 28 30 Instructions Add 2 cups of cold water for 1 cup of rice Let stand for 5 minutes Add 3 cups of cold water for 1 cups of rice Let stand for 5 minutes Mixed Rice Rice Wild Rice 1 cup 80 1...

Page 56: ...tive boiling of liquids and possible scalding stir before during and after heating Keep them in the microwave oven during standing time We recommend putting a plastic spoon or glass stick into the liquids Avoid overheating and therefore spoiling the food It is preferable to underestimate cooking time and add extra heating time if necessary Heating and standing times When reheating food for the fir...

Page 57: ...refully before serving to prevent burns Use the power levels and times in the next table as a guide lines for reheating Reheating liquids and food Use the power levels and times in this table as a guide lines for reheating Food Serving Size Power Time min Drinks Coffee Tea and Water 150 ml 1 cup 300 ml 2 cups 450 ml 3 cups 600 ml 4 cups 100 1 2 3 4 4 4 4 5 Instructions Pour into cups and reheat un...

Page 58: ... lb 70 4 5 Instructions Put filled pasta e g ravioli tortellini in a deep ceramic plate Cover with a plastic lid Stir occasionally during reheating and again before standing and serving Let stand for 3 minutes Plated Meal Chilled 0 8 lb 1 0 lb 1 2 lbs 70 4 5 5 6 6 7 Instructions Plate a meal of 2 3 chilled components on a ceramic dish Cover with microwave cling film Let stand for 3 minutes Cheese ...

Page 59: ...ge Grain Milk Fruit 0 4 lb 70 20 sec Instructions Empty into ceramic deep plate Cook covered Stir after cooking time Before serving stir well and check the temperature carefully Let stand for 2 3 minutes Baby Milk 100 ml 30 30 40 sec 200 ml 1 min to 1 min 10 sec Instructions Stir or shake well and pour into a sterilized glass bottle Place in the center of turntable Cook uncovered Shake well and le...

Page 60: ... around them during defrosting Should poultry start to warm up on the outer surface stop thawing and allow it to stand for 20 minutes before continuing Leave the fish meat and poultry to stand in order to complete defrosting The standing time for complete defrosting will vary depending on the quantity defrosted Please refer to the table below Hint Flat food defrosts better than thick and smaller q...

Page 61: ...at ceramic plate Arrange the thinner parts under the thicker parts Shield narrow ends of fillets and tail of whole fish with aluminium foil Turn over after half of defrosting time Let stand for 10 25 minutes Fruits Berries 0 7 lb 20 6 7 Instructions Spread fruit on a flat round glass dish with a large diameter Let stand for 5 10 minutes Bread Bread Rolls each ca 50 g 2 pcs 4 pcs 20 1 1 2 3 Toast S...

Page 62: ...otating Due to the rotation of the turntable the food browns evenly The default power level for this mode is 30 Cookware for cooking with microwave grill Please use cookware that microwaves can pass through Cookware should be flameproof Do not use metal cookware with combination mode Do not use any type of plastic cookware as it can melt Food suitable for microwave grill cooking Food suitable for ...

Page 63: ...ed 1 0 lb 1 step 30 Grill 2 step Grill 15 18 3 5 Instructions Put the fresh gratin into a small glass pyrex dish Put the dish on the high rack After cooking let stand for 2 3 minutes Baked Apples 2 apples ca 0 9 lb 30 Grill 10 13 Instructions Core the apples and fill them with raisins and jam Put some almond slices on top Put apples on a flat glass pyrex dish Place the dish directly on the low rac...

Page 64: ... Microwave Convection This mode combines the microwave energy with the hot air and is therefore reducing the cooking time while giving the food a brown and crispy surface Cooking with convection is the traditional and well known method of cooking food in an oven with hot air circulated by a fan on the back wall The default power level for this mode is 30 Cookware for cooking with microwaves convec...

Page 65: ... pasta gratin on the low rack After cooking let stand for 2 3 minutes Meat Roast Beef Roast Lamb Medium 2 7 2 9 lbs 30 350 F 22 25 17 20 Instructions Brush beef lamb with oil and spice it with pepper salt and paprika Put it on the low rack first with the fat side down After cooking wrap in aluminium foil and let stand for 10 15 minutes Cake Marble Cake Fresh Dough 1 1 lbs Only 350 F 47 52 Instruct...

Page 66: ...nd 1 cup 250 ml cold water Cook uncovered in a glass pyrex bowl for 3 to 4 minutes using 90 until glaze icing is transparent Stir twice during cooking Cooking jam Put 21 oz of fruit 600 g or about 2 cups for example mixed berries in a suitable sized glass pyrex bowl with lid Add 1 cups 300 g preserving sugar and stir well Cook covered for 10 12 minutes using 90 Stir several times during cooking Em...

Page 67: ...Remove the foreign matter and try again The oven stops while in operation The user has opened the door to turn food over After turning over the food press the Start button again to start operation The power turns off during operation The oven has been cooking for an extended period of time After cooking for an extended period of time let the oven cool The cooling fan is not working Listen for the ...

Page 68: ... being cooked or improper cookware is being used Put one cup of water in a microwave safe container and run the microwave for 1 2 minutes to check whether the water is heated Reduce the amount of food and start the function again Use a cooking container with a flat bottom Heating is weak or slow The oven may not work too much food is being cooked or improper cookware is being used Put one cup of w...

Page 69: ...g If the Auto Cook function is being used this beeping sound means it s time to turn over the food during thawing After turning over the food press the Start button again to restart operation The oven is not level The oven is installed on an uneven surface Make sure the oven is installed on flat stable surface There are sparks during cooking Metal containers are used during the oven thawing functi...

Page 70: ...ing fan continues to run for about 3 minutes after cooking is complete This is not an oven malfunction Pressing the 30sec button operates the oven This happens when the oven was not operating The microwave oven is designed to operate by pressing the 30sec button when it was not operating Turntable While turning the turntable comes out of place or stops turning There is no roller ring or the roller...

Page 71: ...the door and try again Smoke comes out during preheating During initial operation smoke may come from the heating elements when you first use the oven This is not a malfunction and if you run the oven 2 3 times it should stop Food is on the heating elements Let the oven cool and then remove the food from the heating elements There is a burning or plastic smell when using the oven Plastic or non he...

Page 72: ...ry again The grill or other accessories are not correctly inserted Correctly insert the accessories The wrong type or size of cookware is used Reset the oven controls or use suitable cookware with flat bottoms NOTE If the above guidelines do not enable you to solve the problem then contact your local SAMSUNG customer service centre Please have the following information read The model and serial nu...

Page 73: ...re Centre C d0 Control buttons are pressed over 10 seconds Clean the keys and check if there is water on the surface around key If it occurs again turn off the microwave oven over 30 seconds and try setting again If it appears again call your local SAMSUNG Customer Care Centre NOTE For any codes not listed above or if the suggested solution does not solve the problem contact your local SAMSUNG Cus...

Page 74: ...C11J7033C Power source 120 V 60 Hz AC Power consumption Maximum power Microwave Grill heating element Convection heating element 1450 W 1400 W 850 W Max 1450 W Output power 850 W Operating frequency 2450 MHz Dimensions W x H x D Outside Include Handle Oven cavity 20 19 32 x 12 21 128 x 19 59 64 14 11 16 x 9 11 64 x 14 9 16 Volume 1 1 Cu Ft Weight Net 44 1 lbs MC11J7033CT_AC_DE68 04334R 01_EN indd ...

Page 75: ...d service procedures Warranty service can only be performed by a SAMSUNG authorized service center The original dated bill of sale must be presented upon request as proof of purchase to SAMSUNG or SAMSUNG s authorized service center SAMSUNG will repair or replace this product at our option and at no charge as stipulated herein with new or reconditioned parts or products if found to be defective du...

Page 76: ...lities services parts supplies accessories applications installations repairs external wiring or connectors not supplied or authorized by SAMSUNG which damage this product or result in service problems incorrect electrical line voltage fluctuations and surges customer adjustments and failure to follow operating instructions cleaning maintenance and environmental instructions that are covered and p...

Page 77: ...RCHASE PRICE OF THE PRODUCT SOLD BY SAMSUNG AND CAUSING THE ALLEGED DAMAGE WITHOUT LIMITING THE FOREGOING PURCHASER ASSUMES ALL RISK AND LIABILITY FOR LOSS DAMAGE OR INJURY TO PURCHASER AND PURCHASER S PROPERTY AND TO OTHERS AND THEIR PROPERTY ARISING OUT OF THE USE MISUSE OR INABILITY TO USE THIS PRODUCT SOLD BY SAMSUNG NOT CAUSED DIRECTLY BY THE NEGLIGENCE OF SAMSUNG THIS LIMITED WARRANTY SHALL ...

Page 78: ...Memo MC11J7033CT_AC_DE68 04334R 01_EN indd 78 6 25 2015 3 44 43 PM ...

Page 79: ...Memo MC11J7033CT_AC_DE68 04334R 01_EN indd 79 6 25 2015 3 44 43 PM ...

Page 80: ...w samsung com ca_fr support French Please be advised that the Samsung warranty does NOT cover service calls to explain product operation correct improper installation or perform normal cleaning or maintenance Scan the QR code or visit www samsung com spsn to view our helpful How to Videos and Live Shows Requires reader to be installed on your smartphone MC11J7033CT_AC_DE68 04334R 01_EN indd 80 6 2...

Reviews: