background image

ENG

26

25

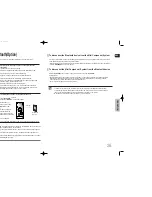
Using Bluetooth(Option)

You can use a Bluetooth device to let you enjoy music with high qualitystereo sound,all without wires!

What is Bluetooth?

Bluetooth is a new technology that enables Bluetooth-compliant devices to easily interconnect 
with each other using a short wireless connection.

• 

A Bluetooth device may cause a noise or malfunction, depending on usage.

• 

When a part of the body is in contact with the receiving/transmitting system of the Bluetooth device 
or the Mini Component System.

• 

Electrical variation from electrical jamming by the wall, corner or office partitioning.

• 

Electrical interference from the same frequency-band devices including medical equipment, 
microwave oven and wireless LAN.

• 

Pair the Mini Component System with the Bluetooth device while maintaining a close distance.

• 

The further the distance is between Mini Component System and Bluetooth device, the worse the quality. 
If the distance exceeds the Bluetooth operational range, the connection is lost.

• 

In poor reception-sensitivity areas, the Bluetooth connection may not work properly.

• 

The Mini Component System has an effective reception range of up to 10 m in all directions if there are 
no obstacles. The connection will be automatically cut off if the distance is out of this range. Even within 
this range, the sound quality may be deteriorated by obstacles such as walls or doors.

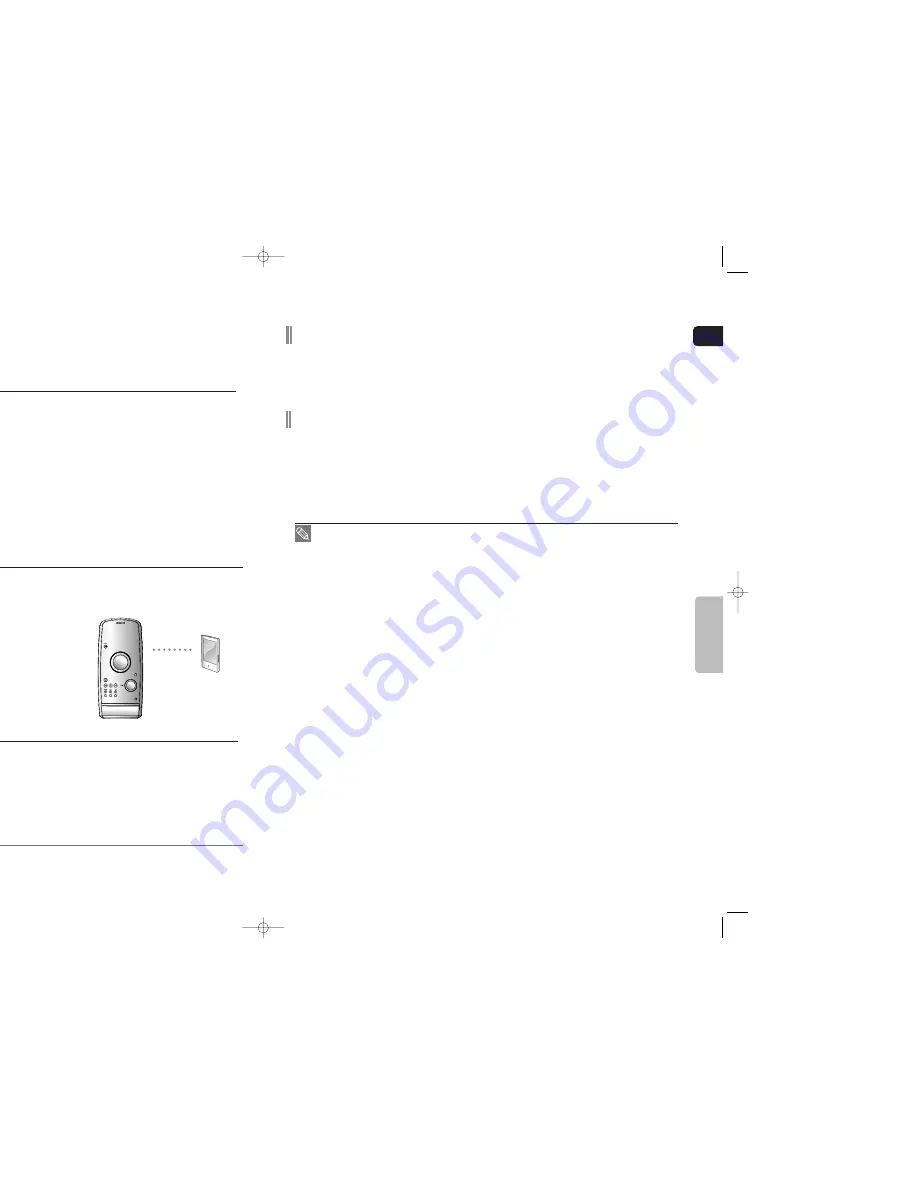
To connect the Mini Component System to a bluetooth device 

Check if the Bluetooth device supports the Bluetooth-compliant stereo headset function. 

1.

Press the 

AUX/PORT

button of the 

Mini Component system repeatedly until the "

BT AUDIO

" appears.

You will see “

WAIT

” for serval seconds and then “

READY

” on the front display 

of the Mini Component System.

2.

Select the Bluetooth menu on the Bluetooth device you 
want to connect. (refer to Bluetooth device's user manual)

3. 

Select a Stereo headset menu on the Bluetooth device.

• 

You will see a list of scanned devices.

4. 

Select "Samsung Mini Component" from the searched list.

• 

When the Mini Component System is connected to the 

Bluetooth device, the Mini Component System will display  
"

Connect

" on the front display, followed by the device name 

of the connected Bluetooth device.

• 

The Mini Component System connection is complete.

5. 

Play music on the connected device.

• 

You can listen to the music playing on the connected Bluetooth device over the Mini Component system.

• 

You may be required to enter a PIN code(password) when connecting the Bluetooth device to the home   

cinema system. If the PIN code input window appears, enter <0000>.

• 

The Mini Component System may control play related function  only when connected device supports 

the function.

• 

If connected device dose not support some play related function, the Mini Component System can't 

control the device.

• 

The Mini Component System only supports Middle Quality SBC data(up to 237kbps@48kHz), and does  

not support High Quality SBC data([email protected]).  

You can disconnect the Mini Component System from the Bluetooth device (refer to Bluetooth devices’ user manual).

• 

The Mini Component System will be disconnected.

• When the Mini Component System is disconnected from the Bluetooth device, the Mini Component System will  

display "

DISCONNECT

" on the front display.

Press the 

AUX/PORT

button of the Mini Component system to switch from “

BT AUDIO

” 

to another mode.
• The bluetooth device connected will wait a certain time for response from the Mini Component system 

When the Mini Component System is disconnected from the before terminating the connection. (Time to  

disconnection may differ, depending on the bluetooth device)

• The currently connected device will be disconnected.

•  In Bluetooth connection mode, the Bluetooth connection will be lost if the distance between the Mini   

Component System and the Bluetooth device exceeds 10 m. If the distance is returned to the effective 
range or you restart the Bluetooth device, the Bluetooth connection can be restored.

•  With some bluetooth devices, some functions may not work properly.

To disconnect the Bluetooth device from the Mini Component System

To disconnect the Mini Component  System from the Bluetooth device

Connect

Bluetooth
Device

OPERA

TION

  1p~28p(DA79)-NO tape-6-27  2008.7.11  4:17 PM  Page 28

Summary of Contents for MAX-DA79

Page 1: ...TH USB HOST DVD CD MP3 CD CD R RW PLAYBACK user manual MAX DA79 imagine the possibilities Thank you for purchasing a Samsung product To receive a more complete service please register your product at www samsung com global register PM Page 2 ...

Page 2: ...ait approximately 2 hours until the unit has reached room temperature before using During thunderstorms disconnect AC main plug from the wall outlet Voltage peaks due to lightning could damage the unit Do not expose the unit to direct sunlight or other heat sources This could lead to overheating and malfunction of the unit The battery used with this product contain chemicals that are harmful to th...

Page 3: ...the Delay Time 49 Setting the Audio Quality 51 Setting the DRC Dynamic Range Compression 53 AV SYNC Setup 54 Dolby Pro Logic II Mode 55 Dolby Pro Logic II Effect 56 RADIO OPERATION Listening to Radio 57 Presetting Stations 58 MISCELLANEOUS Timer Function 59 Canceling the Timer 60 POWER SOUND DSP EQ Function 61 Sleep Timer Function Mute Function 62 DEMO Function DIMMER Function ECO Function 63 CD R...

Page 4: ...mat can be played JPEG file names should be 8 characters or less in length and contain no blank spaces or special characters Only a consecutively written multisession disc can be played If there is a blank segment in the multisession disc the disc can be played only up to the blank segment A maximum of 9 999 images can be stored on a single CD When playing a Kodak Fuji Picture CD only the JPEG fil...

Page 5: ... BUTTON DOOR by hand in no power state Do not use this 1 FM Antenna Connector 2 5 1 Channel Speaker Output Terminals 3 External Digital Optical Input Jack 4 HDMI OUT Jack 5 AUX IN 2 Jacks 6 Component Video Output Connectors Connect a TV with component video input jacks to these jacks 7 Video Output Connector Connect the TV s video input jacks VIDEO IN to the VIDEO OUT connector 4 3 6 5 2 1 7 MAX D...

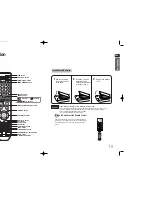
Page 6: ...cking cells Place batteries in the remote control so they match the polarity to and to Use the correct type of batteries Batteries that look similar may differ in voltage Always replace both batteries at the same time Do not expose batteries to heat or flame Insert Remote Batteries D EDIT ODE EFFECT CANCEL button PAUSE button DEMO DIMMER button OPEN CLOSE button PORT AUX button USB button Cursor E...

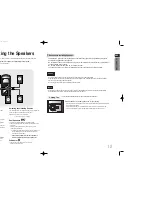
Page 7: ...e duct hole Caution Note The cooling fan supplies cool air to the unit to prevent overheating Please observe the following cautions for your safety Make sure the unit is well ventilated If the unit has poor ventilation the temperature inside the unit could rise and may damage it Do not obstruct the cooling fan or ventilation holes If the cooling fan or ventilation holes are covered with a newspape...

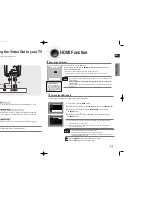
Page 8: ...NTER EXIT RETURN MOVE SELECT EXIT RETURN VIDEO OUT jack on the back of the main unit to the VIDEO IN jack on Good Quality 14 The default setting of this function is HDMI AUDIO OFF HDMI AUDIO is automatically down mixed to 2ch for TV speakers P BASS CD RIPPING MIC VOLUME UP DOWN ECHO P SOUND EQ DSP function is not available when HDMI AUDIO is ON nterlace scan mode for Component Output In Stop mode ...

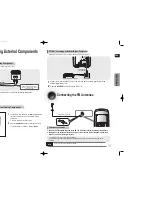
Page 9: ...mponent Audio Cable If the external analog component has only one Audio Out connect either left or right upplied Connect the Digital Input OPTICAL on the Mini Component to the Digital Output of the external digital component 1 Digital signal components such as a Cable Box Satellite receiver Set Top Box OPTICAL Connecting an External Digital Component Press the AUX PORT button to select DIGITAL IN ...

Page 10: ...the recording mode some MP3 CDs cannot be played Table of contents of a MP3 CD varies depending on the MP3 track format recorded on the disc 2 To open close the disc tray press OPEN CLOSE button DVD CD Playback starts automatically DivX MP3 JPEG Playback starts automatically If the TV is on a list of MP3s on the CD will appear on the TV screen Note To resume playback press PLAY button again To tem...

Page 11: ...n Image File Icon Movie File Icon All File Icon hen it is in red icon from on on on the screen Rotate Flip Function button Flip Vertically button Flip Horizontally button Rotate 90 Counterclockwise button Rotate 90 Clockwise Press Cursor buttons during playback Original Image JPEG File Playback Images captured with a digital camera or camcorder or JPEG files on a PC can be stored on a CD and then ...

Page 12: ... Video compatibility All versions of DivX later than 3 11 including the latest 5 1 are supported In addition XviD is supported For WMV V1 V2 V3 and V7 formats are possible The initial resolution is 720X480 and may support up to 720X576 Audio compatibility MP3s encoded at bitrates from 80kbps to 384kbps AC3s from 128kbps to 384kbps and WMAs from 56kbps to 128kbps are supported In addition for subti...

Page 13: ...h type MP3 player 3 Digital camera PTP protocol is not supported Devices which require additional program installation when you have connected it to a computer are not supported 4 USB HDD and USB Flash Drive Devices that support USB2 0 or USB1 1 You may experience a difference in playback quality when you connect a USB1 1 device For a USB HDD make sure to connect an auxiliary power cord to the USB...

Page 14: ...function only when connected device supports port some play related function the Mini Component System can t y supports Middle Quality SBC data up to 237kbps 48kHz and does ta 328kbps 44 1kHz You can disconnect the Mini Component System from the Bluetooth device refer to Bluetooth devices user manual The Mini Component System will be disconnected When the Mini Component System is disconnected from...

Page 15: ...d into several smaller sections called chapters appears on the TV screen s symbol appears on the TV screen while buttons are being operated that ration is not possible with the disc currently being played at is a Track File ection of video or a music file recorded on a CD or MP3 CD TRACK FILE display AUDIO LANGUAGE display SUBTITLE display STEREO L R display DOLBYDIGITALdisplay ANGLE display DivX ...

Page 16: ...Each time the button is pressed the angle changes as follows 3 Press Cursor buttons or numeric buttons to select the desired angle The Angle function works only with discs on which multiple angles have been recorded Note Scenes Songs MP3 g playback the previous or next chapter 30 OPERATION ion DVD time the button is pressed d step motion playback PM Page 32 ...

Page 17: ...or a CD Press INFO button once Playback epeatedly play a chapter title track song or directory MP3 file the repeat playback mode changes as follows 3 JPEG CHAPTER Repeatedly plays the selected chapter TITLE Repeatedly plays the selected title RANDOM Plays tracks in random order A track that has already been played may be played again TRACK Repeatedly plays the selected track DIR Repeatedly plays a...

Page 18: ...D R RW disc has not been recorded properly in DVD Video format it will not be playable DVD Icon Term Definition DVD CD MP3 JPEG DivX CAUTION NOTE DVD CD CD MP3 JPEG DivX This involves a function available with DVD or DVD R DVD RW discs that have been recorded and finalized in Video Mode This involves a function available with a data CD CD R or CD RW This involves a function available with CD R RW ...

Page 19: ...e and then press ENTER button 01 05 028 040 1 30 00 1 1 Moving to a Specific Time 3 Press Cursor buttons to move to Chapter display Moving to a Chapter 01 05 025 040 1 17 30 1 1 5 Press Cursor buttons to move to time display Moving to a Specific Time Press the numeric buttons You can press on the remote control to move directly to the desired title chapter or track Depending on the disc you may no...

Page 20: ...s MENU button 3 Press ENTER button The title menu appears sc Menu udio language subtitle language profile etc isc to disc en you select the disc menu that is not pported by the disc the This menu is not pported message appears on the screen Press Cursor buttons to move to DISC MENU and then press ENTER button Press ENTER button 38 OPERATION Press MENU EXIT button to exit the setup screen Press RET...

Page 21: ...Hausa 1353 Moldavian 1513 Siswati 1052 Azerbaijani 1217 Hindi 1356 Marathi 1514 Sesotho 1053 Bashkir 1226 Croatian 1357 Malay 1515 Sundanese 1057 Byelorussian 1229 Hungarian 1358 Maltese 1516 Swedish 1059 Bulgarian 1233 Armenian 1363 Burmese 1517 Swahili 1060 Bihari 1235 Interlingua 1365 Nauru 1521 Tamil 1069 Bislama 1239 Interlingue 1369 Nepali 1525 Tegulu 1066 Bengali Bangla 1245 Inupiak 1376 Du...

Page 22: ...ard TV select either 4 3PS or 4 3LB option according to personal preference Select WIDE HDTV if you have a widescreen TV Adjusting the TV Aspect Ratio Screen Size 4 3PS 4 3 Pan Scan Select this to play a 16 9 picture in the pan scan mode on a conventional TV You can see the central portion of the screen only with the sides of the 16 9 picture cut off 4 3LB 4 3 Letterbox Select this to play a 16 9 ...

Page 23: ...will be ken to the previous screen 3 Press Cursor button to move to PARENTAL and then press ENTER button Enter the password and then press ENTER button Note 2 1 Press MENU button Press Cursor button to move to Setup and then press ENTER button 4 Enter the old password a new password and confirm new password The setting is complete 3 5 Press Cursor button to move to PASSWORD and then press ENTER bu...

Page 24: ...on to move to LOGO and then press ENTER button To Change the Wallpaper 5 4 Press EXIT button to exit the setup screen Press to select the desired USER and then press ENTER as Select this to set the desired image as your wallpaper Press RETURN button to return to the previous level Press MENU EXIT button to exit the setup screen 46 COPY LOGO DATA will be displayed on the TV screen displayed o set u...

Page 25: ...s set to SMALL 48 SETUP talled 2 1 In Stop mode press MENU button Press Cursor button to move to Audio and then press ENTER button 3 Press Cursor button to move to TEST TONE and then press ENTER button gh Center CH can toggle between SMALL and NONE it is not relevant to r settings be signals are distributed to FRONT L CH and R CH by g a virtual Center CH Default setting is SMALL KER SETUP Availabl...

Page 26: ...t between 00 and 15mSEC e Center Speaker setting is not available for no center speaker ote You can set the delay time for C between 00 and 05mSEC and for LS and RS between 00 and 15mSEC Df The distance from FRONT SPEAKER Dc The distance from CENTER SPEAKER Ds The distance from REAR SPEAKER Ideal CENTER SPEAKER placement It is desirable to place all speakers within this circle Ideal SPEAKER placem...

Page 27: ...eaker Level Adjusting Subwoofer Speaker Level Press SOUND EDIT button and then press Cursor Press SOUND EDIT button and then press Cursor Press SOUND EDIT button and then press Cursor Press SOUND EDIT button and then press Cursor Note TITLE CHAP PRGM RDS RT ST TUNED kHz MHz TITLE CHAP PRGM RDS RT ST TUNED kHz MHz TITLE CHAP PRGM RDS RT ST TUNED kHz MHz TITLE CHAP PRGM RDS ST TUNED kHz MHz TITLE CH...

Page 28: ...s connected with digital TV In this case adjust the delay time of audio to optimal status to fit the video Press Cursor buttons to move to AV SYNC and then press ENTER button Press the MENU button DRC Dynamic Range Compression o enjoy Dolby Digital sound when watching movies at 2 ss MENU button Press Cursor button to move to Audio and then press ENTER button 4 If DRC is selected press ENTER Press ...

Page 29: ...to select MUSIC mode 2 Press the PL II EFFECT button to select PANORAMA then press the Cursor buttons to select the desired effect setting You can select either 0 or 1 This mode extends the front stereo image to include the surround speakers for an exciting wraparound effect with side wall imaging 3 Press the PL II EFFECT button to select C WIDTH then press the Cursor button to select the desired ...

Page 30: ...tting FM 89 10 in the memory This unit does not receive AM broadcasts 1 Press the TUNER button to select the FM band 2 Press the button to select 89 10 3 Press the TUNER MEMORY button 4 Press the button to select preset number You can select between 1 and 15 presets 5 Press the TUNER MEMORY button again The station is stored in memory 6 To preset another station repeat steps 2 to 5 To tune in to a...

Page 31: ...imer Press POWER to set the system to standby mode the hour by pressing or on ss ENTER he minutes flash the minutes by pressing or on ss ENTER OL 10 is displayed where 10 orresponds to the volume ready set Set the timer switch off time 6 Press or button to adjust the volume level and press ENTER MISCELLANEOUS on and off times are identical the word ERROR is displayed Multi Jog or button on the fro...

Page 32: ...eep timer press SLEEP button until OFF appears on the display MUTE appears in the display To turn off mute press the button again Mute Function This is useful when answering a doorbell or telephone call Press MUTE button kHz MHz kHz MHz SOUND DSP EQ h the function of Power Sound s and improves high key or bass twice as much for you to appreciate a few seconds UND again PASS P SOUND uipped with a p...

Page 33: ...hen you use CD high speed search function the CD Ripping can t work When CD Ripping CD audio can t be out During CD Ripping do not deal impact If is shocked while CD Ripping CD Ripping maybe disengage Sometimes some of USB devices CD Ripping time is long If you use scratched disc for CD Ripping or connect disconnect HDMI cable during CD Ripping there might be some noise and broken sound on ripped ...

Page 34: ...nsation forms inside the player the player may not operate correctly If this occurs remove the disc and let the player stand for 1 or 2 hours with the power on Note The loudspeakers are no longer used to output the sound Connect the Microphone Press the MIC VOL buttons to adjust the MIC level Press the ECHO button to select ECHO1 ECHO2 and ECHO OFF When connected a MIC HDMI output is not available...

Page 35: ...hin its operation range of angle and distance Are the batteries exhausted Audio language and subtitles will not work for DVDs not containing them And depending on the disc they may work differently Audio language and subtitles do not work Are you using a disc that does not contain menus Menu screen does not appear even when the menu function is selected While the player is in NO DISC mode hold the...

Page 36: ...ra AZ 1 Olympus Digital Camera 300 digital Olympus Digital Camera Digital Camera USB FLASH DISC Product Company Type Product Company Type Cruzer Micro Sandisk USB 2 0 USB Flash Drive 128M XTICK LG USB 2 0 128M Cruzer Mini Sandisk USB 2 0 128M Micro Mini Iomega USB 2 0 128M Cruzer Mini Sandisk USB 2 0 256M iFlash Imation USB 2 0 64M SONY Micro Vault Sony USB 2 0 64MB LG XTICK M USB 2 0 64M FLEX DRI...

Page 37: ...ZAHSTAN 8 10 800 500 55 500 www samsung kz UZBEKISTAN 8 10 800 500 55 500 www samsung uz KYRGYZSTAN 00 800 500 55 500 TADJIKISTAN 8 10 800 500 55 500 UKRAINE 8 800 502 0000 www samsung com LITHUANIA 8 800 77777 www samsung lt LATVIA 800 7267 www samsung com lv ESTONIA 800 7267 www samsung ee Asia Pacific AUSTRALIA 1300 362 603 www samsung com NEW ZEALAND 0800SAMSUNG 726 7864 www samsung com nz CHIN...

Reviews: