


English - 9
Setting up the tV with your PC
Preset: Press the
SOURCE
button to select PC mode.
1.
Press the
MENU
button to display the menu.
Press the
ENtER
button, to select "Picture".
.
Select the required option by pressing the ▲ or ▼ button,
then press the
ENtER
button.
.
When you are satisfied with your setting, press the
ENtER
button.
.
Press the
EXIt
button to exit.
♦
Auto Adjustment
Auto adjustment allows the PC screen of set to self-adjust to
the incoming PC video signal. The values of fine, coarse and
position are adjusted automatically.
Easy Setting
1.
Press the
tOOLS
button on the remote control.
.
Press the ▲ or ▼ button to select “Auto Adjustment”, then
press the
ENtER
button.
♦
Screen Adjustment:
Coarse/Fine
The purpose of picture quality adjustment is to remove or
reduce picture noise. If the noise is not removed by Fine-
tuning alone, then adjust the frequency as best as possible
(coarse) and Fine-tune again. After the noise has been
reduced, re-adjust the picture so that it is aligned on the
center of screen.
Press the ▲ or ▼ button to select "Coarse" or "Fine", then
press the
ENtER
button.
Press the ◄ or ► button to adjust the screen quality.
Press the
ENtER
button.
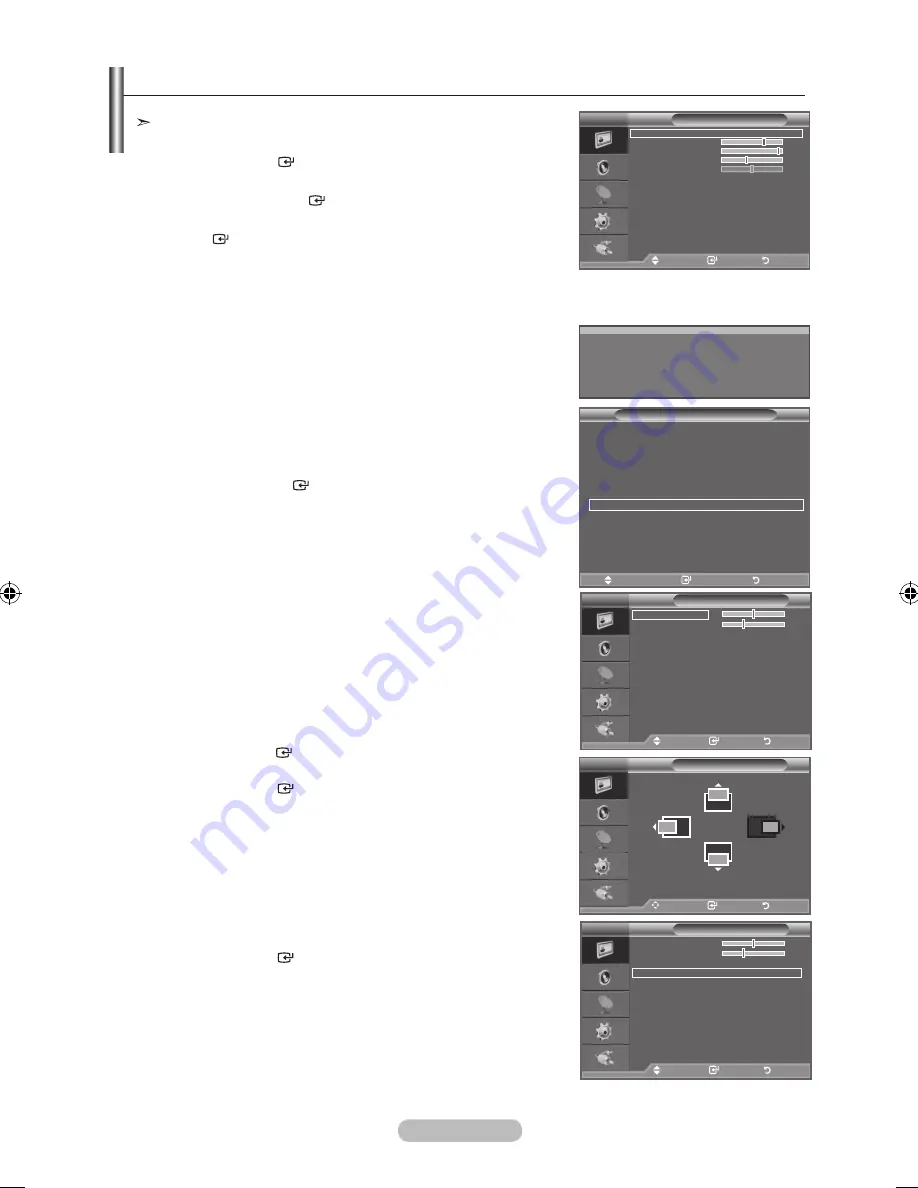
Position
Adjust the PC’s screen positioning if it does not fit the TV
screen.
Press the ▲ or ▼ button to adjusting the Vertical-Position.
Press the ◄ or ► button to adjust the Horizontal-Position.
Press the
ENtER
button.
Image Reset
You can replace all image settings with the factory default
values.
Screen Adjustment
Coarse
0
Fine
Position
Image Reset
tV
Move
Enter
Return
Position
tV
Move
Enter
Return
Picture
Mode
: Standard
Backlight
Contrast
9
Brightness
Sharpness
0
Auto Adjustment
Screen Adjustment
Picture Options
Reset
: OK
tV
Move
Enter
Return
Screen Adjustment
Coarse
0
Fine
Position
Image Reset
tV
Move
Enter
Return
Auto Adjustment in progress
Please wait.
Picture Mode
: Standard
Sound Mode
: Custom
Sleep timer
: Off
SRS tS Xt
: Off
Energy Saving
: Off
PIP
Auto Adjustment
Move
Enter
Exit
tools
BN68-01425H-Eng.indd 29
2008-05-13 ¿ÀÈÄ 4:42:31


