background image

50


English

Setup

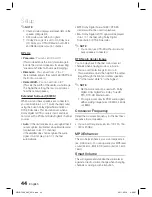
WPS(PBC)

The easiest way to set up the wireless network 
connection is using the WPS(PBC) function or the 
One Foot Connection function.

If your wireless router has a 

WPS(PBC)

 button, 

follow these steps:

Press the ▲▼ buttons to select 

WPS(PBC)

.

Settings

Display

Audio

Network

System

Language

Security

General

Support

Network Settings

>

 Move    

"

 Enter    

'

 Return

One Foot

Connection

Wireless

(general)

Wired

Select a network connection type.

Connect to the Wireless Router easily by pressing the
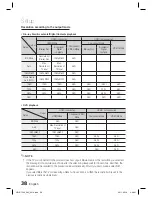
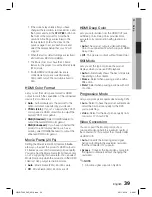
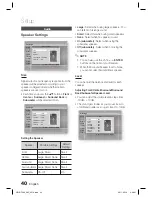
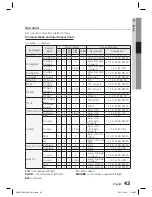
WPS(PBC) button. Choose this if your Wireless Router
supports Push Button Confi guration(PBC).

WPS(PBC)

Press the 

ENTER

 button.

Press the 

WPS(PBC)

 button on your router 

within two minutes. Your product displays 
the Network Selection Screen, and 
automatically acquires all the network 
settings values it needs and connects to your 
network. When it is done, it displays an 

OK


button. Press the 

ENTER

 button on your 

remote.

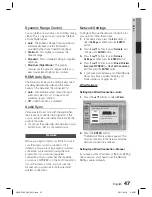
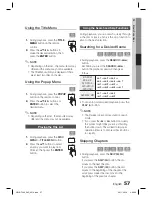
One Foot Connection

You can set up the wireless connection 
automatically if you have a Samsung Wireless 
Router which supports One Foot Connection. To 
connect using the One Foot Connection function, 
follow these steps:

Press the ▲▼ buttons to select 

One Foot 

Connection

.

Settings

Display

Audio

Network

System

Language

Security

General

Support

Network Settings

>

 Move    

"

 Enter    

'

 Return

Wireless

(general)

Wired

Select a network connection type.

Connect to your wireless network automatically if your
Wireless Router supports One Foot Connection. Select
this connection type after placing the Wireless Router
within 10 inches(25cm) of Samsung Wireless LAN Adapter.

One Foot

Connection

WPS(PBC)

1.

2.

3.

1.

Press the 

ENTER

 button.

Place the Samsung Wireless Router within 
25 cm (10 inches) of Samsung Wireless LAN 
Adapter to connect.

Wait until the connection is automatically 
established.

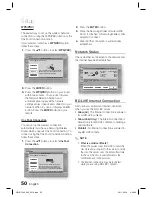
Network Status

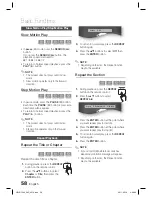
Check whether a connection to the network and 
the Internet have been established.

Settings

Display

Audio

Network

System

Language

Security

General

Support

Network Status


<

 Move    

"

 Enter    

'

 Return

MAC Address 

XX:XX:XX:XX:XX:XX

IP Address 

0.0.0.0

Subnet Mask 

0.0.0.0

Gateway 0.0.0.0
DNS Server 

0.0.0.0

Internet is connected successfully. 
If you have a problem using any Internet services, contact your Internet service 
provider.

KT_WLAN

IP Settings

Retry

OK

Network Settings

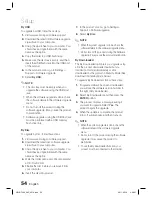
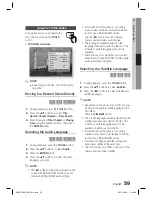
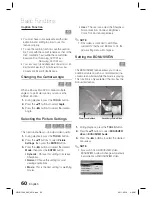
BD-LIVE Internet Connection

Set to allow or prohibit an Internet connection 
when you use the BD-LIVE service.

Allow (All) 

: The Internet connection is allowed 

for all BD-LIVE contents.

Allow (Valid Only) 

: The Internet connection is 

allowed only for BD-LIVE contents containing a 
valid certifi cate.

Prohibit 

: No Internet connection is allowed for 

any BD-LIVE content.

NOTE

What is a valid certifi cate?

When the product uses BD-LIVE to send the 
disc data and a request to the server to certify 
the disc, the server uses the transmitted data 
to check if the disc is valid and sends the 
certifi cate back to the product.

The Internet connection may be restricted 
while you are using BD-LIVE contents.

2.

3.

4.

HW-D7000_XAC_0516.indd   50

HW-D7000_XAC_0516.indd   50

2011-05-16     3:46:32

2011-05-16     3:46:32

Summary of Contents for HW-D7000

Page 1: ...he possibilities Thank you for purchasing this Samsung product To receive more complete service please register your product at www samsung com register HW D7000 HW D7000_XAC_0516 indd 1 HW D7000_XAC_0516 indd 1 2011 05 16 3 44 31 2011 05 16 3 44 31 ...

Page 2: ...e point of cable entry as practical WARNING To reduce the risk of fire or electric shock do not expose this appliance to rain or moisture CAUTION Apparatus shall not be exposed to dripping or splashing and no objects filled with liquids such as vases shall be placed on the apparatus CLASS 1 LASER PRODUCT KLASSE 1 LASER PRODUKT LUOKAN 1 LASER LAITE KLASS 1 LASER APPARAT PRODUCTO LÁSER CLASE 1 CLASS 1...

Page 3: ...or your safety If the provided plug does not fit into your outlet consult an electrician for replacement of the obsolete outlet 10 Protect the power cord from being walked on or pinched particularly at plugs convenience receptacles and the point where they exit from the apparatus 11 Only use attachment accessories specified by the manufacturer 12 Use only with the cart stand tripod bracket or table ...

Page 4: ...roduct or a disc in cold temperatures If transporting the product during the winter wait approximately 2 hours until the product has reached room temperature before using The batteries used with this product contain chemicals that are harmful to the environment Do not dispose of batteries in the general household trash Viewing TV using the 3D function IMPORTANT HEALTH AND SAFETY INFORMATION FOR 3D...

Page 5: ...divx com for more information and software tools to convert your files into DivX video ABOUT DIVX VIDEO ON DEMAND This DivX Certified device must be registered in order to play purchased DivX Video on Demand VOD movies To obtain your registration code locate the DivX VOD section in your device setup menu Go to vod divx com for more information on how to complete your registration DivX Certified to pl...

Page 6: ...e 29 Connecting a CD Player 30 Video Conversion Flow According to the Connected Port 31 Connecting the FM Antenna 31 Connecting AUX Components 32 Connecting to a Network SETUP 34 34 Initial Settings 35 Accessing the Settings Menu 36 Display 36 3D Settings 37 TV Aspect Picture Size and Format 37 Smart Hub Screen Size 37 BD Wise Samsung Products only 37 Resolution 39 HDMI Color Format 39 Movie Frame...

Page 7: ...Phone Using the USB Cable 68 Connecting an iPod iPhone Using the Dock 69 iPod iPhone Models You Can Use with This Product NETWORK SERVICES 70 70 Using Smart Hub 77 Samsung Apps 79 Using vTuner Function 79 BD LIVE 79 Using the AllShare Function OTHER INFORMATION 80 80 Troubleshooting 84 Specifications Figures and illustrations in this User Manual are provided for reference only and may differ from a...

Page 8: ...cted the product to a digital TV video can sometimes lag behind the audio To compensate for this you can adjust the audio delay time so that the audio syncs with the video iPod SYNC function If the video signal from an iPod player you attached to the product lags behind the audio signal during playback you can set the audio delay time so that the video and audio match iPod iPhone support If you ha...

Page 9: ...ession than Dolby Digital for richer sound DTS Neo 6 Provides a full range of 6 channels by converting a digital PCM or analog stereo signal using DTS digital matrix decoding DTS 96 24 DTS 96 24 encodes standard 16 bit 44 1 kHz sound to 24 bit 96kHz and applies it to a 5 1 CH sound track DTS ES Extended Surround Direct 6 1 The DTS ES Extended Surround system is a new multi digital signal format th...

Page 10: ...DVD RW R disc or a USB storage media containing MP3 or WMA contents JPEG G Indicates a function available in a CD RW R DVD RW R disc or a USB storage media containing JPEG contents DivX MKV MP4 DivX x Indicates a function available in a CD RW R DVD RW R disc or a USB storage media containing DivX contents USB storage device F Indicates a function available on a USB storage device CAUTION Indicates...

Page 11: ...may make it impossible to playback a disc When you play a BD Java title loading may take longer than a normal title or some functions may perform slowly Discs that cannot be played HD DVD Disc DVD RAM 3 9 GB DVD R Disc for Authoring DVD RW VR mode Super Audio CD except CD layer DVD ROM PD MV Disc etc CVD CD ROM CDV CD G CD I LD CDGs play audio only not graphics NOTE Some commercial discs and DVD d...

Page 12: ...commercial DVD discs DVD VIDEO discs with movies When switching from the first layer to the second layer of a dual layered DVD VIDEO disc there may be momentary distortion in the image and sound This is not a malfunction of the product DVD RW R R This product can play back a DVD RW R R disc recorded and finalized with a DVD video recorder The ability to play back may depend on recording conditions D...

Page 13: ... Container Video Codec Audio Codec Resolution avi AVI DivX 3 11 4 x 5 1 6 0 MP3 AC3 LPCM ADPCM DTS Core 1920x1080 XviD 1920x1080 H 264 BP MP HP 1920x1080 MPEG4 SP ASP 1920x1080 Motion JPEG 1920x1080 mkv MKV DivX 3 11 4 x 5 1 6 0 MP3 AC3 LPCM ADPCM DTS Core 1920x1080 XviD 1920x1080 H 264 BP MP HP 1920x1080 MPEG4 SP ASP 1920x1080 Motion JPEG 1920x1080 asf ASF DivX 3 11 4 x 5 1 6 0 MP3 AC3 LPCM ADPCM...

Page 14: ...on will not be supported If you play a video via the network it may not play properly depending on the network status Video decoder Up to H 264 Level 4 1 supported H 264 FMO ASO RS VC1 SP MP AP L4 AVCHD not supported XVID MPEG4 SP ASP Below 1280 x 720 60 frame max Above 1280 x 720 30 frame max GMC 2 or higher not supported Audio decoder Up to WMA 7 8 9 supported WMA 9 PRO with more than two channe...

Page 15: ...reader to operate improperly The product does not support the PTP protocol for digital cameras Do not disconnect a USB device during a loading process The bigger the image resolution the longer the image takes to display This player cannot play MP3 files with DRM Digital Rights Management downloaded from commercial sites 6 7 8 9 10 11 Accessories Check the box for the supplied accessories listed be...

Page 16: ...ms 7 OPEN CLOSE BUTTON Ejects a Disc 8 DISPLAY Displays the playing audio input status time listening mode etc 9 MASTER VOLUME Adjusts the volume level 10 POWER BUTTON Turns the product on and off MASTER VOLUME INPUT SELECT TONE CONTROL TUNING MODE AUDIO ASSIGN AUDIO EFFECT Smart HUB S Direct vTuner AV SYNC SELECT MEMORY MENU RETURN 3D SOUND ASC MIC VIDEO AUDIO PHONES AUX 1 IN 1 5 6 7 8 9 11 12 13...

Page 17: ...lected source 23 AUDIO EFFECT BUTTON Toggles to select a surround sound mode 24 3D SOUND BUTTON Used to set the 3D sound 25 ASC MIC JACK Used to connect the ASC Microphone for setting up MRC Musical Room Calibration 26 USB PORT You can connect a USB memory flash stick here and use it as storage when the product is connected to BD LIVE You can also use the USB Host for software upgrades and MP3 JPEG...

Page 18: ...ts the component video signal 11 OPTICAL IN JACKS DIGITAL AUDIO IN Receives the digital optical audio signal 12 COAXIAL IN JACK DIGITAL AUDIO IN Receives the digital coaxial audio signal 13 SUBWOOFER AUDIO OUT JACKS Connect the subwoofers 14 SPEAKER OUT TERMINALS The front speaker and surround back speaker ports can be connected to a speaker that supports bi amplifying For connecting to the bi amp...

Page 19: ...s to apply 3D Sound effect To change to TV mode press the TV button Press to stop play a disc Correct the audio synchronization when playing iPod video content Press to search contents Press to use Netflix Press to select Blu ray s mode or Press to select TV s video mode Select MONO or STEREO for radio broadcasting Press to search backwards or forwards Press to pause a disc Search for active FM st...

Page 20: ...le 18 Cetronic 03 Citizen 03 18 25 Cinema 97 Classic 03 Concerto 18 Contec 46 Coronado 15 Craig 03 05 61 82 83 84 Croslex 62 Crown 03 Curtis Mates 59 61 63 CXC 03 Daewoo 02 03 04 15 16 17 18 19 20 21 22 23 24 25 26 27 28 29 30 32 34 35 36 48 59 90 Daytron 40 Dynasty 03 Emerson 03 15 40 46 59 61 64 82 83 84 85 Fisher 19 65 Funai 03 Futuretech 03 General Electric GE 06 40 56 59 66 67 68 Hall Mark 40...

Page 21: ...akers with the front face of the center speaker or place them slightly in front of the center speaker Center Speaker It is best to install it at the same height as the front speakers You can also install it directly over or under the TV Surround Speakers Place these speakers behind your listening position If there isn t enough room place these speakers so they face each other Place them about 2 to...

Page 22: ... bass If you place a speaker near your TV set screen color may be distorted because of the magnetic field generated by the speaker If this occurs place the speaker away from your TV set Attaching the Toroidal Ferrite Core to the Power Cord of the Main Unit If you attach a Toroidal ferrite core to the power cord it will help to prevent RF interference from radio signals Pull the fixing tab of the Tot...

Page 23: ... our recommend it can be cause of Speaker Unit or Amplifer s trouble so be cations about it 1 2 3 HDMI 1 SAT ARC MONITOR GAME HDMI 2 AUX1 HDMI 3 AUX2 HDMI 4 MDMI IN HDMI OUT iPod LAN VIDEO IN COMPONENT IN OUT VIDEO OUT SAT GAME TV 1 SAT 2 GAME MONITOR AUDIO IN IN OUT GAME SAT TV CD Y PB CB PR CR OPTICAL 1 SAT OPTICAL 2 GAME OPTICAL 3 TV COAXIAL CD SUBWOOFER OUT FRONT FRONT SURROUND SURROUND CENTER...

Page 24: ...r speaker output in the main unit HDMI 1 SAT ARC MONITOR GAME HDMI 2 AUX1 HDMI 3 AUX2 HDMI 4 HDMI IN HDMI OUT iPod LAN VIDEO IN COMPONENT IN OUT VIDEO OUT SAT GAME TV 1 SAT 2 GAME MONITOR AUDIO IN IN OUT SAT GAME TV CD Y PB CB PR CR OPTICAL 1 SAT OPTICAL 2 GAME OPTICAL 3 TV COAXIAL CD SUBWOOFER OUT FRONT FRONT SURROUND SURROUND CENTER SPEAKERS OUT SURROUND BACK FRONT HEIGHT SURROUND BACK FRONT HEI...

Page 25: ...d bit rate may be limited by the performance of the connected device Since HDMI connection supports both video and audio you don t have to connect an additional audio cable HDMI 1 SAT ARC MONITOR GAME HDMI 2 AUX1 HDMI 3 AUX2 HDMI 4 HDMI IN HDMI OUT iPod LAN VIDEO IN COMPONENT IN OUT VIDEO OUT SAT GAME TV 1 SAT 2 GAME MONITOR AUDIO IN IN OUT SAT GAME TV CD Y PB CB PR CR OPTICAL 1 SAT OPTICAL 2 GAME...

Page 26: ...1 HDMI 3 AUX2 HDMI 4 HDMI IN HDMI OUT iPod LAN VIDEO IN COMPONENT IN OUT VIDEO OUT SAT GAME TV 1 SAT 2 GAME MONITOR AUDIO IN IN OUT SAT GAME TV CD Y PB CB PR CR OPTICAL 1 SAT OPTICAL 2 GAME OPTICAL 3 TV COAXIAL CD SUBWOOFER OUT FRONT FRONT SURROUND SURROUND CENTER SPEAKERS OUT SURROUND BACK FRONT HEIGHT SURROUND BACK FRONT HEIGHT FM ANT SPEAKER IMPEDANCE 4 8 A AR R A AR R A AR RC C C C C C M MO ON...

Page 27: ...dio cable s red plug to the red jack and white cable to the white jack HDMI 1 SAT ARC MONITOR GAME HDMI 2 AUX1 HDMI 3 AUX2 HDMI 4 HDMI IN HDMI OUT iPod LAN VIDEO IN COMPONENT IN OUT VIDEO OUT SAT GAME TV 1 SAT 2 GAME MONITOR AUDIO IN IN OUT SAT GAME TV CD Y PB CB PR CR OPTICAL 1 SAT OPTICAL 2 GAME OPTICAL 3 TV COAXIAL CD SUBWOOFER OUT FRONT FRONT SURROUND SURROUND CENTER SPEAKERS OUT SURROUND BACK...

Page 28: ... IN HDMI OUT iPod LAN VIDEO IN COMPONENT IN OUT VIDEO OUT SAT GAME TV 1 SAT 2 GAME MONITOR AUDIO IN IN OUT SAT GAME TV CD Y PB CB PR CR OPTICAL 1 SAT OPTICAL 2 GAME OPTICAL 3 TV COAXIAL CD SUBWOOFER OUT FRONT FRONT SURROUND SURROUND CENTER SPEAKERS OUT SURROUND BACK FRONT HEIGHT SURROUND BACK FRONT HEIGHT FM ANT SPEAKER IMPEDANCE 4 8 A AR R A AR R A AR RC C C C C C M MO ONI M MO ONI O TOR R O TOR ...

Page 29: ...E TV 1 SAT 2 GAME MONITOR AUDIO IN IN OUT SAT GAME TV CD Y PB CB PR CR OPTICAL 1 SAT OPTICAL 2 GAME OPTICAL 3 TV COAXIAL CD SUBWOOFER OUT FRONT FRONT SURROUND SURROUND CENTER SPEAKERS OUT SURROUND BACK FRONT HEIGHT SURROUND BACK FRONT HEIGHT FM ANT SPEAKER IMPEDANCE 4 8 A AR R A AR R A AR RC C C C C C M MO ONI M MO ONI O TOR R O TOR R HDMI IN HDMI OUT iPod LAN VIDEO IN COMPONENT IN OUT VIDEO OUT M...

Page 30: ...1080p Auto conversion is not applied to a video source incoming from HDMI IN port The maximum resolution of the input video signal is 480i and it will not support higher input resolution Video conversion is compatible with the NTSC color system only HDMI 1 SAT ARC MONITOR GAME HDMI 2 AUX1 HDMI 3 AUX2 HDMI 4 HDMI IN HDMI OUT iPod LAN VIDEO IN COMPONENT IN OUT VIDEO OUT SAT GAME TV 1 SAT 2 GAME MONI...

Page 31: ...C MONITOR GAME HDMI 2 AUX1 HDMI 3 AUX2 HDMI 4 HDMI IN HDMI OUT iPod LAN VIDEO IN COMPONENT IN OUT VIDEO OUT SAT GAME TV 1 SAT 2 GAME MONITOR AUDIO IN IN OUT SAT GAME TV CD Y PB CB PR CR OPTICAL 1 SAT OPTICAL 2 GAME OPTICAL 3 TV COAXIAL CD SUBWOOFER OUT F FM ANT A AR R A AR R A AR RC C C C C C M MO ONI M MO ONI O TOR R O TOR R HDMI IN HDMI OUT iPod LAN VIDEO IN COMPONENT IN OUT VIDEO OUT M MO ON N ...

Page 32: ... options See page 47 NOTE Internet access to Samsung s software update server may not be allowed depending on the router you use or the ISP s policy For more information contact your ISP Internet Service Provider DSL users please use a router to make a network connection To use the AllShare function you must connect your PC to the network as shown in the figure 1 2 HDMI 1 SAT ARC MONITOR GAME HDMI ...

Page 33: ...the connection in compliance with new Wi Fi certification specifications If your router supports WPS Wi Fi Protected Setup you can connect to the network via PBC Push Button Configuration or PIN Personal Identification Number WPS will automatically configure the SSID and WPA key in either mode You can set up the wireless network connection in three ways Using Auto Setup the Auto Network Search function...

Page 34: ...on about the Network settings When done go to Step 6 The Home menu appears For more information about the Home menu please see page 35 1 2 3 4 5 6 Home Menu d WPS PBC My Devices Internet Settings Videos Photos Music My Contents Function NOTE The Home menu will not appear if you do not configure the initial settings except as noted below If you press the BLUE D button during the network setup you ca...

Page 35: ...unction 1 1 Selects My Devices 2 Selects Function 3 Selects My Contents 4 Selects Internet 5 Selects Settings 6 Displays the buttons available 1 Press the buttons to select Settings and then press the ENTER button Press the buttons to select the desired submenu and then press the ENTER button Press the buttons to select the desired item and then press the ENTER button Press the EXIT button to exit...

Page 36: ...TOP button again then select 3D Settings in the Blu ray menu Depending on the content and the position of the picture on your TV screen you may see vertical black bars on the left side right side or both sides Screen Size Lets you enter the actual screen size of your TV so that the product can adjust the image according to the screen size and display an optimal 3D image The maximum allowed screen ...

Page 37: ... BD Wise Samsung Products only BD Wise is Samsung s latest inter connectivity feature When you connect a Samsung product and a Samsung TV with BD Wise to each other via HDMI and BD Wise is on in both the product and TV the product outputs video at the video resolution and frame rate of the BD DVD disc Off The output resolution stays fixed at the resolution you set previously in the Resolution menu ...

Page 38: ... playback Output Setup HDMI connected HDMI not connected HDMI Mode Component VIDEO Mode Component Mode VIDEO Mode BD Wise 480i 480i Auto Max Resolution of TV input 480i 1080p 60F 1080p 60F 480i 1080i 1080i 480i 480p 480i 720p 720p 480i 480p 480i 480p 480p 480i 480p 480i 480i 480i 480i NOTE If the TV you connected to the product does not support Movie Frame or the resolution you selected the messag...

Page 39: ...oy the Movie Frame 24Fs feature only on a TV supporting this frame rate You can select Movie Frame only when the product is in the HDMI 1080i or 1080p output resolution modes Auto Movie Frame 24Fs functions work Off Movie Frame 24Fs functions are off HDMI Deep Color Lets you output video from the HDMI OUT jack with Deep Color Deep Color provides more accurate color reproduction with greater color ...

Page 40: ...ll Subwoofer On Off On Large Select when using large speakers You can listen to full range sound Small Select this when using small speakers None Select when no speaker is used On subwoofer Select when using the subwoofer speaker Off subwoofer Select when not using the subwoofer speaker NOTE You can also use the ENTER buttons on the front of your Receiver When the Surround Speaker in set to None y...

Page 41: ...by Pro Logic IIx mode PL IIz Select this if you want to install the surround back speaker in the top front corner With this setting you can enable the Dolby Pro Logic IIz mode Bi AMP Select this if you want to connect the Bi Amp compliant speaker to the surround back port With this setting you can enable the Bi Amp feature NOTE Depending on the surround back settings the surround back speaker or f...

Page 42: ...atically set up in the following sequence Front L Center Front R Surround R Surround Back R Surround Back L Surround L Subwoofer Press the RETURN button to cancel the Musical Room Calibration Setting 1 2 NOTE Running the Musical Room Calibration function takes about 3 minutes Make sure there is no disc in the product when you run the Musical Room Calibration function If the ASC microphone is disco...

Page 43: ... C R SL SR SBL SW DTS HD DTS HD Master Audio O O O O O DTS HD MSTR L C R SL SR SBL SBR SW DTS HD High Resolution O O O O O DTS HD L C R SL SR SBL SBR SW LPCM Multi Channel Multi Channel O O O O O Digtal LPCM L C R SL SR SBL SBR SW Multi Channel O O O O Height O Digtal LPCM L C R SL SR H SW 2 ch PCM Stereo O O Digtal LPCM L R SW ProLogic IIx O O O O O Digtal LPCM Dolby Digital ProLogic IIx L C R SL...

Page 44: ...ze the audio signal it will not play in 6 1 7 1 channel automatically Off Dolby Digital Surround EX DTS ES decoder will not be used for playback On Dolby Digital or DTS signal will be played in 6 1 7 1 channel using Dolby Digital Surround EX DTS ES decoder NOTE You cannot use DTS ES without surround back speakers connected DTS Neo 6 Center Image You can play back 2 channel sound over 6 1 channels ...

Page 45: ...e Digital Output to match the capabilities of the AV device you ve connected to the product PCM Choose if you have connected an HDMI supported AV device Bitstream Unprocessed Select if you have connected an HDMI supported AV device with Dolby TrueHD and DTS HD Master Audio decoding capabilities Bitstream Re encoded DTS Choose if you have connected an AV device using a Digital Optical input that ca...

Page 46: ...sc Any Decodes the main feature audio and BONUSVIEW audio stream together into PCM audio and adds Navigation Sound Effects Outputs only the main feature audio stream so that your AV device can decode the audio bitstream You will not hear BONUSVIEW audio or Navigation Sound Effects Decodes the main feature audio and BONUSVIEW audio stream together into PCM audio and adds Navigation Sound Effects th...

Page 47: ... your router has the capability you can use WPS PBC or One Foot Connection If your IP address is static you must use the manual set up procedure for both wired and wireless connections Network Settings To begin setting up the network connection for your product follow these steps In the Home menu press the buttons to select Settings and then press the ENTER button Press the buttons to select Netwo...

Page 48: ... OK The Network Status screen appears The product connects to the network after the network connection is verified Wireless Network You can setup a wireless network three ways Wireless General Using WPS PBC One Foot Connection Wireless General includes both Automatic and Manual setup procedures Setting Up the Wireless Network Connection Auto Most wireless networks have an optional security system t...

Page 49: ...ngs are displayed 4 5 1 2 3 4 To enter the Network settings into your product follow these steps Follow Steps 1 through 5 in the Setting Up the Wireless Network Connection Auto procedure When done press the buttons to move the cursor to Done and then press the ENTER button The Network Status screen appears Settings Display Audio Network System Language Security General Support IP Settings Move Ent...

Page 50: ... One Foot Connection Select this connection type after placing the Wireless Router within 10 inches 25cm of Samsung Wireless LAN Adapter One Foot Connection WPS PBC 1 2 3 1 Press the ENTER button Place the Samsung Wireless Router within 25 cm 10 inches of Samsung Wireless LAN Adapter to connect Wait until the connection is automatically established Network Status Check whether a connection to the ...

Page 51: ... You can check the device s information including the storage size delete the BD data or change the memory device BD Data Management Screen Information Current Device Display the selected device Total Size Total memory size of the device Available Size Available memory in the device Delete BD Data Delete all BD data in the storage Select Device Change location of desired memory to store BD data NO...

Page 52: ...n you access this function for the first time the password setup screen appears Enter a desired 4 digit password using the number buttons The default password is 0000 After you have set your password select an age rating you want to set for the BD Parental Rating and a rating level you want to set for the DVD Parental Rating The product will only play Blu ray discs rated at or below the age rating ...

Page 53: ...elow By Internet To upgrade by Internet follow these steps Select By Internet and then press the ENTER button The Connecting to Server message appears If there is a download available the Download pop up appears with a progress bar and the download starts When the download is complete the Upgrade Query window appears with three choices Upgrade Now Upgrade Later or Don t Upgrade If you select Upgra...

Page 54: ...net 7 8 1 2 3 4 By USB To upgrade by USB follow these steps Visit www samsung com bluraysupport Download the latest USB software upgrade zip archive to your computer Unzip the zip archive to your computer You should have a single folder with the same name as the zip file Copy the folder to a USB flash drive Make sure the disc tray is empty and then insert the USB flash drive into the USB port of the ...

Page 55: ... the ENTER button Select On or Off Off If you select Off the product will notify you with a pop up message when new upgrade software is available On If you select On the product will automatically download new upgrade software when it is in Standby mode with the power off If it downloads new upgrade software the product will ask you if you want to install it when you turn the product on NOTE To us...

Page 56: ...ided as shown below Blu ray Disc DVD VIDEO title 1 title 2 chapter 1 chapter 2 chapter 1 chapter 2 chapter 3 1 2 Audio CD CD DA track 1 track 2 track 3 track 4 track 5 MP3 WMA DivX MKV and MP4 folder group 1 folder group 2 file 1 file 2 file 1 file 2 file 3 Playing a 2D video in 3D mode hZ You can enjoy an ordinary 2D video in 3D mode NOTE If you move to the Home or Smart Hub Home menu in 3D mode it wi...

Page 57: ...ckly through a chapter or track and use the skip function to jump to the next selection Searching for a Desired Scene hzZyx During playback press the SEARCH button Each time you press the SEARCH button the playback speed will change as follows BD ROM BD RE R DVD RW R DVD RW R DVD VIDEO 1 2 3 4 5 6 7 1 2 3 4 5 6 7 DivX MKV MP4 1 2 3 1 2 3 To return to normal speed playback press the PLAY button NOT...

Page 58: ...EAT button on the remote control Press the buttons to select Chapter or Title then press the ENTER button 1 2 Repeat Off To return to normal play press the REPEAT button again Press the buttons to select Off then press the ENTER button NOTE Depending on the disc the Repeat function may not be available Repeat the Section hzZy During playback press the REPEAT button on the remote control Press the ...

Page 59: ...played if the Blu ray Disc has a BONUSVIEW section Use the button to switch between primary and secondary audio modes The languages available depend on the languages that are encoded on the disc This function or certain languages may not be available Some Blu ray Discs may allow you to select either the multi channel LPCM or Dolby digital audio soundtrack in English Selecting the Subtitle Language...

Page 60: ... Mode then press the ENTER button Dynamic Choose this setting to increase Sharpness Normal Choose this setting for most viewing applications Movie This is the best setting for watching movies 1 2 3 1 2 3 User The user can adjust the Sharpness Noise reduction Contrast Brightness Color Tint function respectively NOTE If the system is connected to a BD Wise compliant TV that has set BD Wise to On the...

Page 61: ...ck in the Music List or Playlist 6 YELLOW C button Select or deselect a track in the music list 7 ENTER button Plays the selected track 8 button During playback moves to the next page in the Music List or moves to the next track in the Playlist button During playback moves to the previous page in the Music List or moves to the previous track in the Playlist 9 STOP button Stops a track 0 button Pla...

Page 62: ... button Select the desired play mode by pressing the REPEAT button repeatedly Off Audio CD CD DA MP3 Tracks on a disc are played in the order in which they were recorded on the disc One Song Audio CD CD DA MP3 Current track is repeated All Audio CD CD DA MP3 All tracks are repeated NOTE During playback press the TOOLS button and set Shuffle Mode to On You can play the tracks in a random order Playl...

Page 63: ...type of music you are listening to Press the SFE MODE button repetatively STEREO HALL 1 HALL 2 J CLUB CHURCH ROCK CLASSIC LIVE GAME MOVIE CONCERT STADIUM will be selected in turn Dolby Pro Logic II Mode You can select the desired Dolby Pro Logic II audio mode Press the PL II button Setting the speakers with PL IIz Set the 7 1CH Connection settings to PL IIz For further details refer to page 41 Pre...

Page 64: ...CH Connection settings to Surround Back For further details refer to page 41 Press the PL II button of the remote control until the desired setting is displayed Once selected with the desired mode sound will be heard through the surround speakers MOVIE Adds realism to the movie soundtrack MUSIC When listening to music you can experience sound effects as if you are listening to the actual performan...

Page 65: ...lect to set the slide show effects Background Music Select to listen to music while viewing a slide show 1 2 3 4 AUDIO ASSIGN You can listen to sound in 2 channel analog Dolby Digital or DTS using this unit Each time you press this button the input mode changes as follows For SAT function SAT HDMI1 SAT OPTIC1 SAT ANALOG For GAME function GAME HDMI2 GAME OPTIC2 GAME ANALOG For TV function TV OPTIC3...

Page 66: ...te Select to rotate the picture Rotate the picture either clockwise or counter clockwise Picture Settings Select to adjust the picture quality Information Shows the picture information including the name and size etc NOTE If the system is connected to a BD Wise compliant TV that has set BD Wise to On the Picture settings menu will not appear Before you can enable the background music function the ...

Page 67: ...ch time the button is pressed the sound switches between STEREO and MONO In a poor reception area select MONO for a clear interference free broadcast 1 2 1 2 3 4 5 C TUNER MEMORY Using buttons on the Main Unit Using the INPUT SELECT dial on the front panel to select FM Tune in to the desired station Preset Tuning 1 You must first add a desired frequency as a preset Press the STOP or TURNING MODE bu...

Page 68: ...IN COMPONE VIDEO OUT SAT GAME TV 1 SAT GA MONITOR AUDIO IN IN SAT GAME TV CD Y PB CB PR CR FM ANT iPod 1 2 3 Playing Music d WPS PBC My Devices Internet Settings Videos Photos Music My Contents iPod Connected Device Enter Return Function Connect the iPod dock connector to the iPod Jack on the rear panel of the product Place the iPod in the supplied iPod Dock Your iPod automatically turns on The iP...

Page 69: ...aying contents downloaded to the iPod If you have a problem using your iPod please visit www apple com support ipod Press the buttons to select Video and then press the ENTER button Select the video file to play You can use the remote control or the product to control simple playback functions such as the PLAY PAUSE STOP and buttons See page 19 NOTE You must have the VIDEO output Composite connecte...

Page 70: ...My Devices Internet Settings Videos Photos Music My Contents Function Press the buttons to select Internet and press the ENTER button 1 2 The Smart Hub screen appears NOTE Certain applications are available only in certain countries The Terms of Service Agreement screen appears If you want to agree press the buttons to select Agree then press the ENTER button NOTE Screens can take a few seconds to...

Page 71: ...ase visit www samsung com 4 Samsung Apps You can download various for pay or free of charge application services 5 Recommended Displays recommended contents managed by Samsung 6 Navigation Help Displays the remote control buttons you can use to navigate in Smart Hub RED A To log in to Smart Hub GREEN B To sort the applications YELLOW C To edit the applications BLUE D To change the settings of Smar...

Page 72: ...ive configuration of Smart Hub create your own Smart TV Account To create an account follow these steps Press the RED A button on your remote control The Login screen appears xxxxxxxx Contents 1 xxxxxxxx Contents 6 xxxxxxxx Contents 5 xxxxxxxx Contents 4 xxxxxxxx Contents 3 xxxxxxxx Contents 2 xxxxxxxx Contents 7 xxxxxxxx Contents 8 xxxxxxxx Contents 9 xxxxxxxx Contents 10 xxxxxxxx Contents 11 xxxx...

Page 73: ...utton on your remote The Login screen appears 8 9 10 11 12 13 14 1 Select the Down Arrow next to the Smart TV ID field and then press the ENTER button Select your ID from the list that appears and then press the ENTER button The Login screen re appears Select Password and then press the ENTER button The Password window and a keypad appears Using the keypad and your remote enter your password When d...

Page 74: ... Change Password and then press the ENTER button Enter your current password The next screen appears 1 2 3 4 5 6 1 2 On the next screen enter a new password on the first line Enter it again on the second line to confirm The Changing Password Complete message screen appears Press the ENTER button or wait for the screen to close about 5 seconds Remove from TV Account List The Remove from TV Account Li...

Page 75: ... a menu item and then press the ENTER button 3 4 1 2 The functions in the Edit Mode Menu bar are described below NOTE Some menu items may not appear on the screen To see these items press the to move to the screen edge and then press one more time to reveal the items You can close the bar by highlighting the X on the bottom right side and then pressing the ENTER button Move The Move function lets ...

Page 76: ...ect My Apps and then press the ENTER button The Move to Folder window closes and the application returns to the main My Applications screen 1 2 3 4 1 2 3 1 2 3 Rename Folder The Rename Folder function lets you rename folders To use the Rename Folder function follow these steps Press the YELLOW C button on your remote Press the to select a folder and then press the ENTER button Press the to select ...

Page 77: ...ically highlights User Defined when you start it To sort the application in My Applications follow these steps Press the GREEN B button on your remote Press the to select a sorting method and then press the ENTER button Smart Hub sorts the application by the method you have chosen 1 2 3 4 5 1 2 3 4 1 2 Samsung Apps Samsung Apps lets you download for pay or free of charge applications and services t...

Page 78: ...nt Name You can also use the BLUE D button on your remote to access the Sort By tabs Each time you press the BLUE D button you change the display from one sort tab to the next 1 2 3 4 5 Samsung Apps by category The following categories are available What s New Displays newly registered applications Video Displays various video media such as movies TV shows and short length videos Game Displays var...

Page 79: ... BD LIVE compliant disc Attach a USB memory stick to the USB jack on the front of the product and then check its remaining memory The memory device must have at least 1GB of free space to accommodate the BD LIVE services Insert a Blu ray disc that supports BD LIVE Select an item from various BD LIVE service contents provided by the disc manufacturer NOTE The way you use BD LIVE and the provided co...

Page 80: ...Are the speakers connected properly Is the speaker setup correctly customized Is the disc severely damaged Sound can be heard only from a few speakers and not all 8 On certain BD DVD discs sound is output from the front speakers only Check if the speakers are connected properly Adjust the volume When listening to a CD radio or TV sound is output to the front speakers only Select 3D SOUND NEO 6 PRO...

Page 81: ...Press and hold the romote control s STOP button for 5 seconds in STANDBY mode Using the RESET function will erase all stored settings Do not use this unless necessary Only S DIRECT TONE SLEEP and AUDIO ASSIGN buttons will operate after pressing the SHIFT button You have forgotten the rating level password With no disc in the product press and hold the product s STOP button for longer than 5 second...

Page 82: ... Abnormal HDMI output screen If random noise appears on the screen it means that TV does not support HDCP High bandwidth Digital Content Protection There is no sound from surround speakers Are the surround speakers connected properly Is Surround incorrectly set to NONE in the Speaker Size Is surround mode set to stereo There is no sound from surround back speakers Are the surround back speakers co...

Page 83: ...on Check if you have a firewall enabled If so disable the firewall function BD LIVE I cannot connect to the BD LIVE server Check whether the network connection is successful or not by using Network Test menu The memory device must have at least 1GB of free space to accommodate the BD LIVE service You can check the available size in BD Data Management See page 51 Please check whether the BD LIVE Inte...

Page 84: ...p 75 Ω load Pr 0 70 Vp p 75 Ω load Pb 0 70 Vp p 75 Ω load BD 480i DVD 480p 480i Video Audio HDMI 1080p 1080i 720p 480p PCM multichannel audio Bitstream audio PCM audio Amplifier Front speaker output 120W x 2 4Ω THD 0 9 Surround Back Front Height speaker output 120W x 2 4Ω THD 0 9 Center speaker output 120W 4Ω THD 0 9 Surround speaker output 120W x 2 4Ω THD 0 9 Frequency response Analog input 20Hz ...

Page 85: ...oof of purchase It must be presented to the authorized service center at the time service is requested This warranty does not cover damage due to accident fire flood and or other acts of God misuse incorrect line voltage improper installation improper or unauthorized repairs commercial use or damage that occurs in shipping Exterior and interior finish lamps glass are not covered under this warrant...

Page 86: ...sung 0700 726 7864 www samsung com Slovakia 0800 SAMSUNG 726 7864 www samsung com Spain 902 1 SAMSUNG 902 172 678 www samsung com Sweden 0771 726 7864 SAMSUNG www samsung com Switzerland 0848 SAMSUNG 7267864 CHF 0 08 min www samsung com ch www samsung com ch_fr French U K 0330 SAMSUNG 7267864 www samsung com Eire 0818 717100 www samsung com Lithuania 8 800 77777 www samsung com Latvia 8000 7267 ww...

Page 87: ...HW D7000_XAC_0516 indd 87 HW D7000_XAC_0516 indd 87 2011 05 16 3 47 18 2011 05 16 3 47 18 ...

Page 88: ...les possibilités Merci d avoir acheté ce produit Samsung Pour obtenir notre service complet veuillez enregistrer votre produit sur www samsung com register HW D7000 HW D7000_FRC_0516 indd 1 HW D7000_FRC_0516 indd 1 2011 05 16 3 48 15 2011 05 16 3 48 15 ...

Page 89: ... et ce le plus près possible du point d entrée du câble dans le bâtiment AVERTISSEMENT Afin de réduire tout risque d incendie ou d électrocution n exposez jamais cet appareil à la pluie ou à l humidité ATTENTION Évitez toute projection d eau sur l appareil et ne posez jamais d objet contenant un liquide ex un vase dessus CLASS 1 LASER PRODUCT KLASSE 1 LASER PRODUKT LUOKAN 1 LASER LAITE KLASS 1 LASE...

Page 90: ...s plus une troisième broche de mise à la terre La broche large ou la troisième broche garantissent votre sécurité Si la fiche fournie ne s adapte pas sur votre prise murale renseignez vous auprès d un électricien pour le remplacement de la prise obsolète 10 Protégez le cordon contre le piétinement ou les pincements en particulier près des fiches des prises murales et à leur point de sortie de l appa...

Page 91: ...a ppareil doit être transporté pendant l hiver attendez environ 2 heures pour qu il s adapte à la température de la pièce avant de l utiliser Les piles utilisées dans cet appareil contiennent des produits chimiques néfastes pour l environnement Ne jetez pas les piles avec les déchets domestiques Pour regarder la télévision en utilisant la fonction 3D INFORMATION IMPORTANTE SUR LA SANTÉ ET LA SÉCUR...

Page 92: ...ent en vue de le reproduire Blu ray Disc Blu ray et les logos qui y sont associés sont des marques commerciales de Blu ray Disc Association iPod est une marque de commerce d Apple Inc déposée aux États Unis et dans d autres pays iPhone est une marque de commerce d Apple Inc Avis de licence libre En cas d utilisation de logiciels libres les licences libres sont disponibles dans le menu du produit D...

Page 93: ...on d une console de jeux 29 Connexion d un lecteur CD 30 Flux de conversion vidéo en fonction du port connecté 31 Connexion de l antenne FM 31 Connexion des composants auxiliaires 32 Connexion au réseau CONFIGURATION 34 34 Paramètres initiaux 35 Accès au menu des paramètres 36 Affichage 36 Réglages 3D 37 Format image Taille et format de l image 37 Taille écran Smart Hub 37 BD Wise Produits Samsung ...

Page 94: ...du socle 69 Modèles iPod iPhone susceptibles d être utilisés avec ce produit SERVICES RÉSEAU 70 70 Utilisation de la fonction Smart Hub 77 Apps Samsung 79 Utilisation de la fonction vTuner 79 BD LIVE 79 Utilisation de la fonction AllShare AUTRES INFORMATIONS 80 80 Dépannage 84 Caractéristiques Les figures et illustrations de ce manuel d utilisation sont fournies à titre de référence et peuvent dif...

Page 95: ...onction Audio Sync Si vous avez connecté le produit à un téléviseur numérique la vidéo pourrait parfois être en décalage avec le son Pour résoudre ce problème vous pouvez régler le décalage de l audio pour la synchroniser avec la vidéo Fonction iPod SYNC Si le signal vidéo d un lecteur iPod que vous avez raccordé au produit est en décalage par rapport au signal audio pendant la lecture vous pouvez...

Page 96: ... que le Dolby Digital et ce pour offrir un son aux tonalités plus riches DTS Neo 6 Offrez vous une gamme complète de 6 canaux en convertissant un signal MIC numérique ou stéréo analogique à l aide du décodage de matrice numérique DTS DTS 96 24 Ajoute un canal ambiophonique arrière pour offrir un son ambiophonique étendu comparativement au format sonore Dolby Digital ordinaire de 5 1 canaux DTS ES ...

Page 97: ...kage USB avec un contenu MP3 or WMA JPEG G Ceci indique une fonction disponible sur un disque CD RW R DVD RW R ou un support de stockage USB avec un contenu JPEG DivX MKV MP4 DivX x Ceci indique une fonction disponible sur un disque CD RW R DVD RW R ou un support de stockage USB avec un contenu DivX Périphérique de stockage USB F Ceci indique une fonction disponible sur un périphérique de stockage...

Page 98: ...trement peuvent rendre la lecture du disque impossible Lors de la lecture de titres en format BD Java il est possible que certaines fonctions soient plus lentes ou que le chargement soit plus long que pour un titre normal Les disques qui ne peuvent pas être lus Disque DVD HD DVD RAM Disque DVD R 3 9 Go pour Système auteur DVD RW mode VR CD super audio à l exception de la couche CD Disques DVD ROM ...

Page 99: ...films Durant le passage de la première couche à la deuxième couche d un DVD VIDÉO bicouche une déformation momentanée de l image ou une distorsion du son peuvent se produire Il ne s agit pas d un mauvais fonctionnement du lecteur DVD RW R R Ce lecteur peut lire des disques DVD RW R R enregistrés et finalisés à l aide d un graveur vidéo DVD La capacité de lecture du lecteur peut dépendre des conditio...

Page 100: ...idéo pris en charge Extension de fichier Conteneur Codec Vidéo Codec audio Résolution avi AVI DivX 3 11 4 x 5 1 6 0 MP3 AC3 LPCM ADPCM DTS Core 1920x1080 XviD 1920x1080 H 264 BP MP HP 1920x1080 MPEG4 SP ASP 1920x1080 Motion JPEG 1920x1080 mkv MKV DivX 3 11 4 x 5 1 6 0 MP3 AC3 LPCM ADPCM DTS Core 1920x1080 XviD 1920x1080 H 264 BP MP HP 1920x1080 MPEG4 SP ASP 1920x1080 Motion JPEG 1920x1080 asf ASF ...

Page 101: ... une vidéo via le réseau celle ci risque de ne pas s exécuter correctement selon l état du réseau Décodeur vidéo Norme H 264 Level 4 1 prise en charge Formats H 264 FMO ASO RS VC1 SP MP AP L4 AVCHD non pris en charge XVID MPEG4 SP ASP Résolution inférieure à 1280 x 720 60 images maxi Résolution supérieure à 1280 x 720 30 images maxi Format GMC 2 ou supérieur non pris en charge Décodeur audio Forma...

Page 102: ...de plusieurs périphériques de mémoire dans un lecteur multicarte peut entraîner un dysfonctionnement Le protocole PTP pour caméras numériques n est pas pris en charge Ne déconnectez pas le périphérique USB durant un processus de chargement Plus la résolution de l image est élevée plus lent le délai d affichage de l image Les fichiers MP3 de type DRM téléchargés depuis un site commercial ne sont pas ...

Page 103: ...tionner les éléments du menu 7 TOUCHE OUVRIR FERMER Pour éjecter un disque 8 AFFICHAGE Affiche l état de la lecture entrée audio l heure le mode d écoute etc 9 MASTER VOLUME Pour régler le volume 10 TOUCHE DE MISE EN MARCHE Permet de mettre l appareil en marche ou en arrêt MASTER VOLUME INPUT SELECT TONE CONTROL TUNING MODE AUDIO ASSIGN AUDIO EFFECT Smart HUB S Direct vTuner AV SYNC SELECT MEMORY M...

Page 104: ...DIO EFFECT Bascule pour sélectionner un mode de son ambiophonique 24 TOUCHE 3D SOUND Pour définir le son 3D 25 PRISE ENTREE ASC Permet de connecter le microphone MRC Etalonnage salle musique afin de configurer l ASC 26 PORT USB Vous pouvez connecter ici un périphérique de stockage USB et l utiliser lors d une connexion à BDLIVE Ceci peut aussi être utilisé pour les mises à niveau des logiciels et l...

Page 105: ...OUT Transmettent le signal vidéo en composante 11 PRISES OPTICAL IN DIGITAL AUDIO IN Reçoivent le signal audio optique numérique 12 PRISE COAXIAL IN DIGITAL AUDIO IN Reçoit le signal audio numérique coaxial 13 PRISE SUBWOOFER AUDIO OUT Pour connecter le caisson d extrêmes graves 14 BORNES SPEAKER OUT Les prises d enceinte avant et ambiophonique arrière peuvent être connectées à une enceinte qui pr...

Page 106: ...r appuyez sur la touche TV Permet d arrêter de démarrer la lecture d un disque Corrigez la synchronisation audio pendant la lecture du contenu vidéo de l iPod Appuyez ici pour rechercher du contenu Appuyez ici pour utiliser Netflix Appuyez pour sélectionner le mode Blu ray ou Appuyez pour sélectionner le mode vidéo du téléviseur Permet de sélectionner MONO ou STEREO pour la diffusion de la radio P...

Page 107: ...e de téléviseur Type de piles AAA Marque Code Admiral M Wards 56 57 58 A Mark 01 15 Anam 01 02 03 04 05 06 07 08 09 10 11 12 13 14 AOC 01 18 40 48 Bell Howell M Wards 57 58 81 Brocsonic 59 60 Candle 18 Cetronic 03 Citizen 03 18 25 Cinema 97 Classic 03 Concerto 18 Contec 46 Coronado 15 Craig 03 05 61 82 83 84 Croslex 62 Crown 03 Curtis Mates 59 61 63 CXC 03 Daewoo 02 03 04 15 16 17 18 19 20 21 22 2...

Page 108: ...a face des enceintes avant avec la face de l enceinte centrale ou placez les légèrement en avant de l enceinte centrale Enceinte centrale Il est préférable de l installer à la même hauteur que les enceintes avant Vous pouvez aussi l installer directement sur ou sous le téléviseur Enceintes ambiophoniques Placez ces enceintes derrière votre position d écoute Si vous manquez d espace placez les face...

Page 109: ...enir des graves puissantes et solides Si vous placez une enceinte à proximité de votre téléviseur il se peut qu il y ait une distorsion de la couleur dans l écran en raison du champ magnétique généré par l enceinte Dans ce cas éloignez l enceinte Fixation du noyau torique en ferrite au cordon d alimentation de l unité principale Si vous fixez le noyau torique en ferrite au cordon électrique cela e...

Page 110: ...uits de gamme inférieure à ceux que nous recommandons vous pourriez éprouver des problèmes d unité d enceinte ou d amplificateur Vous devez donc vous montrer vigilant 1 2 3 HDMI 1 SAT ARC MONITOR GAME HDMI 2 AUX1 HDMI 3 AUX2 HDMI 4 MDMI IN HDMI OUT iPod LAN VIDEO IN COMPONENT IN OUT VIDEO OUT SAT GAME TV 1 SAT 2 GAME MONITOR AUDIO IN IN OUT GAME SAT TV CD Y PB CB PR CR OPTICAL 1 SAT OPTICAL 2 GAME ...

Page 111: ...ec la fonction Bi AMP vous pouvez utiliser 5 1 canaux pour la sortie de l enceinte de l unité principale HDMI 1 SAT ARC MONITOR GAME HDMI 2 AUX1 HDMI 3 AUX2 HDMI 4 HDMI IN HDMI OUT iPod LAN VIDEO IN COMPONENT IN OUT VIDEO OUT SAT GAME TV 1 SAT 2 GAME MONITOR AUDIO IN IN OUT SAT GAME TV CD Y PB CB PR CR OPTICAL 1 SAT OPTICAL 2 GAME OPTICAL 3 TV COAXIAL CD SUBWOOFER OUT FRONT FRONT SURROUND SURROUND...

Page 112: ... prend en charge ce système Il se peut que la qualité du son sortant avec une connexion HDMI fréquence d échantillonnage et débit binaire soit limitée par le rendement du périphérique branché Vous n avez pas à brancher un câble audio supplémentaire car la connexion HDMI prend en charge tant le son que les images HDMI 1 SAT ARC MONITOR GAME HDMI 2 AUX1 HDMI 3 AUX2 HDMI 4 HDMI IN HDMI OUT iPod LAN V...

Page 113: ...trée AUDIO IN TV de votre récepteur à la sortie audio du téléviseur HDMI 1 SAT ARC MONITOR GAME HDMI 2 AUX1 HDMI 3 AUX2 HDMI 4 HDMI IN HDMI OUT iPod LAN VIDEO IN COMPONENT IN OUT VIDEO OUT SAT GAME TV 1 SAT 2 GAME MONITOR AUDIO IN IN OUT SAT GAME TV CD Y PB CB PR CR OPTICAL 1 SAT OPTICAL 2 GAME OPTICAL 3 TV COAXIAL CD SUBWOOFER OUT FRONT FRONT SURROUND SURROUND CENTER SPEAKERS OUT SURROUND BACK FR...

Page 114: ...tez le à la prise d entrée audio droite ou gauche de l unité principale Connectez la fiche rouge du câble audio à la prise rouge et le câble blanc à la prise blanche HDMI 1 SAT ARC MONITOR GAME HDMI 2 AUX1 HDMI 3 AUX2 HDMI 4 HDMI IN HDMI OUT iPod LAN VIDEO IN COMPONENT IN OUT VIDEO OUT SAT GAME TV 1 SAT 2 GAME MONITOR AUDIO IN IN OUT SAT GAME TV CD Y PB CB PR CR OPTICAL 1 SAT OPTICAL 2 GAME OPTICAL...

Page 115: ...I 3 AUX2 HDMI 4 HDMI IN HDMI OUT iPod LAN VIDEO IN COMPONENT IN OUT VIDEO OUT SAT GAME TV 1 SAT 2 GAME MONITOR AUDIO IN IN OUT SAT GAME TV CD Y PB CB PR CR OPTICAL 1 SAT OPTICAL 2 GAME OPTICAL 3 TV COAXIAL CD SUBWOOFER OUT FRONT FRONT SURROUND SURROUND CENTER SPEAKERS OUT SURROUND BACK FRONT HEIGHT SURROUND BACK FRONT HEIGHT FM ANT SPEAKER IMPEDANCE 4 8 A AR R A AR R A AR RC C C C C C M MO ONI M M...

Page 116: ...ENT IN OUT VIDEO OUT SAT GAME TV 1 SAT 2 GAME MONITOR AUDIO IN IN OUT SAT GAME TV CD Y PB CB PR CR OPTICAL 1 SAT OPTICAL 2 GAME OPTICAL 3 TV COAXIAL CD SUBWOOFER OUT FRONT FRONT SURROUND SURROUND CENTER SPEAKERS OUT SURROUND BACK FRONT HEIGHT SURROUND BACK FRONT HEIGHT FM ANT SPEAKER IMPEDANCE 4 8 A AR R A AR R A AR RC C C C C C M MO ONI M MO ONI O TOR R O TOR R HDMI IN HDMI OUT iPod LAN VIDEO IN ...

Page 117: ...uvant atteindre 1080p La conversion automatique n est pas appliquée à une source vidéo qui provient d un port HDMI IN La résolution maximum du signal d entrée vidéo est de 480i les résolutions d entrée supérieures ne sont pas prise en charge La conversion vidéo est uniquement compatible avec le système couleur NTSC HDMI 1 SAT ARC MONITOR GAME HDMI 2 AUX1 HDMI 3 AUX2 HDMI 4 HDMI IN HDMI OUT iPod LA...

Page 118: ...nt de cette unité 1 2 HDMI 1 SAT ARC MONITOR GAME HDMI 2 AUX1 HDMI 3 AUX2 HDMI 4 HDMI IN HDMI OUT iPod LAN VIDEO IN COMPONENT IN OUT VIDEO OUT SAT GAME TV 1 SAT 2 GAME MONITOR AUDIO IN IN OUT SAT GAME TV CD Y PB CB PR CR OPTICAL 1 SAT OPTICAL 2 GAME OPTICAL 3 TV COAXIAL CD SUBWOOFER OUT F FM ANT A AR R A AR R A AR RC C C C C C M MO ONI M MO ONI O TOR R O TOR R HDMI IN HDMI OUT iPod LAN VIDEO IN CO...

Page 119: ...rnet au serveur de mise à jour de logiciel Samsung peut ne pas être autorisé en fonction du routeur que vous utilisez ou de la politique ISP Pour de plus amples informations contactez votre fournisseur de services ISP Pour les utilisateurs DSL veuillez utiliser un routeur pour effectuer la connexion au réseau Pour utiliser la fonction de partage total AllShare un ordinateur doit être connecté au r...

Page 120: ...orme aux nouvelles spécifications de certification Wi Fi Si votre point d accès prend en charge la configuration WPS Wi Fi Protected Setup vous pouvez effectuer la connexion au réseau au moyen d une configuration par touche ou d un NIP numéro d identification personnel La configuration WPS configurera automatiquement la clé SSID et WPA dans l un ou l autre mode Méthodes de connexion Vous pouvez configurer...

Page 121: ... paramètres réseau Ensuite passez à l étape 6 Le menu Accueil apparaît Pour de plus amples renseignements sur le menu Accueil veuillez vous reporter à la page 35 1 2 3 4 5 6 Menu Accueil d WPS PBC Mes appareils Internet Paramètres Vidéos Photos Musique Mon contenu Fonction REMARQUE Le menu Accueil ne s affiche pas si vous ne définissez pas les paramètres initiaux sauf dans le cas ci après Si vous ap...

Page 122: ...ls 2 Permet de sélectionner la Fonction 3 Sélectionne Mon contenu 4 Sélectionne Internet 5 Sélectionne Paramètres 6 Affiche les touches pouvant être utilisées 1 Appuyez sur les touches pour sélectionner Paramètres puis appuyez sur la touche ENTRER Appuyez sur les touches pour sélectionner le sous menu désiré puis appuyez sur la touche ENTRER Appuyez sur les touches pour sélectionner l élément désir...

Page 123: ...nu Blu ray s affiche Appuyez de nouveau sur la touche ARRÊT puis sélectionnez Paramètres 3D dans le menu Blu ray Selon le contenu et la position de l image sur l écran de votre téléviseur vous pourriez voir des barres noires verticales sur le côté gauche droit ou sur les deux côtés Taille écran Vous permet d entrer la taille réelle de l écran de votre téléviseur de sorte que le produit puisse régle...

Page 124: ... plus récente de Samsung Lorsque vous connectez un produit Samsung et un téléviseur Samsung dotés tous deux de la fonctionnalité BD Wise via HDMI l appareil émet des vidéos en sortie selon la résolution et la vitesse d enregistrement d image propres au disque BD DVD Arrêt La résolution de sortie demeure à la résolution que vous avez précédemment réglée dans le menu Résolution indépendamment de la ...

Page 125: ...i 480i 480i Lecture de DVD Sortie Configuration HDMI connecté HDMI non connecté Mode HDMI Mode Composantes VIDÉO Mode Composantes Mode VIDÉO BD Wise 480i 480i Auto Résolution max de l entrée du téléviseur 480i 1080p à 60 ips 1080p 60F 480i 1080i 1080i 480i 480p 480i 720p 720p 480i 480p 480i 480p 480p 480i 480p 480i 480i 480i 480i REMARQUE Si le téléviseur connecté au produit ne prend pas en charge ...

Page 126: ...uence d image Vous pouvez sélectionner Trame vidéo uniquement lorsque le produit est en mode de résolution de sortie HDMI 1080i ou 1080p Auto La fonction Fréquence cinéma 24 ips est activée Désac La fonction Fréquence cinéma 24 ips est désactivée Couleure profondes HDMI Vous permet de diffuser la vidéo avec des couleurs profondes depuis la prise HDMI OUT Le mode Couleurs profondes reproduit les co...

Page 127: ...ntes Cette fonction vous permet d écouter un son à gamme étendue Petit sélectionnez cette option lorsque vous utilisez de petites enceintes Aucun sélectionnez cette option lorsque vous n utilisez aucune enceinte Activ Caisson de graves sélectionnez cette option lorsque vous utilisez un caisson de graves Désac Caisson de graves sélectionnez cette option lorsque vous n utilisez pas de caisson de gra...

Page 128: ...r l enceinte ambiophonique arrière dans le coin supérieur avant Ce paramètre vous permet d activer le mode Dolby Pro Logic IIz Bi AMP Sélectionnez ceci si vous souhaitez connecter l enceinte compatible Bi Amp au port d enceinte ambiophonique arrière Ce paramètre vous permet d activer la fonction Bi Amp REMARQUE Selon les paramètres ambiophoniques arrière les menus de l enceinte ambiophonique arriè...

Page 129: ...ntre Avant droit Ambioph droit Ambioph arr droit Ambioph arr gauche Ambioph gauche Caisson de graves Appuyez sur la touche RETURN pour annuler le réglage de la fonction Etalonnage salle musique 1 2 REMARQUE Le réglage de la fonction Etalonnage salle musique demande environ 3 minutes Assurez vous qu il n y a pas de disque dans le produit lorsque vous exécutez la fonction Étalonnage du son musical d...

Page 130: ... SR SBL SW DTS HD DTS HD Master Audio O O O O O DTS HD MSTR L C R SL SR SBL SBR SW DTS HD High Resolution O O O O O DTS HD L C R SL SR SBL SBR SW LPCM Multi Channel Multi Channel O O O O O Digtal LPCM L C R SL SR SBL SBR SW Multi Channel O O O O Hauteur O Digtal LPCM L C R SL SR H SW 2 ch PCM Stereo O O Digtal LPCM L R SW ProLogic IIx O O O O O Digtal LPCM Dolby Digital ProLogic IIx L C R SL SR SB...

Page 131: ...t pas le signal audio elle n effectuera pas automatiquement la lecture par le biais des canaux 6 1 7 1 Désac Le décodeur Surround EX DTS ES Dolby Digital ne sera pas utilisé pour la lecture Activ le signal Dolby Digital ou DTS sera émis par le biais des canaux 6 1 7 1 à l aide du décodeur Surround EX DTS ES Dolby Digital REMARQUE Vous ne pouvez pas utiliser le canal DTS ES si les enceintes ambioph...

Page 132: ...ie numérique en fonction des fonctionnalités de l appareil A V que vous avez connecté au produit PCM Choisissez cette option si vous avez connecté un appareil A V qui prend en charge la configuration HDMI Bitstream non traité Sélectionnez cette option si vous avez connecté un appareil A V HDMI doté des fonctionnalités de décodage Dolby TrueHD et DTS HD Master Audio Bitstream DTS réencodé Choisissez...

Page 133: ... audio de la fonction principale et de BONUSVIEW dans l audio PCM et ajoute les effets sonores de navigation Produit le flux de données audio principal de sorte que votre appareil A V peut décoder le train de bits audio Vous n entendrez pas l audio BONUSVIEW ni les effets sonores de navigation Décode à la fois le flux de données audio de la fonction principale et de BONUSVIEW dans l audio en format ...

Page 134: ...e la fonctionnalité vous pouvez utiliser WPS PBC ou Connexion Un pied Si votre adresse IP est statique vous devez utiliser la procédure de configuration fournie dans le guide tant pour les connexions câblées que sans fil Paramètres réseau Pour lancer la configuration de la connexion réseau sur votre produit suivez les étapes suivantes Dans le menu Accueil appuyez sur les touches pour sélectionner Par...

Page 135: ... ci dessus 1 2 3 4 1 2 3 4 5 6 7 8 9 10 Appuyez sur la touche ENTRER pour sélectionner OK L écran État du réseau apparaît Le produit se connecte au réseau une fois que la connexion réseau a été validée Réseau sans fil Vous pouvez configurer le réseau sans fil de trois façons Sans fil général En utilisant le WPS PBC Connexion Un pied La connexion Sans fil Général comprend les deux procédures de configura...

Page 136: ...iquez sur le bouton Détails Les paramètres réseau sont affichés 4 5 1 2 3 4 Pour entrer les paramètres réseau dans le produit exécutez les étapes suivantes Suivez les étapes 1 à 5 de la procédure Configuration de la connexion Réseau sans fil Auto Ensuite appuyez sur les touches pour placer le curseur à Terminé puis appuyez sur la touche ENTRER L écran État du réseau apparaît Paramètres Affichage Audio...

Page 137: ...tion Sélectionner ce type de connexion après avoir placé le routeur à moins de 10 po 25 cm de l adaptateur de réseau local sans fil Samsung One Foot Connection WPS PBC 1 2 3 1 Appuyez sur la touche ENTRER Veuillez placer le routeur sans fil Samsung à moins de 25 cm 10 po de l adaptateur RL sans fil Samsung pour le connecter Patientez jusqu à ce que la connexion soit automatiquement établie État du ré...

Page 138: ...s pouvez vérifier les données du périphérique y compris la capacité de stockage supprimer les données BD ou modifier le périphérique de stockage de mémoire Flash Information sur l écran Gestion des données BD Appareil actuel Affiche le périphérique sélectionné Espace total Capacité totale de mémoire du périphérique de stockage Espace disponible Capacité de mémoire disponible sur le périphérique Suppr...

Page 139: ...touches numériques Le mot de passe par défaut est 0000 Après avoir défini votre mot de passe sélectionnez une limite d âge que vous souhaitez définir pour le classement parental BD et le niveau de classement que vous souhaitez définir pour le classement parental DVD L appareil ne peut lire que les disques Blu ray équivalents ou inférieurs en capacité à la puissance nominale minimum de classification p...

Page 140: ... les quatre étapes suivantes Sélectionnez Par Internet puis appuyez sur la touche ENTRER Le message Connexion au serveur en cours apparaît Si un téléchargement est disponible la fenêtre contextuelle apparaît affichant la barre de progression et le téléchargement commence Lorsque le téléchargement est terminé la fenêtre Demande de mise à niveau apparaît et propose trois choix Mettre à niveau mainten...

Page 141: ...B Pour mettre à niveau par USB exécutez les étapes suivantes Allez à www samsung com bluraysupport Téléchargez le fichier auto décompressable le plus récent de mise à niveau du logiciel par USB sur votre ordinateur Décompressez le fichier sur votre ordinateur Vous devriez avoir un seul dossier portant le même nom que le fichier compressé Copiez le dossier sur une clé USB Assurez vous que le tiroir à ...

Page 142: ...ez Activ ou Désac Désac Si vous sélectionnez Désac le produit vous notifiera par un message déroulant de la disponibilité d un nouveau logiciel de mise à niveau Activ Si vous sélectionnez Activ le produit procèdera automatiquement au téléchargement du nouveau logiciel de mise à niveau lorsqu il sera en mode Veille hors tension Avant de télécharger le nouveau logiciel de mise à niveau le système vou...

Page 143: ...t généralement divisé comme suit Disque Blu ray DVD VIDÉO Titre 1 Titre 2 Chapitre 1 Chapitre 2 Chapitre 1 Chapitre 2 Chapitre 3 1 2 CD audio CD DA Piste 1 Piste 2 Piste 3 Piste 4 Piste 5 MP3 WMA DivX MKV et MP4 Dossier groupe 1 Dossier groupe 2 Fichier 1 Fichier 2 Fichier 1 Fichier 2 Fichier 3 Lecture d une vidéo 2D en 3D hZ Vous pouvez bénéficier d un mode vidéo ordinaire 2D en mode 3D REMARQUE S...

Page 144: ... rapide dans un chapitre ou une piste et utiliser la fonction de saut pour passer à la sélection suivante Recherche de la scène de votre choix hzZyx En cours de lecture appuyez sur la touche RECHERCHE Chaque fois que vous appuyez sur la touche RECHERCHE la vitesse de lecture change comme suit BD ROM BD RE R DVD RW R DVD RW R DVD VIDEO 1 2 3 4 5 6 7 1 2 3 4 5 6 7 DivX MKV MP4 1 2 3 1 2 3 Appuyez su...

Page 145: ... ou le chapitre du disque En cours de lecture appuyez sur la touche REPEAT de la télécommande Appuyez sur les touches pour sélectionner Chapitre ou Titre puis sur la touche ENTRER 1 2 Répétition Arrêt Appuyez à nouveau sur la touche REPEAT pour revenir à la lecture normale Appuyez sur les touches pour sélectionner Arrêt puis sur la touche ENTRER REMARQUE La fonction Répéter peut ne pas être dispon...

Page 146: ... primaire secondaire s affichent aussi si le disque Blu ray possède un segment BONUSVIEW Utilisez la touche pour basculer entre les modes audio primaire et secondaire Cette fonction dépend des langues audio présentes sur le disque et peut donc ne pas être disponible Sur certains disques Blu ray vous pouvez sélectionner plusieurs chaînes au format LPCM ou des bandes son en anglais Dolby digital Séle...

Page 147: ...ouches pour sélectionner le Mode souhaité Dynamique choisissez ce réglage pour améliorer la netteté Normal choisissez ce réglage pour la plupart des applications de visualisation Film il s agit du meilleur réglage pour la visualisation des films 1 2 3 1 2 3 Utilisateur L utilisateur peut régler les options Netteté Réduction de bruit Contraste Luminosité Couleur et Teinte REMARQUE Si le système est ...

Page 148: ... C sélectionnez Mode Édition ou Mode Lecture 7 Touche ENTRER Lit la piste sélectionnée 8 Touche Durant la lecture ceci permet d accéder respectivement à la page suivante dans la liste musicale ou à la piste suivante dans la liste de lecture Touche Durant la lecture ceci permet de revenir respectivement sur la page précédente dans la liste musicale ou sur la piste précédente dans la liste de lectur...

Page 149: ...hoix en appuyant à plusieurs reprises sur la touche REPEAT Désactivée CD audio CD DA MP3 Les pistes du disque sont lues selon l ordre dans lequel elles ont été enregistrées Une CD audio CD DA MP3 Toutes les pistes sont répétées Tous CD audio CD DA MP3 All tracks are repeated REMARQUE Pendant la lecture appuyez sur la touche TOOLS et réglez le mode Aléatoire à Activ Les pistes peuvent être lues dan...

Page 150: ...outez Appuyez à plusieurs reprises sur la touche SFE MODE STEREO HALL 1 HALL 2 J CLUB CHURCH ROCK CLASSIC LIVE GAME MOVIE CONCERT STADIUM seront sélectionnés à tour de rôle Mode Dolby Pro Logic II Vous pouvez sélectionner le mode audio Dolby Pro Logic II souhaité Appuyez sur la touche PL II Réglage des enceintes avec PL IIz Réglez 7 1CH Connection Connexion 7 1 canaux à PL IIz Pour plus de détails...

Page 151: ...églez Connexion 7 1 canaux à Ambiophonie arrière Pour plus de détails reportez vous à la page 41 Appuyez sur la touche PL II de la télécommande jusqu à ce que le réglage souhaité s affiche Une fois que le mode souhaité a été sélectionné le son est produit par les enceintes ambiophoniques MOVIE Assure un son plus réel à la bande son du film MUSIC Lorsque vous écoutez de la musique vous entendez les e...

Page 152: ...rmet de définir un effet pour le diaporama Musique de fond Sélectionnez pour écouter de la musique tout en visionnant un diaporama 1 2 3 4 AUDIO ASSIGN Avec cet appareil vous pouvez obtenir un son analogique 2 canaux un son Dolby Digital ou un son DTS Chaque fois que vous appuyez sur cette touche les fonctions du mode d entrée défilent comme suit Pour la fonction SAT SAT HDMI1 SAT OPTIC1 SAT ANALOG ...

Page 153: ...u à x4 Rotation sélectionnez cette fonction si vous souhaitez faire pivoter l image L image pivotera dans le sens des aiguilles d une montre ou dans le sens inverse Paramètres de l image Sélectionnez si vous voulez régler la qualité de l image Information affiche les informations relatives à l image nom taille etc REMARQUE Si le système est connecté à un téléviseur compatible BD Wise dont la foncti...

Page 154: ...z sur cette touche le son est commuté entre STEREO et MONO Dans une zone de faible réception sélectionnez MONO pour une réception claire sans interférence 1 2 1 2 3 4 5 C TUNER MEMORY Utilisation des touches de l unité principale Utilisation du cadran INPUT SELECT de la face avant pour sélectionner FM Sélectionnez une station Syntonisation préréglée 1 Vous devez d abord ajouter une fréquence de vo...

Page 155: ...C MONITOR HDMI OUT iPod LAN VIDEO IN COMPONE VIDEO OUT SAT GAME TV 1 SAT GA MONITOR AUDIO IN IN SAT GAME TV CD Y PB CB PR CR FM ANT iPod 1 2 3 Lecture de la musique d WPS PBC My Devices Internet Paramètres Vidéos Photos Music Mon contenu iPod Appareil connecté Entrer Retour Fonction Connectez le connecteur du socle d iPod à la prise iPod située sur la face arrière du produit Placez l iPod dans le ...

Page 156: ...tenu téléchargé sur l iPod Si vous rencontrez des difficultés dans l utilisation de l iPod reportez vous au site Web du constructeur à l adresse www apple com support ipod Appuyez sur les touches pour sélectionner la vidéo puis appuyez sur la touche ENTRER Sélectionnez le fichier vidéo que vous souhaitez visionner Vous pouvez utiliser les touches de la télécommande ou le produit pour exécuter les fo...

Page 157: ...s appareils Internet Paramètres Vidéos Photos Musique Mon contenu Fonction Appuyez sur les touches pour sélectionner Internet puis appuyez sur la touche ENTRER 1 2 L écran Smart Hub apparaît REMARQUE Certaines applications ne sont offertes que dans certains pays L écran Conditions de l entente de service s affiche Si vous voulez accepter les conditions appuyez sur pour sélectionner J accepte puis a...

Page 158: ...sung com 4 Samsung Apps Vous pouvez télécharger plusieurs applications facturables ou gratuites 5 Recommandé Affiche le contenu recommandé géré par Samsung 6 Aide à la navigation Affiche les touches de la télécommande que vous pouvez utiliser pour naviguer dans Smart Hub ROUGE A Pour ouvrir une session dans Smart Hub VERTE B Pour trier les applications JAUNE C Pour modifier les applications BLEUE D P...

Page 159: ...ropre configuration exclusive de Smart Hub créez votre propre compte Smart TV Pour créer un compte exécutez les étapes suivantes Appuyez sur la touche ROUGE A de la télécommande L écran Connexion apparaît xxxxxxxx Contents 1 xxxxxxxx Contents 6 xxxxxxxx Contents 5 xxxxxxxx Contents 4 xxxxxxxx Contents 3 xxxxxxxx Contents 2 xxxxxxxx Contents 7 xxxxxxxx Contents 8 xxxxxxxx Contents 9 xxxxxxxx Content...

Page 160: ... télécommande L écran Connexion apparaît 8 9 10 11 12 13 14 1 Sélectionnez la flèche descendante située à côté du champ ID Smart TV puis appuyez sur la touche ENTRER Sélectionnez votre ID dans la liste qui apparaît puis appuyez sur la touche ENTRER L écran Connexion réapparaît Sélectionnez Mot de passe puis appuyez sur la touche ENTRER L écran Mot de passe et un clavier apparaissent À l aide du cla...

Page 161: ...e passe exécutez les étapes suivantes Sélectionnez Modif m de p puis appuyez sur la touche ENTRER Saisissez votre mot de passe actuel L écran suivant apparaît 1 2 3 4 5 6 1 2 À l écran suivant saisissez le nouveau mot de passe sur la première ligne Saisissez le de nouveau sur la seconde ligne Le message Changement du mot de passe réussi apparaît Appuyez sur la touche ENTRER ou patientez jusqu à ce...

Page 162: ...ent du menu puis appuyez sur la touche ENTRER 3 4 1 2 Les fonctions de la barre du menu Mode Éditer sont décrites ci dessous REMARQUE Certains éléments du menu pourraient ne pas apparaître à l écran Pour voir ces éléments appuyez sur afin de vous placer au bord de l écran puis appuyez de nouveau pour exposer les éléments Vous pouvez fermer la barre en surlignant le X situé sur le côté droit inférie...

Page 163: ...a touche ENTRER La fenêtre Déplacer vers dossier se ferme et l application est renvoyée vers l écran Mes applications 1 2 3 4 1 2 3 1 2 3 Renommer le dossier La fonction Renommer le dossier vous permet de renommer les dossiers Pour utiliser la fonction Renommer le dossier exécutez les étapes suivantes Appuyez sur la touche JAUNE C de votre télécommande Appuyez sur les pour sélectionner un dossier ...

Page 164: ...eur lorsque vous démarrez l application Pour trier les applications dans Mes applications suivez les étapes suivantes Appuyez sur la touche VERTE B de votre télécommande Appuyez sur les pour sélectionner un mode de tri puis appuyez sur la touche ENTRER Smart Hub trie les applications selon la méthode que vous avez choisie 1 2 3 4 5 1 2 3 4 1 2 Apps Samsung Apps Samsung vous permet de télécharger d...

Page 165: ...e pour accéder aux onglets Trier par Chaque fois que vous appuyez sur la touche BLEUE D vous passez de l affichage d un onglet de tri au suivant 1 2 3 4 5 Apps Samsung par catégorie Les catégories suivantes sont offertes Quoi de neuf Affiche les applications récemment enregistrées Vidéo Affiche différents média vidéo films émissions télévisées et vidéos de court métrage Jeux Affiche différents jeux tel...

Page 166: ...tible BD LIVE Reliez une carte mémoire flash USB à la prise USB située à l avant de l appareil puis vérifiez la capacité de mémoire disponible Le périphérique de stockage doit disposer au minimum de 1 Go d espace libre pour pouvoir prendre en charge les services BD LIVE Insérez un disque Blu ray compatible avec les services BD LIVE Sélectionnez un élément parmi les nombreux contenus BD LIVE fournis ...

Page 167: ...nt elles raccordées correctement La configuration des enceintes a t elle été correctement personnalisée Le disque a t il été sérieusement endommagé Le son n est généré que par certaines enceintes pas par les 8 Sur certains disques Blu ray DVD le son est uniquement généré par les enceintes avant Vérifiez si les enceintes sont correctement connectées Réglez le volume Pendant l écoute d un CD de la rad...

Page 168: ... de la télécommande et maintenez la enfoncée pendant 5 secondes en mode STANDBY L utilisation de la fonction RESET efface tous les réglages enregistrés N utilisez cette fonction que lorsque cela s avère nécessaire Les touches S DIRECT TONE SLEEP et AUDIO ASSIGN fonctionneront après que vous aurez appuyé sur la touche SHIFT Le mot de passe du niveau d évaluation a été oublié Après avoir vérifié qu a...

Page 169: ...tion Protection du contenu numérique sur large bande passante Aucun son n est émis par les enceintes ambiophoniques L enceinte ambiophonique est elle connectée correctement Est ce que Ambiophonique a été incorrectement réglé à NONE dans Taille d enceinte Le mode ambiophonique est il réglé à stéréo Aucun son n est émis par les enceintes ambiophoniques arrière Les enceintes ambiophoniques arrière so...

Page 170: ... LIVE Impossible de me connecter au serveur BD LIVE Vérifiez que la connexion réseau fonctionne correctement à l aide du menu Test du réseau Vérifiez si le périphérique USB est connecté au produit Le périphérique d enregistrement doit disposer d au moins 1 Go d espace libre pour accueillir les services BD LIVE Consultez la Gestion des données BD pour vérifier l espace disponible Voir page 51 Vérifiez ...

Page 171: ...e de 75 Ω Pr 0 70 Vpp charge de 75 Ω Pr 0 70 Vpp charge de 75 Ω BD 480i DVD 480p 480i Vidéo Audio HDMI 1080p 1080i 720p 480p Audio PCM multi canaux audio Bitstream audio PCM Amplificateur Sortie enceinte avant 120 W x 2 4 Ω THD 0 9 Sortie d enceintes ambiophoniques arrière en hauteur avant 120 W x 2 4 Ω THD 0 9 Sortie enceinte centrale 120 W 4 Ω THD 0 9 Sortie enceinte ambiophonique 120 W x 2 4 Ω ...

Page 172: ...Cette garantie ne couvre pas les dommages causés par un accident un incendie une inondation un cas de force majeure un mauvais usage ou une tension incorrecte La garantie ne couvre pas une mauvaise installation une mauvaise réparation une réparation non autorisée et tout usage commercial ou dommages survenus durant le transport Le fini extérieur et intérieur de même que les lampes ne sont pas couv...

Page 173: ...864 www samsung com Slovakia 0800 SAMSUNG 726 7864 www samsung com Spain 902 1 SAMSUNG 902 172 678 www samsung com Sweden 0771 726 7864 SAMSUNG www samsung com Switzerland 0848 SAMSUNG 7267864 CHF 0 08 min www samsung com ch www samsung com ch_fr French U K 0330 SAMSUNG 7267864 www samsung com Eire 0818 717100 www samsung com Lithuania 8 800 77777 www samsung com Latvia 8000 7267 www samsung com E...

Page 174: ...Code No AH68 02341P HW D7000_FRC_0516 indd 87 HW D7000_FRC_0516 indd 87 2011 05 16 3 50 58 2011 05 16 3 50 58 ...

Reviews: