background image

English  

33


|

05

Media Play

Playing a Disc with User Recorded 
Content

You can play multimedia files you have recorded 
on DVD or CD discs. 

1 · 

Turn on the home cinema.

2 · 

Open the disc tray, place a user recorded disc 
into the disc tray with the disc’s label facing up, 
and then close the tray.

3 · 

After the disc loads,  press the 

RED (A)

 button.

4 · 

Press the ▲▼ buttons to select 

CD

 or 

DVD

and then press the 

E

 button.

5 · 

Press the ◄► buttons to select 

Videos

Music

or 

Photos

, then press the 

E

 button.

6 · 

If files appear on the screen, go to Step 7. If 
file folders appear on the screen, use the ◄► 
buttons to select a folder, press 

E

, and then 

go to Step 7.

7 · 

Use the ◄► buttons to select a file to play or 
view, and then press the 

E

 button.

OR

3

-1

After the disc loads, press the 

BLUE (D)


button.

4

-1

Press the ◄► buttons to select 

CD

 or 

DVD

and then press the 

E

 button.

5

-1

Press the ▲▼ buttons to select 

Videos

Music

, or 

Photos

, and then press the 

E


button.

6

-1

If files appear on the screen go to Step 7

-1

If file folders appear on the screen, use the 
▲▼ buttons to select a folder, press 

E

, and 

then go to Step 7

-1

.

7

-1

Use the ▲▼ buttons to select a file to play or 
view, and then press the 

E

 button.

Playing a Commercial Video Disc

Place a disc into the disc tray with the disc’s label 
facing up and then close the disc tray. Playback 
starts automatically. If it does not playback 
automatically, move to 

Videos

 in the Home menu 

and press the 

E

 button.

In most cases, commercial videos will display a 
disc menu. To play the movie on the disc, select 

Play

 on the disc menu, and then press 

E

.

|

 NOTE 

|


For more information about playing videos, go to "Controlling 
Video Playback" on page 34.

Playing a Pre-Recorded 
Commercial Audio Disc

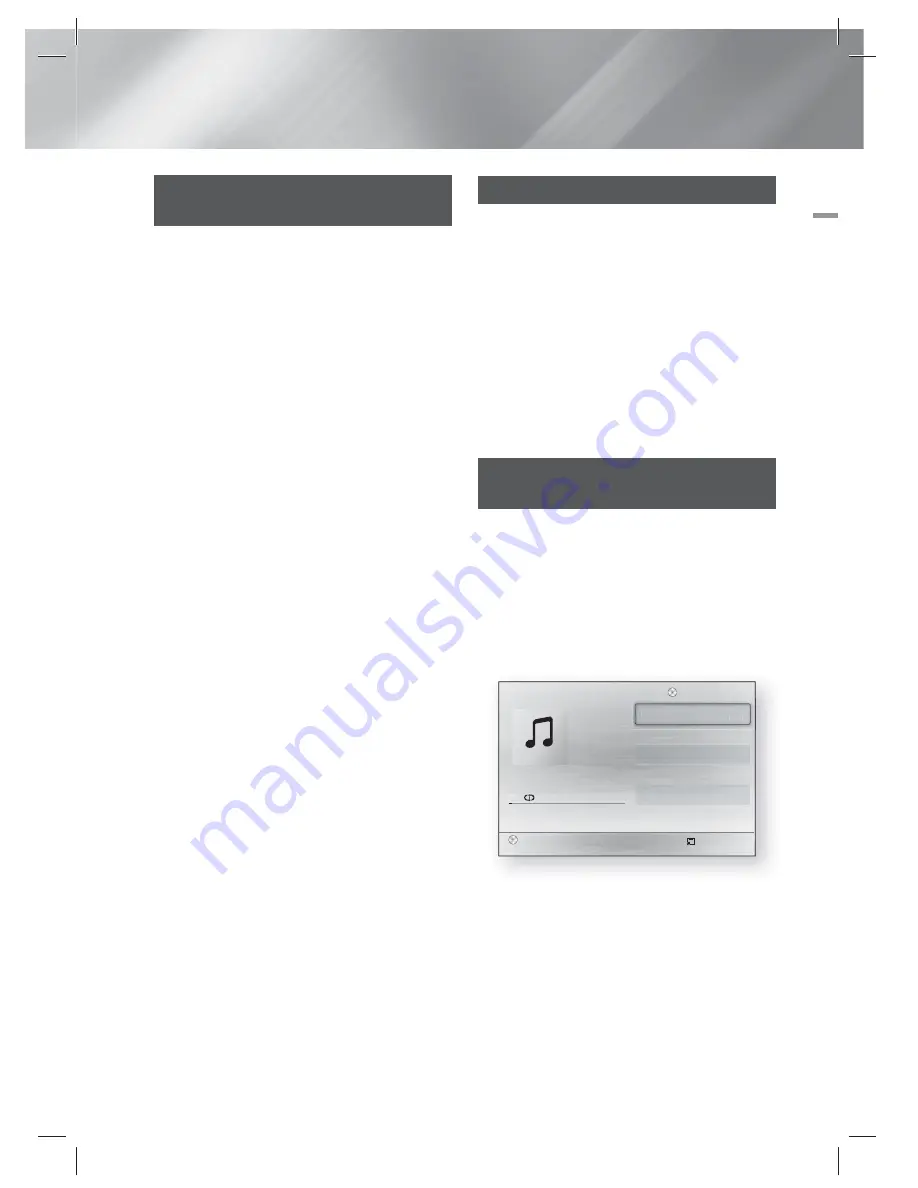
1 · 

Insert an Audio CD (CD-DA) or an MP3 Disc into 
the disc tray.

•  For an Audio CD (CD-DA), the first track will 

be played automatically. Tracks on a disc 
are played in the order in which they were 
recorded on the disc.

•  For an MP3 disc, press the ◄► buttons to 

select 

Music

, then press the 

E

 button.

E


s


Pause   

 Tools  

'


Return

+  


00:08 / 05:57

TRACK 001

TRACK 001

05:57

TRACK 002

04:27

TRACK 003

04:07

TRACK 004

03:41

TRACK 005

03:17

TRACK 006

03:35

Playlist

1/12

1/12

TRACK 001

05:57

CD

2 · 

To play a particular track, use the ▲▼ buttons 
on the remote to select the track, and then 
press the 

E

 button.

|

 NOTE 

|


For more information about playing music, go to "Controlling 
Music Playback" on page 36.

HT-E3500_XY_0229.indd   33

HT-E3500_XY_0229.indd   33

2012-02-29   오후 3:36:41

2012-02-29   오후 3:36:41

Summary of Contents for HT-E3550

Page 1: ...roduct To receive more complete service please register your product at www samsung com register 5 1CH Blu ray Home Entertainment System user manual HT E3500 HT E3530 HT E3550 HT E3500_XY_0229 indd 1 HT E3500_XY_0229 indd 1 2012 02 29 오후 3 33 08 2012 02 29 오후 3 33 08 ...

Page 2: ...liquids such as vases shall be placed on the apparatus The Mains plug is used as a disconnect device and shall stay readily operable at any time This apparatus shall always be connected to an AC outlet with a protective grounding connection To disconnect the apparatus from the mains the plug must be pulled out from the mains socket therefore the mains plug shall be readily operable CLASS 1 LASER P...

Page 3: ...ing parts and lens and cause abnormal disc playback If this occurs unplug the product wait for two hours and then connect the plug to the power outlet Then insert the disc and try to play back again If the product makes an abnormal noise or produces a burning smell or smoke turn off the power switch immediately and disconnect the power plug from the wall outlet Then contact the nearest customer se...

Page 4: ...nd Blu ray 3D logo are trademarks of the Blu ray Disc Association Licence Dolby and the double D symbol are registered trademarks of Dolby Laboratories Manufactured under licence under U S Patent Nos 5 956 674 5 974 380 6 226 616 6 487 535 7 392 195 7 272 567 7 333 929 7 212 872 other U S and worldwide patents issued pending DTS HD the Symbol DTS HD and the Symbol together are registered trademark...

Page 5: ...a technology is provided at the Cinavia Online Consumer Information Centre at http www cinavia com To request additional information about Cinavia by mail send a postcard with your mailing address to Cinavia Consumer Information Centre P O Box 86851 San Diego CA 92138 USA This product incorporates proprietary technology under licence from Verance Corporation and is protected by U S Patent 7 369 67...

Page 6: ...xternal Analouge Component 19 Method 2 OPTICAL Connecting an External Digital Audio Component 20 Connecting the FM Antenna 20 Connecting to a Network Router SETTINGS 21 The Initial Settings Procedure 22 The Home Screen 23 Accessing the Settings Screen 24 Settings Menu Functions 28 Networks and the Internet 29 Upgrading Software 31 Setting Up AllShare MEDIA PLAY 32 Using the Streaming Media Service...

Page 7: ...gle change and aspect ratio adjustment Information about the discs is written in detail on the disc box Please refer to this if necessary When you play a BD J title loading may take longer than a normal title or some functions may perform slowly Disc types your product cannot play HD DVD DVD ROM PD MV Disc etc DVD RAM Super Audio CD except CD layer DVD RW VR mode CVD CD ROM CDV CD G CD I LD CD Gs ...

Page 8: ...pt South Africa Greenland 3 Taiwan Korea the Philippines Indonesia Hong Kong 4 Mexico South America Central America Australia New Zealand Pacific Islands Caribbean 5 Russia Eastern Europe India most of Africa North Korea Mongolia 6 China NOTE If the Region number of a Blu ray Disc DVDs does not correspond to the Region number of this product the product cannot play the disc Logos of Discs the prod...

Page 9: ...not be played if its content has a problem Normal playback is not guaranteed if the file s container information is wrong or the file itself is corrupted Files a higher bit rate or frame rate than standard may stutter during sound video playback The Seek skip function is not available if the file s index table is damaged Video decoder Supports up to H 264 Level 4 1 and AVCHD Does not support H 264...

Page 10: ...y Remove USB function to prevent possible damage to the USB memory Press the HOME button to move to the home menu press the YELLOW C button and then press the E button SAMSUNG is not responsible for any data file damage or data loss AVCHD Advanced Video Codec High Definition This product can play back AVCHD format discs These discs are normally recorded and used in camcorders The AVCHD format is a...

Page 11: ...E MO ST TUNER MEMORY A B C D TUNING DOWN UP SOUND EFFECT VOLUME Video Cable User Manual For Power cord FM Antenna Toroidal Ferrite Core Remote Control Batteries AAA size Figures and illustrations in this User Manual are provided for reference only and may differ from actual product appearance HT E3500_XY_0229 indd 11 HT E3500_XY_0229 indd 11 2012 02 29 오후 3 34 37 2012 02 29 오후 3 34 37 ...

Page 12: ...ear Panel HDMI OUT AUX IN VIDEO OUT OPTICAL DIGITAL AUDIO IN FM ANT IMPEDANCE 3 SPEAKERS OUT CENTER SUBWOOFER FRONT L SURROUND L FRONT R SURROUND R L R LAN HDMI OUT AUX IN VIDEO OUT OPTICAL DIGITAL AUDIO IN FM ANT IMPEDANCE 3 SPEAKERS OUT CENTER SUBWOOFER FRONT L SURROUND L FRONT R SURROUND R L R LAN LAN TERMINAL HDMI OUT EXTERNAL DIGITAL AUDIO IN OPTICAL FM ANTENNA SPEAKER OUTPUT CONNECTORS AUX I...

Page 13: ...s to apply sound effects Press to stop a disc Cut off the sound temporarily Press to select Blu ray s mode AUX BD DVD etc Press to search backwards or forwards Press to pause a disc Allows you to repeat a title chapter track or disc Use to enter the Popup menu Title menu Select MONO or STEREO for radio broadcasts Search for active FM stations and to change channels Use to display the playback info...

Page 14: ...akers the surround speakers are used mainly for sound effects Sound will not come from them all the time Subwoofer The position of the subwoofer is not so critical Place it anywhere you like Position of the product Place it on a stand or cabinet shelf or under the TV stand Selecting the Listening Position The listening position should be located about 2 5 to 3 times the size of the TV s screen fro...

Page 15: ...STAND BASE L R CENTRE SPEAKER CABLE L R CENTRE SUBWOOFER SPEAKER CABLE FRONT SURROUND STAND STAND BASE L L R R SUBWOOFER FRONT L L R R SURROUND CENTRE SCREW 5X15 2EA SCREW 5X20 6EA SCREW 5X15 4EA SCREW 5X20 12EA HT E3500_XY_0229 indd 15 HT E3500_XY_0229 indd 15 2012 02 29 오후 3 34 56 2012 02 29 오후 3 34 56 ...

Page 16: ...r is installed Follow this steps to install other speaker 5 2 4 6 1 3 Stand Base Stand Speaker Stand Connecting The Speakers 1 Match each speaker cable bundle to the correct speaker by matching the colour coded plug on each bundle to the coloured sticker on the bottom of each speaker 2 To attach speaker wire to each speaker a Press down the red tab on the back of the speaker insert the red wire an...

Page 17: ... the company Do not let children play with or near the speakers They could get hurt if a speaker falls When connecting the speaker wires to the speakers make sure that the polarity is correct Keep the subwoofer speaker out of reach of children to prevent children from inserting their hands or alien substances into the duct hole of the subwoofer speaker Do not hang the subwoofer on the wall through...

Page 18: ...HDMI OUT jack on the back of the product to the HDMI IN jack on your TV If the TV supports ARC you can hear TV sound from home cinema with only connect this cable Method 2 Connecting to a TV with a Video Cable Good Quality Connect the supplied Video cable from the VIDEO OUT jack on the back of the product to the VIDEO IN jack on your TV NOTE The VIDEO Out jack always outputs in the 576i 480i resol...

Page 19: ... AUX mode Be sure to match the colours on the cable plugs to the colours on the input and output jacks Method 2 OPTICAL Connecting an External Digital Audio Component To connect the digital audio output of digital signal components such as Cable Boxes and Satellite Receivers Set Top Boxes Using a digital optical cable not supplied connect the Optical Digital Audio In jack on the product to the Dig...

Page 20: ...This product does not receive AM broadcasts Connecting to a Network Router NOTE Internet access to Samsung s software update server may not be allowed depending on the router you use or your ISP s policy For more information contact your ISP Internet Service Provider DSL users please use a router to make a network connection For the AllShare function a PC must be connected in the network as shown ...

Page 21: ... pictures in their original 16 9 format and expands 4 3 pictures to fill the 16 9 screen 4 3 Letter Box For older standard screen analouge TVs Displays 4 3 pictures in full screen and 16 9 pictures in letter box format that retains the 16 9 aspect ratio but puts black bars above and below the picture 4 3 Pan Scan For older standard screen analouge TVs Displays 4 3 pictures in full screen and 16 9 ...

Page 22: ...h the TV and the product and 2 You have set the TV to a language supported by the product the product will select that language as the preferred language automatically The Home Screen No Disc a Change Device d View Devices Enter Settings 5 6 4 1 2 3 1 Videos Play videos located on discs USB devices or your PC 2 Photos View photos located on discs USB devices or your PC 3 Network Service Select a n...

Page 23: ...ings Menu TOOLS RETURN EXIT INFO SUBTITLE REPEAT HOME TUNER 1 2 4 3 1 HOME Button Press to move to the Home screen 2 RETURN Button Return to the previous menu 3 E Enter DIRECTION Button Press to move the cursor or select an item Press the E button to activate the currently selected item or confirm a setting 4 EXIT Button Press to exit the current menu NOTE The E button on the product s front panel...

Page 24: ...o Auto 1080p 1080i 720p 576p 480p If Composite is connected the resolution supports only 576i 480i The number indicates the number of lines of video per frame The i and p indicate interlaced and progressive scan respectively The more lines the higher quality Movie Frame 24 Fs Setting the Movie Frame 24 Fs feature to Auto lets the product adjust its HDMI output to 24 frames per second automatically...

Page 25: ...the product For more details please refer to the digital output selection table See page 44 Dynamic Range Control Lets you apply dynamic range control to Dolby Digital Dolby Digital Plus and Dolby True HD audio Auto Automatically controls the dynamic range of Dolby TrueHD audio based on information in the Dolby TrueHD soundtrack Also turns dynamic range control on for Dolby Digital and Dolby Digit...

Page 26: ...her Samsung products that have the Anynet feature and lets you control those products with one Samsung TV remote To operate this function you must connect this product to an Anynet Samsung TV using an HDMI cable BD Data Management Lets you manage the contents you downloaded through a Blu ray disc that supports the BD Live service You can view the information about the USB device you are using for ...

Page 27: ...se the service Change PIN Change the 4 digit PIN used to access security functions General Time Zone You can specify the time zone that is applicable to your area Support Software Upgrade For more information about the Software Upgrade function see Upgrading Software on page 29 Contact Samsung Provides contact information for assistance with your product Terms of Service Agreement View the general...

Page 28: ...elect Return 5 The Network function acquires and fills in the values for IP Address Subnet Mask etc automatically 6 After the Network function has acquired the network values press the RETURN button 7 Select Network Test and then press E The home cinema validates the network connection When it is done press the RETURN button Manual If you have a static IP address or the Automatic procedure does no...

Page 29: ... may differ Upgrading Software The Software Upgrade menu allows you to upgrade the product s software for performance improvements or additional services Never turn the product off or back on manually during the update process 1 In the Home menu select Settings and then press the E button 2 Select Support and then press the E button 3 Select Software Upgrade and then press the E button 4 Select on...

Page 30: ... drive into the USB port of the product 11 In the product s menu go to Settings Support Software Upgrade 12 Select By USB NOTE There should be no disc in the product when you upgrade the software using the USB Host jack Never turn the product off or on manually during the update process When the software upgrade is done check the software details in the Software Upgrade menu Auto Upgrade Notificat...

Page 31: ...nloads on the left side under Downloads The Download Centre appears 5 On the Download Centre page click the Software tab 6 On the software tab click the File icon on the right side of the AllShare line 7 In the pop up that appears click Save File 8 Find the AllShare install file on your disk and then double click the file 9 In the pop up that appears click Run and then follow the directions that a...

Page 32: ...files appear on the screen go to Step 8 If file folders appear on the screen use the buttons to select a folder press E and then go to Step 8 8 Use the buttons to select a file to play or view and then press the E button OR 4 1 Press the BLUE D button USB DISK USB DISK d HOME Enter 5 1 Press the buttons to select USB Flash Mem or Disk then press the E button 6 1 Press the buttons to select Videos ...

Page 33: ...or view and then press the E button Playing a Commercial Video Disc Place a disc into the disc tray with the disc s label facing up and then close the disc tray Playback starts automatically If it does not playback automatically move to Videos in the Home menu and press the E button In most cases commercial videos will display a disc menu To play the movie on the disc select Play on the disc menu ...

Page 34: ...ENU During playback press this button to display the Title menu If your disc has a playlist press the GREEN B button to go to the playlist POPUP MENU During playback press this button to display the Pop up menu DISC MENU or TITLE MENU During playback press this button to display the title list Playback related buttons The product does not play sound in Search Slow or Step mode 6 Starts playback 5 ...

Page 35: ...to a chapter that you desire to watch Repeat Mode Select to repeat a specific title chapter or marked section Works the same as the REPEAT button See page 34 Audio Select to set the desired audio language Subtitle Select to set the desired subtitle language You can also operate this function by pressing the SUBTITLE button on the remote control Angle To view a scene from another angle The Angle op...

Page 36: ...l CD or DVD press the 5 or RETURN button The Music List Screen appears If you are creating a playlist from music on a user created disk or USB device access the Music list as described in Playing Files on a USB Device on page 32 or Playing a Disc with User Recorded Content on page 33 2 Press the buttons to move to the desired file and then press the YELLOW C button to select it Repeat this procedu...

Page 37: ...ress the FUNCTION button to select FM 2 Tune in to the desired station Preset Tuning 1 Press the 5 button to select PRESET and then press the TUNING UP DOWN button to select the preset station Before you can tune to preset stations you must add preset stations to the product s memory Manual Tuning Press the 5 button to select MANUAL and then press the TUNING UP DOWN button to tune in to a lower or...

Page 38: ...ound with all speakers active A specific speaker s may not output depending on the input signal Using BD LIVE 1 Connect the product to the network See page 20 2 Configure the network settings See pages 28 29 Once the product is connected to your network you can enjoy various movie related service contents available on BD LIVE compliant discs 1 Attach a USB memory stick to the USB jack on the front...

Page 39: ...ct the kind of file you want to view or play Videos Photos or Music and then press E 6 Use the button to select the folder with the kind of files you selected and then press E The File List is displayed 7 Select the file you want to view or play and then press E NOTE You can create Playlists from files on your PC in the same way you create playlists from files on USB devices and discs With a few e...

Page 40: ...the 16 9 Original your TV may display 4 3 Pillarbox black bars on sides of picture BD Wise Samsung Products only When BD Wise is on the Resolution setting automatically defaults to BD Wise and BD Wise appears in the Resolution menu If the product is connected to a device that does not support BD Wise you can not use the BD Wise function For proper operation of BD Wise set the BD Wise option in bot...

Page 41: ...read write speed The Resume Play function may not work after you format the storage device The total memory available to BD Data Management may differ depending on the conditions DivX Video On Demand For more information about DivX R VOD visit http vod divx com Speaker Settings When Speaker Selection is set to TV Speaker audio is produced through the TV speakers HDMI audio When HDMI audio is outpu...

Page 42: ...ry and secondary subtitles at the same time The total number of primary and secondary subtitles are displayed respectively Playing a JPEG files You can t enlarge the subtitle and PG graphic in the full screen mode Media Play Dolby Pro Logic II Mode Before selecting Dolby Pro Logic II mode connect your external device to the AUDIO INPUT jacks L and R on the product If you connect to only one of the...

Page 43: ...vie Frame Auto 24Fs 1080p 24F 1080p 24F 576i 480i 1080i 1080i 1080i 576i 480i 576i 480i 720p 720p 720p 576i 480i 576i 480i 576p 480p 576p 480p 576p 480p 576i 480i 576i 480i 576i 480i 576i 480i DVD playback Output Setup HDMI connected HDMI not connected HDMI Mode VIDEO Mode VIDEO Mode BD Wise 576i 480i 576i 480i Auto Max Resolution of TV input 576i 480i 1080p 60F 1080p 60F 576i 480i 1080i 1080i 576...

Page 44: ...ray Disc Any Decodes the main feature audio and BONUSVIEW audio stream together into PCM audio and adds Navigation Sound Effects Outputs only the main feature audio stream so that your AV receiver can decode the audio bitstream You will not hear BONUSVIEW audio or Navigation Sound Effects Decodes the main feature audio and BONUSVIEW audio stream together into PCM audio and adds Navigation Sound Ef...

Page 45: ...d Sound can be heard only from a few speakers and not all 6 On certain Blu ray DVD discs sound is output from the front speakers only Check if the speakers are connected properly Adjust the volume When listening to a CD radio or TV sound is output to the front speakers only Dolby Digital 5 1 CH Surround Sound is not produced Is there Dolby Digital 5 1 CH mark on the disc Dolby Digital 5 1 CH Surro...

Page 46: ...V audio through the Product no sound is heard If the OPEN CLOSE button is pressed while listening to TV audio using the D IN or AUX functions the Blu ray DVD disc functions are turned on and the TV audio is muted Not Available appears on screen The features or action cannot be completed at this time because 1 The Blu ray DVD disc s software restricts it 2 The Blu ray DVD disc s software doesn t su...

Page 47: ...ion BD LIVE I cannot connect to the BD LIVE server Test whether the network connection is active by using the Network Status function Check whether a USB memory device is connected to the product The memory device must have at least 1GB of free space to accommodate the BD LIVE service You can check the available size in BD Data Management See page 41 See if the BD LIVE Internet Connection option i...

Page 48: ...c Maximum Play Time 74 min CD 8cm COMPACT DISC Reading Speed 4 8 5 6 m sec Maximum Play Time 20 min Video Output Composite Video 1 channel 1 0 Vp p 75 Ω load Blu ray Disc 576i 480i DVD 576i 480i Video Audio HDMI 1080p 1080i 720p 576p 480p PCM multichannel audio Bitstream audio PCM audio Amplifier Front speaker output 80W x 2 3Ω Centre speaker output 80W 3Ω Surround speaker output 80W x 2 3Ω Subwoo...

Page 49: ... Front Surround Centre Subwoofer 89 x 1053 x 71 Stand base 230 x 25 x 230 89 x 1053 x 71 Stand base 230 x 25 x 230 228 x 77 x 70 155 x 300 x 285 Weights Unit kg HT E3500 Front Surround Centre Subwoofer 0 35 0 38 0 46 2 88 HT E3530 Front Surround Centre Subwoofer 2 87 0 38 0 46 2 88 HT E3550 Front Surround Centre Subwoofer 2 87 2 87 0 46 2 88 Network speeds equal to or below 10Mbps are not supporte...

Page 50: ...ndia 3030 8282 1800 110011 1800 3000 8282 1800 266 8282 www samsung com Indonesia 0800 112 8888 021 5699 7777 www samsung com Area Contact Centre Web Site Japan 0120 327 527 www samsung com Malaysia 1800 88 9999 www samsung com Philippines 1 800 10 SAMSUNG 726 7864 1 800 3 SAMSUNG 726 7864 1 800 8 SAMSUNG 726 7864 02 5805777 www samsung com Singapore 1800 SAMSUNG 726 7864 www samsung com Thailand ...

Reviews: