background image

How to Playback 

the Images

Explains how to view or delete the picture images including how to view 

images in thumbnail view on LCD monitor.

110  Playing Back Still Pictures

110 Rotating 

Images

111 

Displaying Multiple Images

111 

Selecting the Number of Images to Display

111 Displaying 

Folder

112 Slideshow
113 Digital 

Filters

115 Converting 

RAW 

fi

 les to JPEG format

116 Deleting 

Images

116 

Deleting a Single Image

116 Deleting 

All 

Images

117 

Deleting Selected Images (from Nine-Image Display)

117 Deleting 

Folders

118 

Deleting images taken with the RAW+ button

119 

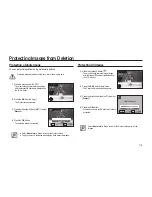
Protecting a Single Image

119 Protecting 

All 

Images

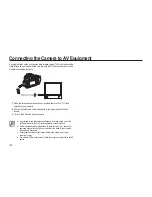
120  Connecting the Camera to AV Equipment

Summary of Contents for GX-20 - Digital Camera SLR

Page 1: ......

Page 2: ...ung Camera Service centre Do not continue to use the camera as this may cause a fire or electric shock Do not insert or drop metallic or inflammable foreign objects into the camera through access poin...

Page 3: ...ttery It may cause leakage or breakage If liquid from the battery enters the eyes wash it away immediately with fresh water and consult a doctor It may cause loss of eyesight If any of the battery lea...

Page 4: ...he OIS Function 026 Optical Image Stabilization 027 LCD Monitor Indications 027 While Power is On or Operating Mode Dial 028 Capture Mode 029 Playback Mode 030 Histogram Display 031 Viewfinder Indicat...

Page 5: ...4 High Noise 064 ISO Display 065 ISO Steps 065 Set Max ISO Range 065 Reset Custom1 066 Using the CUSTOM2 MENU 066 E Dial in Program Sv Tv Av TAv M X B 066 Green Button in TAv M 066 UseAperture Ring 06...

Page 6: ...096 Adjusting the sensitivity of the image sensor 096 Setting the Sensitivity 096 Setting the Sensitivity 096 Setting the Sensitivit 096 Setting the Range ofAutomatic Correction inAUTO 098 Using the...

Page 7: ...s 146 Others 146 Other 147 Troubleshooting 152 Main Speci cations 154 Glossary 154 Glossary 154 Glossar 156 Index 158 Correct Disposal of This Product 158 FCC notice How to Make a Photo Print Appendix...

Page 8: ...e Wizard function enables you to adjust image before shooting You can create the image you desire by adjusting the colour tone saturation and contrast and so on The captured area view angle will diffe...

Page 9: ...direction button This Note symbol indicates information that supplements important points of the main text This Warning symbol advises users that failure to take or avoid a specific action could resul...

Page 10: ...of view exposure focusing the object and so on 4 Using Advanced Shooting Modes This chapter explains how to use the advanced shooting mode such as Tv Shutter PriorityAE mode Av Aperture PriorityAE mo...

Page 11: ...Memo...

Page 12: ...Top 014 Rear 015 Quick reference guide 016 Charging and Inserting the Battery 016 Charging the Battery 017 Inserting the Battery 018 Battery Level Indicator 018 Approximate Playback Time Fully charge...

Page 13: ...onal equipment contact your nearest Samsung dealer or Samsung service centre What are included in the package Hot shoe cover Installed on camera Eyecup Installed on camera Viewfinder cap Body mount co...

Page 14: ...y cause the product to malfunction Self Timer lamp Remote control receiver Main Switch Front dial Shutter Button Lens unlock button Lens information contacts Lens mount index Mirror AF coupler Strap h...

Page 15: ...ewfinder Diopter adjustment lever Card cover lock OIS Optical Image Stabilization lever Fn Button Card access lamp Focus point selection dial Strap Holder Rear e dial AF Button AE L Lock Button Direct...

Page 16: ...g in the different exposure rates p 82 Taking a picture of a fast moving subject p 83 Using the automatic ISO setting mode p 85 RAW button p 49 Memory Card Cover p 19 Front dial p 53 Green Button p 66...

Page 17: ...Charged Red LED is on Charging is complete The LED is off Charging error Red LED is blinking Proper operating temperatures of the Charger are 0 C 40 C The battery may not be charged under or over the...

Page 18: ...while the power is on Remove the batteries when you will not use the camera for a long while The batteries may leak If the date and time settings have been reset when you insert new batteries after a...

Page 19: ...tions and may vary depending on the user s methods Battery performance temporarily decreases while being used in cold conditions When using the camera in cold climates have extra batteries on hand and...

Page 20: ...ory card facing toward the LCD monitor and insert the memory card Press the memory card one more time to remove it out of the memory card slot 3 Close the Card cover Inserting the Memory Card Do not r...

Page 21: ...Camera does not accept any liability for data that is deleted if 1 The Memory Card is mishandled by the user 2 The Memory Card is exposed to static electricity or electrical interference 3 The card h...

Page 22: ...turn on the camera again rotate the main switch or refer to the followings Press the shutter button halfway down Press the playback button Press the INFO button Using the Vertical Battery Grip SBG D1V...

Page 23: ...the LCD monitor and the current date and time Once setting is done these will not need to be set again when turning your camera on 1 The following screen appears when you turn on the camera for the f...

Page 24: ...26 Turning On the OIS Function 026 Optical Image Stabilization 027 LCD Monitor Indications 027 While Power is On or Operating Mode Dial 028 Capture Mode 029 Playback Mode 030 Histogram Display 031 Vie...

Page 25: ...hat the lens is secure Also check that the red dots of the lens are on top and the attached portion does not move sideways 4 Remove the front lens cap by pushing the indicated portions inward 5 To det...

Page 26: ...ong photographers the slowest recommended shutter speed for a handheld camera is generally 1 focal lengthx1 5 For example it is 1 75 of a second for a focal length of 50mm and 1 150 of a second for 10...

Page 27: ...n taking close up shots In this case it is recommended that the OIS function be turned off and the camera be used with a tripod The OIS function will not fully work when shooting with a slower shutter...

Page 28: ...the desired time from SETUP MENU Guide Display Detailed Information Indicators Metering type Focus Point Information White balance and Sensitivity only appear when a setting other than the default se...

Page 29: ...1 Colour Tone 12 Saturation 13 Contrast 14 Sharpness 15 Date and time 16 Colour space 17 OIS Optical Image Stabilization 18 Quality level 19 BAcompensation value GM BAcompensation value BA 20 Recorded...

Page 30: ...2 Exposure Bracket Multi Exposure 3 Drive mode 4 Metering mode 5 Flash mode 6 OIS Optical Image Stabilization 7 DPOF settings 8 Folder name and Stored image number 9 Protect icon 10 AF mode 11 Extende...

Page 31: ...the bars are higher on the left the image may be too dark If the lighting conditions are too bright to check the subject by using the LCD checking the histogram will enable more precise exposure contr...

Page 32: ...Shows the number of recordable images including the number of recordable images using the Drive mode with current quality and recorded pixel setting The differences between the compensated exposure a...

Page 33: ...ay White Balance Compensation Number of recordable images EV compensation value PC Pb PC Personal Computer Removable disk Pb PictBridge Drive mode Single frame Continuous Shot Self timer Remote contro...

Page 34: ...ct A zoom lens can be used to change the size of the subject in the viewfinder Using the full automatic program mode 4 Position the subject inside the autofocus frame and press the shutter release but...

Page 35: ...en when focus indicator is displayed when 6 above applies Using the full automatic program mode 6 Review captured images on the LCD monitor Image appears for 1 second on the LCD monitor after capturin...

Page 36: ...yecup removed as shown above To remove the eyecup pull upward and remove as shown on the right Using the full automatic program mode Using the Zoom ring Using the zoom ring you can enlarge telephoto a...

Page 37: ...ton If you set Remaining Count to Continuous from the Custom2 MENU the maximum continuous shootable images appears in the view finder on half shutter The focus is adjusted each time the shutter is rel...

Page 38: ...sition in the Viewfinder 042 Fixing the Focus 043 Adjusting the Focus Manually Manual Focus 043 Using the Focus Indicator 044 Using the Viewfinder Matte Field 045 Setting the Exposure 045 Effect of Sh...

Page 39: ...ut the depth of eld see page 46 Depth of eld Using the Liveview function Using the Liveview function You can actually see the composition of your subject and the focus through the LCD monitor in real...

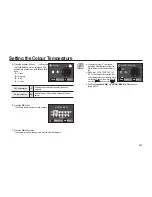
Page 40: ...n Manual White Balance Manual W B Using the Manual White Balance you can easily adjust the white balance before shooting The white balance preview is very helpful when you are taking pictures under va...

Page 41: ...is not in focus The camera can be focused by pressing the AF button In SAF Single mode the focus is locked focus lock while focus indicator is lit To focus on another subject take your finger off the...

Page 42: ...not displayed in the viewfinder when Off is selected for Superimpose AF Area in the CUSTOM1 MENU menu Setting the Focus Position in the Viewfinder 1 Select SEL with the Focus point selection dial Aut...

Page 43: ...not in focus 3 Keep pressing the shutter button halfway Focus will be fixed unless you release the shutter button 4 Re compose the picture while keeping the shutter release button pressed halfway 5 Pr...

Page 44: ...ust focus Using the Focus Indicator You can manually adjust the focus using the focus indicator 1 Set the focus mode lever to MF 2 Look through the viewfinder press the shutter release button halfway...

Page 45: ...View nder Matte Field Using the View nder Matte Field You can manually adjust the focus using the view nder matte eld 1 Set the focus mode lever to MF 2 Look through the view nder and turn the focusi...

Page 46: ...the amount of light reaching the image sensor This is similar to the way the pupil of the human eyes reacts to bright light The next image shows how the aperture is adjusted to a different size accord...

Page 47: ...ld When you focus on a specific subject there is a range in which objects closer and further away will also be in focus This focused range is called the depth of field The wider the wide angle lens an...

Page 48: ...our picture You can adjust the EV Compensation from 3 to 3 EV in increments of 1 2 EV or 1 3 EV For information about under or over exposed samples see page 90 Changing the Exposure and Shooting Auto...

Page 49: ...er releasing the AE L button the exposure remains in memory as long as the viewfinder is turned on The exposure remains locked as long as the AE L button is kept pressed or the shutter release button...

Page 50: ...the LCD panel Press the Shutter button to take a picture To cancel the RAW button function turn the mode dial or press the RAW button once again When the picture is taken using the RAW button it may t...

Page 51: ...ns to select Self Timer 2 secs 3 Focus on the subject 4 Press the shutter release button fully The mirror pops up and the picture is taken 2 seconds later The AE lock is enabled with the exposure valu...

Page 52: ...y The focus indicator appears when the subject is in focus 5 Press the shutter release button fully The self timer lamp starts blinking slowly at first and then blinks rapidly for 2 seconds before the...

Page 53: ...in remote control wait status 3 Press the OK button The camera is ready to take pictures 4 Press the shutter release button halfway The autofocus system operates The focus indicator appears in the vie...

Page 54: ...NU and PLAYBACK MENU menu appear in order each time the direction buttons is pressed Press the MENU button to return to your previous screen Use the front dial to move forward to the next screen in th...

Page 55: ...ENU Picture Wizard The Picture Wizard function enables you to adjust the image before shooting You can create the image you desire by adjusting the Colour tone Saturation Contrast and Sharpness The fo...

Page 56: ...menu The file size varies according to the settings RAW RAW data is CCD output data saved without processing Effects such as White Balance Contrast Saturation and Sharpness are not applied to the ima...

Page 57: ...up is selected in the Set RAW Button menu RAW button function is available for one time use Liveview You can set the grid and FocusingArea AF Point AF frame display options in the Liveview mode The Fo...

Page 58: ...ess and contrast levels Three pictures are saved with each shot The following settings are available in the Extended Bracket menu White Balance MG 3 MG 2 MG 1 AB 3 AB 2 AB 1 M Masenta G Green A Amber...

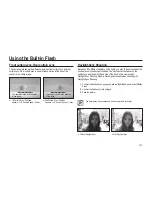
Page 59: ...g the pictures that have already been taken are saved and Multi exposure is exited Extended Bracket and Multi Exposure are not used at the same time The last mode selected is set Press the delete butt...

Page 60: ...you use the lens that does not support the automatic information about the focal length you can manually select the available focal length to enable the OIS function 1 Select OIS menu in the CAPTURE...

Page 61: ...Off Exposure is set separately from AF point On Exposure is set in accordance with AF point Using the Menu CUSTOM1 MENU Move Exit LinkAF Point AE Off SuperimposeAFArea On AF in Remote Control Off AF B...

Page 62: ...nual focusing lens is used with the focus mode lever set to SAF The current lens has an AF MF lever and it is set to MF Off Off Off Shutter res whether the subject is in focus or not On Shutter res on...

Page 63: ...Sets the exposure metering time to 10 seconds 10 sec 3 sec Sets the exposure metering time to 3 seconds 3 sec Sets the exposure metering time to 3 seconds 3 sec 30 sec Sets the exposure metering time...

Page 64: ...to t the white balance value is automatically adjusted within the adjustable range WBAdjustable Range WBAdjustable Range function is not available for the AUTO function is not available for the AUTO...

Page 65: ...than the shutter speed of 0 3 Using the Menu Using the Menu CUSTOM1 MENU Move Exit Colour Temp Unit Kelvin Noise Reduction Auto High Noise Off ISO Display Off ISO Steps 1 EV Set Max ISO Range 3200 Res...

Page 66: ...setting the ISO sensitivity to 6400 CUSTOM1 MENU Move Exit Colour Temp Unit Kelvin Noise Reduction Auto High Noise Off ISO Display Off ISO Steps 1 EV Set Max ISO Range 3200 Reset Custom1 CUSTOM1 MENU...

Page 67: ...ing the CUSTOM2 MENU Using the CUSTOM2 MENU E Dial in Program Sv Tv Av TAv M X B E Dial in Program Sv Tv Av TAv M X B Sets the front dial and rear dial in Program Sv Tv Av TAv M X B mode Using the Men...

Page 68: ...0 with an aperture stop of 8 0 you will get three different shots with the aperture stops of 8 0 6 7 and 9 5 For more information about auto bracketing see page 90 Changing the Exposure and Shooting A...

Page 69: ...Info If Saving Rotation Info is set to On a shot taken using a vertical position is displayed in the vertical angle of view On Saves the rotation information when shooting Off Off Off Does not save t...

Page 70: ...e settings in the CUSTOM2 MENU menu to the defaults Reset Reset Reset The settings will reset Cancel The settings will not reset Using the Menu Using the Menu CUSTOM2 MENU Move Exit Auto Rotation On S...

Page 71: ...formatting is completed camera mode is changed to the Capture or Playing back mode Do not open the card cover while formatting Memory Card The card may be damaged beyond use Formatting will delete pr...

Page 72: ...l Format Beep Date Time Off Language 3 sec Guide Display 10 sec LCD Brightness 30 sec LCD colour adjustment Date Time Set Back Type Date Time dd mm yy 24h 01 01 2008 00 00 Date Time Set Cancel Type Da...

Page 73: ...r Using the Menu LCD Brightness You can adjust the brightness of the LCD monitor Adjust settings when the LCD monitor is hard to see You can select 7 0 7 steps of LCD brightness LCD colour adjustment...

Page 74: ...n 30min Off Auto Power Off is not activated when using the USB connection remote control Liveview Fn menu or slide show SETUP MENU Move Exit Video Out NTSC USB Computer Auto Power Off 1min Folder Name...

Page 75: ...ay scratch the Sensor Do not wipe the Sensor with a cloth 8 Turn the camera off 9 Attach the lens after the mirror returns to its original position Using the Menu Change File Name You can change the f...

Page 76: ...moval The dust can be removed by shaking the Sensor Start up Action Removes dust in the sensor by selecting the check box in the Start up Action using the direction buttons Using the Menu Dust Alert C...

Page 77: ...red as All Types and One Type can be adjusted AF fine tuning is available for up to 20 registered lenses Lens ID is required for AF fine adjustment If add stops on the current depth of field will move...

Page 78: ...mode the display changes to the Playback mode Display Time 1sec 3sec 5sec Off Hold Histogram Exposure Warning Select check boxes using the direction buttons PLAYBACK MENU Move Exit Exposure Warning Of...

Page 79: ...ther or not to display the histogram and Bright Dark area warning during Digital Preview Histogram Exposure Warning Set check boxes using the direction buttons For more information about how to set Pr...

Page 80: ...ode 085 Using the automatic ISO setting mode 085 TAv Shutter Aperture Priority Mode 086 Using the manual mode to choose your own camera settings 086 M Manual Mode 087 Shooting with long time shutter s...

Page 81: ...rstand products and the results may differ depending on the types of lenses or the shooting environment P Automatic Program Exposure Mode 1 Rotate the Mode dial to select P 2 Check the Shutter speed a...

Page 82: ...switch to Aperture Priority automatic exposure by turning the rear dial in P Hyperprogram mode You can only set the aperture to a value that is in relation to shutter speed If the brightness changes a...

Page 83: ...ight conditions Sv Sensitivity Priority Mode Sv Sensitivity Priority Mode 1 Rotate the Mode dial to select Sv 2 Turn the rear dial and adjust the sensitivity The shutter speed aperture value and sensi...

Page 84: ...de 1 Rotate the Mode dial to select Tv 2 Turn the front dial and adjust the shutter speed The shutter speed and aperture value are displayed in the viewfinder and on the LCD panel 3 Now you are ready...

Page 85: ...the LCD panel 3 Now you are ready to take some pictures Expressing the background out of focus Using the Av Aperture priority mode you can express the subject in the background out of focus Shutter s...

Page 86: ...to adjust the automatic ISO sensitivity range 5 Now you are ready to take some pictures You can keep using the same shutter speed and aperture stop even if the brightness of the subject changes You ca...

Page 87: ...the middle of the EV bar If it is towards it is underexposed If it is towards it is overexposed If the value exceeds the range of the EV bar the or blinks AE L in M mode Press the AE L button to recor...

Page 88: ...e The shutter remains open as long as the shutter release button of the optional remote control is held down Noise reduction is a process to reduce noise image roughness or unevenness caused by low sh...

Page 89: ...nal flash refer to the user guide on external flash 3 Now the flash fires as soon as you press the shutter button Turn the rear dial to adjust the aperture value Press the green button to retain the s...

Page 90: ...rmation about the User Registration function see page 57 User Registration 1 Rotate the Mode dial to select User The exposure value you saved in the User Registration appears on the LCD monitor 2 Now...

Page 91: ...gative compensation and the third is over exposed positive compensation 5 If you want to cancel the auto bracket function set the number of shots to OFF using the front dial Press and hold the exposur...

Page 92: ...lt setting is 20 seconds the camera returns to settings for taking the first picture You can combineAuto Bracket with the built in flash or external flash P TTL auto only to change only the flash outp...

Page 93: ...tures in the shade It reduces the bluish colour tones in a picture About 8000K Cloudy For use when taking pictures on cloudy days About 6000K Fluorescent Light For use when taking pictures under fluor...

Page 94: ...te Balance screen appears 3 Press the direction buttons to select a desired white balance After selecting a desired White Balance rotate the main switch to You can check the previous White Balance Adj...

Page 95: ...setting Images are not saved if you fire unclear the shutter button Press the Fn button when adjustment is unsuccessful to set again If picture is extremely overexposed or underexposed white balance m...

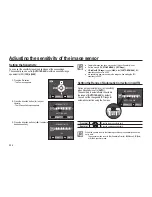
Page 96: ...n The White Balance fine tune screen appears 7 Press the OK button twice The camera is ready to take a picture with the set White Balance If the green button is pressed during the White Balance settin...

Page 97: ...sensitivity can be set to 6400 It is possible to see more noise in the images when setting the ISO sensitivity to 6400 Setting the Range of Automatic Correction in AUTO Set range to automatically corr...

Page 98: ...mpensating Flash Output 102 Flash Characteristics in Each Exposure Mode 103 Using Slow Speed Sync 104 Distance andAperture when Using the Built in Flash 104 CalculatingAperture Value from Shooting Dis...

Page 99: ...ges the flash automatically in dark or backlit locations Fill In The built in flash discharges manually When the pop up flash is closed the flash doesn t discharge When the flash is opened the flash w...

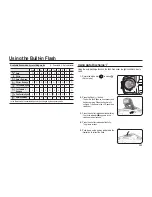
Page 100: ...changed by the exposure mode O Selectable X Not selectable Using Auto Discharge Using the auto discharge function the flash fires under low light conditions in auto mode 1 Rotate the Mode dial to sel...

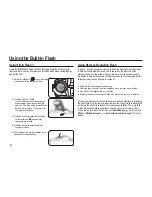
Page 101: ...fore the shutter is released This reduces pupil dilation The main flash is then discharged while the pupils are smaller reducing the red eye effect To use the red eye reduction function set Auto Red e...

Page 102: ...mode is set to Fill In Flash 2 Confirm that the flash is fully charged 3 Take the picture The picture may be over exposed if the background is too bright Front curtain sync Rear curtain sync The next...

Page 103: ...the image if the subject is too close aperture is low or sensitivity is high Using the Built in Flash Flash Characteristics in Each Exposure Mode Using the Flash in Tv Shutter Priority Mode When taki...

Page 104: ...und is as bright as the subject in the example shown slow speed sync was used in low light conditions Using Tv Shutter Priority Mode 1 Rotate the Mode dial to select Tv Tv Shutter Priority mode is set...

Page 105: ...e is not available as a lens aperture the smaller number that is closest 2 8 in the above example is generally used Using the Built in Flash Calculating Shooting Distance from Aperture Value The follo...

Page 106: ...high speed flash sync mode and wireless mode See the chart below for details O Available X Not available See the external flash operating manual for details The following information is about using th...

Page 107: ...uitable for daylight sync shooting Never press the flash pop up button when any external flash unit is attached to the camera The built in flash will hit the external flash See the SEF 36PZF or SEF 54...

Page 108: ...SLAVE2 in wireless flash sync see the SEF 36PZF SEF 54PZF operating manual Using in Wireless Mode Wireless flash mode is available for the SEF 54PZF or SEF 36PZF models You do not have to connect the...

Page 109: ...al ash sync terminal The use of high voltage or high current external ashes may cause a camera breakdown When using the external ash sync terminal the shooting information of the camera is not shared...

Page 110: ...electing the Number of Images to Display 111 Displaying a Folder 112 Slideshow 113 Digital Filters 115 Converting RAW files to JPEG format 116 Deleting Images 116 Deleting a Single Image 116 DeletingA...

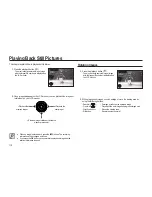
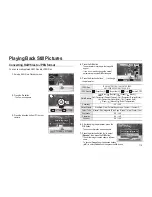
Page 111: ...rotate the playback image and the rotation information is saved Playing Back Still Pictures Rotating Images 1 Press the playback button The most recently captured image image with the largest file num...

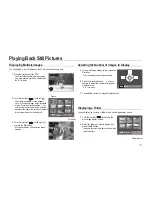
Page 112: ...selected folder are shown in the thumbnail view Playing Back Still Pictures Displaying Multiple Images You can display 4 9 or 16 images on the LCD monitor at the same time 1 Press the playback button...

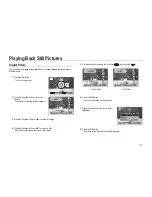
Page 113: ...xt image Direction button Stop Effect of the Slideshow Effect of the slide show Function Show Play Repeat Interval 3 5 10 20 30 sec Effect Off Effect1 Shows the fading effects between slide images Eff...

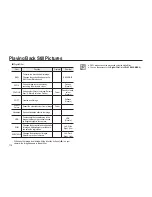
Page 114: ...buttons to select an image 4 Press the direction buttons to select a filter Select a filter and preview the effects on the image 5 Set a desired filter by using the front dial and rear dial 6 Press th...

Page 115: ...he selected colour from of image Colour Illustration Adds an illustration effect to the image HDR Compensate the contrast value in the images that have high contrast caused by bright backlight to the...

Page 116: ...Shade Cloudy Fluorescent Daylight Colours Fluorescent Daylight White Fluorescent White Lighte Tungsten Light Flash Manual Colour Temperature Sensitivity 2 0 2 0 Picture Wizard Standard Vivid Portrait...

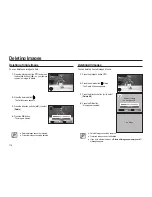
Page 117: ...ot be restored Protected images cannot be deleted Deleting All Images You can delete all saved images at once 1 Press the playback button 2 Press the delete button twice The Delete All screen appears...

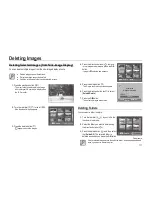
Page 118: ...te All The selected folder is deleted as soon as you press the OK button OK button OK If any protected images are in the selected folder a message appears and asks if you want to delete them all Delet...

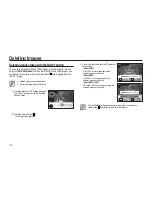
Page 119: ...ges Deleting images taken with the RAW button You can save both the RAW and JPEG images at one time shutter release using the Set RAW Button function Both the RAW and JPEG images can be deleted at onc...

Page 120: ...nprotect in Step 3 to cancel the Protect setting The symbol is displayed when playing back protected images Protecting All Images 1 Press the playback button The most recently captured image image wit...

Page 121: ...ack on the AV device 3 Turn on the AV device and the camera If you intend to use the camera continuously for a long period use of the AC PowerAdapter SAC 82 sold separately is recommended ForAV equipm...

Page 122: ...ored images 127 Removing the removable disk 127 Windows 2000 ME XP Vista 127 Setting up the USB Driver for MAC 127 Using the USB Driver for MAC 128 Samsung Master 128 Downloading images 130 Image view...

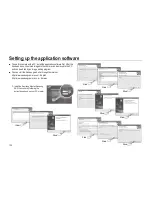
Page 123: ...guaranteed by the manufacturer is not covered by the Samsung warranty Before reading this manual you should have a basic knowledge of computers and O S Operating Systems Screen Captures illustrated o...

Page 124: ...seconds for running the automatic setup program according to the capability of your computer If the frame is not shown run the Windows Explorer and select setup exe in the CD ROM Drive root directory...

Page 125: ...s in the camera can be moved to the PC and can be edited by an image editing program You can visit the Samsung web site through the internet http www samsungcamera com English http www samsungcamera c...

Page 126: ...ting up the application software Setting up the application software Starting PC mode Starting PC mode In this mode you can download stored images to your PC through the USB cable The LCD monitor is a...

Page 127: ...n image to download Removable Disk 4 Select Copy from the Edit menu 5 Select the destination folder and click Paste from the Edit menu 6 You will find the downloaded files on your computer We recommen...

Page 128: ...disk may then be removed safely 6 Now you can safely remove the USB cable Unplug the USB cable Setting up the USB Driver for MAC Digital camera is automatically recognized by the Macintosh when conne...

Page 129: ...indow for downloading images will display after connecting the camera and your PC To download the captured images select the Select All button Select desired folder in the window and click the Select...

Page 130: ...Master 6 A window will open as shown The destination of the selected folder will be displayed along the top of the window Click the Start button to download the images 7 Downloaded images will be disp...

Page 131: ...ype selection menu You can select image viewer image edit movie edit functions in this menu 4Preview window You can preview a image or a movie clip and check the multi media information 5Zoom bar You...

Page 132: ...image quality Retouch You can change image or insert effects on the image 2Drawing tools Tools for editing an image 3Image display window Aselected image displays in this window 4Preview window You ca...

Page 133: ...ovie Edit Clip You can change the brightness contrast colour and saturation Effects You can insert an effect Set Text You can insert texts Narrate You can insert a narration Produce You can save the e...

Page 134: ...program click Start All Programs Samsung RAW Converter 2 0 Samsung RAW Converter 2 0 Developing the RAW files 1Menu bar 2Image editing tools Exposure bias Compensates the exposure value White balance...

Page 135: ...result whichever you change first The following images show how you can change the exposure to the image using the Samsung RAW Converter 2 0 You can see the changed results in the histogram windows as...

Page 136: ...JPEG or TIFF format Handling the JPEG TIFF les as you edit RAW les Handling the JPEG TIFF les as you edit RAW les Using the Samsung RAW Converter 2 0 you can handle the JPEG TIFF les as you edit RAW l...

Page 137: ...MEMO...

Page 138: ...ting Service DPOF 138 Printing Single Images 139 Settings forAll Images 140 Printing Using PictBridge 140 Connecting the Camera to the Printer 141 Printing Single Images 143 PrintingAll Images 144 Pri...

Page 139: ...he Fn button The Fn menu appears 4 Press the direction button The DPOF screen appears If DPOF settings have already been made for an image the previous number of prints and date setting on or off will...

Page 140: ...ert the date or not The date will be imprinted The date will not be imprinted Refer to Steps 5 and 6 in Printing Single Images for details of how to make the settings 5 Press the OK button The DPOF se...

Page 141: ...s Print single images Print all images Print with DPOF settings Use of theAC PowerAdapter SAC 82 sold separately is recommended when connecting the camera to a printer If theAC PowerAdapter is not use...

Page 142: ...on buttons on your camera to select Print One 2 Press the OK button The Print one screen appears 3 Press the direction buttons to select an image to print 4 Press the direction buttons to select the n...

Page 143: ...pears after each item has been set When the Paper Size is set to Standard images are printed according to the printer settings Paper Type Standard Best Good Normal Quality Standard Super fine Fine Nor...

Page 144: ...e Images for details on how to change the settings 4 Press the OK button The print settings confirmation screen appears Refer to Steps 7 and 8 of Printing Single Images for details on how to change th...

Page 145: ...the OK button The print settings confirmation screen appears Refer to Steps 7 and 8 of Printing Single Images for details on how to change the settings 4 Press the OK button on the print settings conf...

Page 146: ...l terms used in this user guide Appendix 146 Optional Accessories 146 External Flash SEF 54PZF SEF 36PZF 146 Camera Case 146 Others 147 Troubleshooting 152 Main Specifications 154 Glossary 156 Index 1...

Page 147: ...This is an auto flash unit with a maximum guide number of 54 ISO 100 m 36 ISO 100 m Its features include slave sync flash contrast control sync flash AF spot beam high speed sync wireless flash and f...

Page 148: ...locked A locked Memory Card is inserted in the camera Unlock the Memory Card Card is locked Rotation information cannot be saved Error Messages Description This image is protected Rotation information...

Page 149: ...or images captured with other cameras No DPOF files No file set with DPOF Set DPOF and print Printer error There is an error with the printer and the file cannot be printed Fix error and print No pap...

Page 150: ...uter Set transfer mode to Printer We recommend checking the following items before contacting a service centre Problem Cause Remedy Camera does not turn on Batteries are not installed Check if batteri...

Page 151: ...e a tripod Optical image stabilization OIS may not work if shots are taken at a very short distance Move away from the subject or turn off the Shake Reduction function and use a tripod In rare cases t...

Page 152: ...ave Legacy USB Support If you can t change the menu by yourself contact the PC manufacturer or BIOS manufacturer Case 9 The camera is connected to the USB port located on the front of the computer Whe...

Page 153: ...step 2EV 1 3 EV step Exposure Control AE Lock AEL ISO Auto 100 200 400 800 1600 3200 1 3EV or 1 2EV step 6400 User setting When expanded Bulb mode 1600 Maximum Flash Type Built in retractable P TTL m...

Page 154: ...d camera settings Image Play Type Single image Thumbnail Rotate Slide Show 4 type Transition Effect Histogram Magnification up to 32X Edit Rotate Digital Filter Digital Filter B W 4 types Sepia 3 type...

Page 155: ...defined range of colours from the spectrum which are used In digital cameras sRGB is defined as the standard Colour Space by Exif In this camera AdobeRGB is also used because of its richer colour exp...

Page 156: ...viewing on your PC or for attaching to e mail ND Neutral Density Filter Afilter which reduces the amount of light entering the camera lens by a measured amount without affecting the picture itself Noi...

Page 157: ...emperature 092 Colour Temp Unit Colour Temp Unit Colour Temp Unit 064 Colour Space 056 CUSTOM1 MENU 060 CUSTOM2 MENU 066 Continuous Shooting 036 Change File Name 074 Center weighted metering 047 Compe...

Page 158: ...n 100 RAW RAW RAW 049 056 RAW 049 056 Remote control 052 Reset Custom1 060 Reset Custom2 066 Reset Reset Reset 076 Recording information 110 Release in Charging 067 S Shutter release button 034 Shutte...

Page 159: ...l product manufacturing stages to preserve the environment and is taking a number of steps to provide customers with more environment friendly products The Eco mark represents Samsung Techwin s will t...

Page 160: ...y one or more of the following measures Reorient or relocate the receiving antenna Increase the distance between the equipment and receiver Connect the equipment into an outlet on a circuit different...

Page 161: ...MEMO...

Page 162: ...MEMO...

Page 163: ......

Reviews: