background image

9

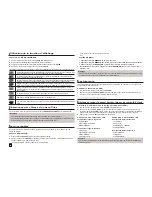
Fast playback

To play back the disc at a faster speed, press (

k/K

) during playback

•   Each time you press either button, the playback speed will change as follows : 2X 

 4X 

 8X 

 16X 

 32X.

Compatible Devices

1.  USB devices that support USB Mass Storage v1.0.(USB devices that operate as a removable disk in 

Windows (2000 or later) without additional driver installation.)

2.  MP3 Player: Flash type MP3 player.

3.  Digital camera: Cameras that support USB Mass Storage v1.0. 

  •  Cameras that operate as a removable disk in Windows (2000 or later) without additional driver installation.

4.  USB Flash Drive: Devices that support USB2.0 or USB1.1.  

  •  You may experience a difference in playback quality when you connect a USB1.1 device.

5.  USB card Reader: One slot USB card reader and Multi slot USB card reader 

  •  Depending on the manufacturer. the USB card reader may not be supported. 

  •  If you install multiple memory devices into a multi card reader, you may experience problems.

6.  If you use a USB extension cable, the USB device might not be recognized.
•   CBI (Control/Bulk/Interrupt) is not supported.

•   Digital Cameras that use PTP protocol or require additional program installation when connected to a PC are 

not supported.

•   A device using NTFS file system is not supported. (Only FAT 16/32 (File Allocation Table 16/32) file system is 

supported.)

•   Some MP3 players, when connected to this product,may not operate depending on the sector size of their 

file system.

•   The USB HOST function is not supported if a product that transfers media files by its manufacturer-specific 

program is connected.

•   Does not operate with Janus enabled MTP(Media Transfer Protocol) devices.

•   The USB host function of this product does not support all USB devices.

Picture CD Playback

1.

  Select the desired folder.

2.

  Press the 

›

/

‚

 buttons to select a Picture file in the clips menu and then press the 

ENTER

 button.

Note

-  Press the STOP button to return to the clips menu.
-  When playing a Kodak Picture CD, the unit displays the Photo directly, not the clips menu.

CD Ripping (Only DVD-C550/DVD-C550K)

This feature allows you to copy  audio files from a disc to a USB device in MP3 format

Open the dics tray. Place the Audio CD(CD DA) disc on the tray, and close the tray. Connect the USB device to 
the USB port on the front of the unit. Press the DVD button.

1.

  Press the 

TOOLS

 button to display the Ripping screen.

2.

  Press the 

›

/

‚

 buttons, then press the 

ENTER

 button to select files for ripping.


-  To deselect files, press ENTER button again.

3.

  Press the 

¥

 and 

‚

 button to select 

START

, then press the 

ENTER

 button begin ripping.


The Ripping menu contain the following buttons :


-   Mode (Fast/Normal)


-   Bitrate, press ENTER to change : 128kbps 

➞ 

192kbps 

➞ 

128kbps ... 


  • Standard : 128kbps


  • Better Quality : 192kbps


-  Device selection, press ENTER to change between partitions on the USB device (max 4).

     -  Select - Unselect, press ENTER to change from Select all (files) or Select none.

Note

-  To cancel copying in progress, press the ENTER button.

-  To return to CDDA screen, press the TOOLS button again.

-  When the CD ripping being processed the player will automatic in play mode.

-  Ripping process is 2.6 times of normal speed.

-  Only the Audio CD(CD DA) dics can be ripping.

-  The USB button does not work while you’re in the Ripping menu.

-  CD ripping function may not supported for some MP3 players device.

Playing Media Files Using the USB Host feature 
(Only DVD-C550/DVD-C550K)

You can enjoy the media files such as pictures, movies andtunes saved in an MP3 player, USB memory or 
digital camera in high audio by connecting the storage device to the USB port of the DVD Player.

Using the USB HOST feature
1.

  Connect the USB device to the USB port on the front of the unit.

2.

  The USB Menu screen appears. Press the 

¥

/

Š

 button to select Menu, then press 

ENTER

.

3.

  Press the 

›

/

‚

 buttons to select a file in the USB device. Press 

ENTER

 to Open the file.

Note

•  Each time the USB button on the remote control is  pressed, a frame of the USB device selection will appear.
•  “USB” appears on the display screen.
•  Depends on the file size and clip duration, loading time on USB may take longer than using CD or DVD media.
•  USB MENU screen appears on the TV screen and the saved file is played. 
•  If there is a Disc in the unit, pressing the DVD button will make the player exit the USB menu and load the disc.

Safe USB Removal
1.

  Press the DVD button to return to disc mode or the main screen.

2.

  Press the STOP (

) button

3.

   Remove the USB cable.

Skip Forward/Back

During playback, press the (

|k/K|

) button.

•  When there is more than one file, when you press the 

K|

 button, the next file is selected.

•  When there is more than one file, when you press the 

|k

 button, the previous file is selected.

Rotation

- Press the 

TOOLS

 button to select Rotate, and then press the 

ENTER

 button.

-  Each time the 

¥Š

buttons are pressed, the picture rotates 90 degrees clockwise.

-  Each time the 

›

 button is  pressed, the picture will reverse to the upside down to show a mirror image.

-  Each time the 

‚

 button is pressed, the picture will reverse to the right  side to show a mirror image.

Zoom

-  Press the 

TOOLS

 button to select Zoom, and then press the 

ENTER

 button..

-  Each time 

ENTER

 button is pressed, the picture is enlarged. Zoom mode : X1-X2-X3-X4-X1.

Slide Show

-  When you press the PLAY at JPEG file, it will go to full screen mode and automatically slide show.

Note

-  Depending on a file size, the amount of time between each picture may be different from the manual.
-  If you don’t press any button, the slide show will start automatically in about 10 seconds by default.

Summary of Contents for DVD-C500

Page 1: ...User Manual AK68 01890A imagine the possibilities Thank you for purchasing this Samsung product To receive more complete service please register your product at www samsung com global register DVD C500 DVD C550 DVD C550K ...

Page 2: ...ce only covers the use of this product unit to encode and or decode audio files conforming to the ISO OUR 11172 3 or ISO OUR 13818 3 No rights are granted under this licence for product features or functions that do not conform to the ISO OUR 11172 3 or ISO OUR 13818 3 CAUTION USE OF ANY CONTROLS ADJUSTMENTS OR PROCEDURES OTHER THAN SPECIFIED HEREIN MAY RESULT IN HAZARDOUS RADIATION EXPOSURE Table...

Page 3: ...080p DVD PLAYER PLEASE CONTACT SAMSUNG S CUSTOMER SERVICE CENTER Description Front Panel Controls Region Number Both the DVD player and the discs are coded by region These regional codes must match in order for the disc to play If the codes do not match the disc will not play The Region Number for this player is described on the rear panel of the player Disc Markings Play Region Number PAL broadca...

Page 4: ... set the HDMI output resolution 720p 1080p or 1080i HDMI output provides better picture quality If you connect an HDMI cable between Samsung TV and this DVD player you can operate this DVD player using your TV remote control This is only available with Samsung TVs that support Anynet HDMI CEC If your TV has an logo then it will Supports the Anynet Function HDMI High Definition Multimedia Interface...

Page 5: ...he language for the startup screen is not set the set tings may change whenever you turn the power on or off Therefore make sure that you select the language you want to use Once you select a menu language you can change it by pressing the button on the front panel of the unit for more than 5 seconds with no disc in the unit Then the SELECT MENU LANGUAGE window appears again where you can reset yo...

Page 6: ...tical Fit If you are using a 4 3 TV For 16 9 aspect ratio discs 4 3 Letter Box 4 3 Pan Scan SCREEN FIT ZOOM FIT For 4 3 aspect ratio discs Normal Screen SCREEN FIT ZOOM FIT Using the Display Function When Playing a DVD VCD MPEG4 1 During play press the TOOLS button on the remote control 2 Press the buttons to select the desired item 3 Press the buttons to make the desired setup 4 To make the scree...

Page 7: ...go access these folders and the files in them follow these steps 1 Open the disc tray Place the disc on the tray 2 Close the tray The tray closes and the Parent Folder Menu screen appears top screen image Parent folders contain all the Peer folders that have the same kind of content music video photos etc 3 Press the buttons to select the Parent folder of your choice and then press the ENTER A scr...

Page 8: ...iD then press the ENTER Press the and then press the ENTER button Note A B REPEAT allow you to set point B directly after point A has been set MPEG4 Function Description Function Description Skip k or K During play press the k or K button it moves to next or previous track Search k or K During play press the SEARCH k or K button and press again to search at a faster speed Allows you to search at a...

Page 9: ...ENTER to change 128kbps 192kbps 128kbps Standard 128kbps Better Quality 192kbps Device selection press ENTER to change between partitions on the USB device max 4 Select Unselect press ENTER to change from Select all files or Select none Note To cancel copying in progress press the ENTER button To return to CDDA screen press the TOOLS button again When the CD ripping being processed the player will...

Page 10: ...isc is over 500 only 500 JPEG files can be played If the number of folders in 1 Disc is over 500 only JPEG files in 500 folders can be played Mic Volume and Key Control 1 Playback the Karaoke Disc containing the wanted songs Press the KARAOKE button and then press to select VOL or KEY 2 Press the buttons to change the desired item Using the Setup Menu Changing setup menu The Setup menu lets you cu...

Page 11: ...rectly the screen may be blocked The resolutions available for HDMI output depend on the connected TV or projector For details see the user s manual of your TV or projector When the resolution is changed during playback it may take a few seconds for a normal image to appear If you set the HDMI output resolution 720p 1080p or 1080i HDMI output provides better picture quality It is recommended to se...

Page 12: ...udio and subtitle language in advance they will come up auto matically every time you watch a movie 1 With the unit in Stop mode press the MENU button Press the buttons to select SETTINGS then press the ENTER button 2 Press the buttons to select LANGUAGE then press the or ENTER button 3 Press the buttons to select the desired language then press the ENTER button Note The language is selected and t...

Page 13: ...5 1 channel sound Check whether the disc being played has the 5 1 ch mark on the outside Check if your audio system is connected and working properly In a SETUP Menu is the Audio Output set Bitstream The screen is blocked Press the button in front panel for more than 5 seconds under no disc inside All setting will revert to factory settings Forgot password Press the button in front panel for more ...

Page 14: ... H Operating Temperature Range 5ºC to 35ºC Operating Humidity Range 10 to 75 Video Output Composite Video 1 channel 1 0 Vp p 75 Ω load Component Video Y 1 0 Vp p 75 Ω load Pr 0 70 Vp p 75 Ω load Pb 0 70 Vp p 75 Ω load HDMI 480p 576p 720p 1080p 1080i Audio Output Output terminal RCA Maximum Output Level 2Vrms Frequency Response 20 Hz to 20 kHz Digital Audio Out Coaxial terminal S PDIF 5 1 Channel D...

Page 15: ...Memo ...

Page 16: ...67864 www samsung com no Poland 0 801 1SAMSUNG 172678 022 607 93 33 www samsung com pl Portugal 80820 SAMSUNG 726 7864 www samsung com pt Slovakia 0800 SAMSUNG 726 7864 www samsung com sk Spain 902 1 SAMSUNG 902 172 678 www samsung com es Sweden 0771 726 7864 SAMSUNG www samsung com se U K 0845 SAMSUNG 7267864 www samsung com uk Eire 0818 717 100 www samsung com ie Austria 0810 SAMSUNG 7267864 å 0...

Page 17: ...DVD Manuel d utilisation Un monde de possibilités Merci d avoir choisi Samsung Pour bénéficier d un service plus complet enregistrez votre produit sur le site www samsung com global register DVD C500 DVD C550 DVD C550K ...

Page 18: ... privée non commerciale par l utilisateur final pour les contenus sous licence Aucun droit n est concédé pour une utilisation commerciale Cette licence ne couvre aucun produit autre que celui ci et ne peut être étendue à un produit ou processus qui n est pas sous licence selon la norme ISO IEC 11172 3 ou ISO IEC 13818 3 utilisé ou vendu avec ce produit La licence couvre uniquement l utilisation de...

Page 19: ...dif féremment selon les parties du monde Il faut donc le code correspondant à chaque région pour un bon fonctionnement du lecteur Si vous tentez de lire un disque DVD avec un code incorrect le lecteur ne fonctionnera pas et un message d erreur apparaîtra Les codes régionaux pour ce lecteur figurent sur la face arrière du lecteur DivX Certification DivX DivX Certified et les logos qui leur sont ass...

Page 20: ...le HDMI ou HDMI DVI est branché sur le téléviseur la sortie du lecteur DVD bascule automatiquement sur HDMI DVI au bout de 10 secondes Si vous réglez la résolution de sortie HDMI 720p 1080i ou 1080p la sortie HDMI offre une meilleure qualité d image Si vous reliez le câble HDMI au téléviseur Samsung vous pouvez facilement régler le lecteur DVD à l aide de la télécommande du téléviseur uniquement d...

Page 21: ...ement lorsque vous branchez le lecteur DVD pour la première fois Si vous ne définissez pas la langue dans l écran de démarrage les réglages peuvent changer à chaque mise sous ou hors tension de l appareil Veillez par conséquent à sélectionner la langue d affichage souhaitée Après validation vous pou vez néanmoins la modifier en appuyant sur le bouton situé en façade de l appareil pendant plus de c...

Page 22: ...élément souhaité 3 Utilisez les boutons pour effectuer le réglage souhaité et appuyez sur ENTER 4 Pour fermer l écran appuyez à nouveau sur la touche TOOLS Remarque Dans le cas de certains disques le comportement du rapport hauteur largeur de l écran pourrait différer de celui décrit ci dessus Les fonctions disponibles lors de l utilisation de la fonction d affichage sont répertoriées dans le tabl...

Page 23: ...nt un sous titre avec le bouton SUBTITLE Utilisation du bouton SUBTITLE DVD MPEG4 1 Lors de la lecture Appuyez sur le bouton SUBTITLE 2 Appuyez sur la touche SUBTITLE ou pour changer la langue pour changer la langue Chaque fois que vous appuyez sur la touch SUBTITLE SOUS TITRES ou sur la langue change 3 Pour que l icône SUBTITLE disparaisse de l écran appuyez sur le bouton EXIT Sélection de la lan...

Page 24: ...de définir un point B directement après avoir sélectionné le point A Fichier CD R AVI Ce lecteur permet de lire les fichiers vidéo compressés suivants contenus dans un fichier au format AVI Contenus DivX 3 11 Contenus DivX 4 basés sur le profil simple MPEG4 Contenus DivX 5 profil simple MPEG4 en plus d autres caractéristiques comme des images bidirectionnelles Les fonctions Qpel et GMC sont égalem...

Page 25: ...e menu USB et charge le disque Retrait du périphérique USB en toute sécurité 1 Appuyez sur la touche DVD pour revenir au mode du disque ou à l écran principal 2 Appuyez sur le bouton STOP ARRÊT 3 Déconnectez le câble USB Saut avant arrière Pendant la lecture appuyez sur le bouton k K Quand il y a plus d un fichier le fichier suivant est sélectionné lorsque vous appuyez sur le bouton K Quand il y a...

Page 26: ...SS Picture Si le disque comporte plus de 500 fichiers seuls 500 fichiers JPEG seront lus Si le disque comporte plus de 500 dossiers seuls les fichiers JPEG de 500 dossiers seront lus Lecture de CD image pour JPEG HD Connexion HDMI ou DVI obligatoire La résolution doit être de 720p 1080i 1080p et JPEG HD doit être en mode HD 1 Sélectionnez le dossier souhaité 2 Appuyez sur les boutons pour sélectio...

Page 27: ...is appuyez sur ou ENTER 3 Appuyez sur les boutons pour sélectionner l élément souhait puis appuyez sur ou ENTER Configuration des enceintes ambiophoniques Seulement DVD C550K 1 Appuyez sur le bouton MENU appareil en mode Arrêt Appuyez sur les boutons our sélectionner PARAMÉTRES puis appuyez sur ENTER 2 Appuyez sur les boutons pour sélectionner AUDIO puis appuyez sur ou ENTER 3 Appuyez sur les bout...

Page 28: ...e Remarque La langue est sélectionnée et l écran revient au menu Configuration de la langue Pour que le menu de configuration disparaisse appuyez sur le bouton MENU Si la langue sélectionnée n est pas enregistrée sur le disque la langue originale pré enregistrée est sélectionnée Sélectionnez Originale si vous souhaitez que la langue de la bande son par défaut soit la langue originale d enregistrem...

Page 29: ...e la mention Dolby ou DTS 5 1 ch Vérifiez si votre système audio est branché et fonctionne correctement Dans le menu CONFIGURATION la sortie audio est elle réglée sur Bitstream L écran est bloqué Appuyez sur le bouton pendant plus de 5 secondes en l absence de disque Tous les réglages sont réinitialisés sur les valeurs usine Mot de passe oublié Appuyez sur le bouton pendant plus de 5 secondes en l...

Page 30: ...e de fonctionnement 5ºC to 35ºC Humidité ambiante 10 to 75 Sortie Vidéo Vidéo composite 1 canaux 1 0 Vp p impédance de 75 Ω Vidéo Composant Y 1 0 Vp p impédance de 75 Ω Pr 0 70 Vp p impédance de 75 Ω Pb 0 70 VVp p impédance de 75 Ω HDMI 480p 576p 720p 1080p 1080i Sortie Audio Borne de sortie RCA Niveau de sortie maximum 2Vrms RÉPONSE EN FRÉQUENCE 20 Hz 20 kHz Sortie audio numérique Coaxial SPDIF 5...

Page 31: ...Memo ...

Page 32: ... Norway 3 SAMSUNG 7267864 www samsung com no Poland 0 801 1SAMSUNG 172678 022 607 93 33 www samsung com pl Portugal 80820 SAMSUNG 726 7864 www samsung com pt Slovakia 0800 SAMSUNG 726 7864 www samsung com sk Spain 902 1 SAMSUNG 902 172 678 www samsung com es Sweden 0771 726 7864 SAMSUNG www samsung com se U K 0845 SAMSUNG 7267864 www samsung com uk Eire 0818 717 100 www samsung com ie Austria 0810...

Reviews: