background image

6

ENGLISH

7

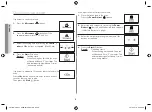
Installing your microwave oven

Place the oven on a flat level surface 85cm above the floor. The surface 

should be strong enough to safety bear the weight of the oven.

1. 

When you install your oven, make sure there is 

adequate ventilation for your oven by leaving at least 

10 cm (4 inches) of space behind and, on the sides 

of the oven and 20 cm (8 inches) of space above.

2. 

Remove all packing materials inside the oven. 

Install the roller ring and turntable. Check that the 

turntable rotates freely.

3. 

This microwave oven has to be positioned so that plug is accessible.

If the supply cord is damaged, it must be replaced by a special cord or 

assembly available from the manufacturer or its service agent. 

For your personal safety, plug the cable into a 3-pin, 230 Volt, 50 Hz, 

AC earthed socket. If the power cable of this appliance is damaged, it 

must be replaced by a special cable.

Do not install the microwave oven in hot or damp surroundings like 

next to a traditional oven or radiator. The power supply specifications 

of the oven must be respected and any extension cable used must 

be of the same standard as the power cable supplied with the oven. 

Wipe the interior and the door seal with a damp cloth before using your 

microwave oven for the first time.

10 cm 

behind

20 cm 

above

10 cm on 

the side

85 cm of 

the floor

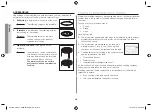
Cleaning your microwave oven

The following parts of your microwave oven should be cleaned regularly to 

prevent grease and food particles from building up:

•  Inside and outside surfaces
•  Door and door seals
•  Turntable and Roller rings

aLwayS

 ensure that the door seals are clean and the door closes 

properly.

Failure to maintain the oven in a clean condition could lead to 

deterioration of the surface that could adversely affect the life of the 

appliance and possibly result in a hazardous situation.

1. 

Clean the outside surfaces with a soft cloth and warm, soapy water.

Rinse and dry.

2. 

Remove any splashes or stains on the inside surfaces or on the roller 

ring with a soapy cloth. Rinse and dry.

3. 

To loosen hardened food particles and remove smells, place a cup 

of diluted lemon juice on the turntable and heat for ten minutes at 

maximum power.

4. 

Wash the dishwasher-safe plate whenever necessary.

do NoT

 spill water in the vents. 

NEvEr

 use any abrasive products or 

chemical solvents.Take particular care when cleaning the door seals to 

ensure that no particles:

•  Accumulate
•  Prevent the door from closing correctly

clean 

the microwave oven cavity right ofter each use with a mild 

detergent solution, but let the microwave oven cool down before 

cleaning in order to avoid injury.

The instructions for cooking ranges, hobs and ovens shall state that a 

steam cleaner is not to be used.

When cleaning the upper part inside the cavity, it will be 

convenient to turn heater downward by 45 ° and clean it.

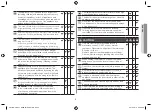
Eggs in their shell and whole hard-boiled eggs 

should not be heated in microwave ovens since they 

may explode, even after microwave heating has 

ended; Also do not heat airtight or vacuum-sealed 

bottles, jars, containers, nuts inshells, tomatoes etc.

Do not cover the ventilation slots with cloth or paper. 

They may catch fire as hot air escapes from the 

oven. The oven may also overheat and switch itself 

off automatically, and will remain off until it cools 

sufficiently.

Always use oven mitts when removing a dish from 

the oven to avoid unintentional burns.
Do not touch heating elements or interior oven walls 

until the oven has cooled down.

Stir liquids halfway during heating or after heating 

ends and allow the liquid stand at least 20 seconds 

after heating to prevent eruptive boiling.

Stand at arms length from the oven when opening 

the door to avoid getting scalded by escaping hot 

air or steam.

Do not operate the microwave oven when it is 

empty. The microwave oven will automatically 

shut down for 30 minutes for safety purposes. We 

recommend placing a glass of water inside the oven 

at all times to absorb microwave energy in case the 

microwave oven is started accidentally.

Do not use harsh abrasive cleaners or sharp metal 

scrapers to clean the oven door glass since they can 

scratch the surface, which may result in shattering 

of the glass.

Install the oven in compliance with the clearances 

stated in this manual. (See installing your microwave 

oven.)

Take care when connecting other electrical 

appliances to sockets near the oven.

CE74JD-CR_XTL_DE68-04168A-01_EN.indd   6

2014-05-16   �� 9:09:21

Summary of Contents for CE74JD

Page 1: ...ctions Cooking Guide CE74JD This manual is made with 100 recycled paper Please be advised that the Samsung warranty does NOT cover service calls to explain product operation correct improper installation or perform normal cleaning or maintenance CE74JD CR_XTL_DE68 04168A 01_EN indd 1 2014 05 16 9 09 10 ...

Page 2: ...then with a soft dry cloth c Do NOT operate the oven if it is damaged until it has been repaired by a S c a Contents Safety information 2 Installing your microwave oven 6 Cleaning your microwave oven 7 Storing and repairing your microwave oven 7 Quick look up guide 8 Oven features 9 Oven 9 Control panel 9 Accessories 10 How a microwave oven works 10 Checking that your oven is operating correctly 1...

Page 3: ... contact points using a dry cloth on a regular basis Do not pull or excessively bend or place heavy objecton the power cord In the event of a gas leak such as propane gas LP gas etc ventilate immediately without touching the power plug Do not touch the power plug with wet hands Do not turn the appliance off by unplugging the power plug while an operation is in progress Do not insert fingers or for...

Page 4: ... Cleaning and user maintenance shall not be made by children without supervision WARNING If the door or door seals are damaged the oven must not be operated until it has been repaired by a competent person WARNING It is hazardous for anyone other than a competent person to carry out any service or repair operation that involves the removal of a cover which gives protection against exposure to micr...

Page 5: ...facturer its service agent or similarly qualified persons in order to avoid a hazard WARNING When the appliance is operated in the combination mode children should only use the oven under adult supervision due to the temperatures generated The temperature of accessible surfaces may be high when the appliance is operating The door or the outer surface may get hot when the appliance is operating Do ...

Page 6: ...boiled eggs should not be heated in microwave ovens since they may explode even after microwave heating has ended Also do not heat airtight or vacuum sealed bottles jars containers nuts inshells tomatoes etc Do not cover the ventilation slots with cloth or paper They may catch fire as hot air escapes from the oven The oven may also overheat and switch itself off automatically and will remain off u...

Page 7: ...properly Failure to maintain the oven in a clean condition could lead to deterioration of the surface that could adversely affect the life of the appliance and possibly result in a hazardous situation 1 Clean the outside surfaces with a soft cloth and warm soapy water Rinse and dry 2 Remove any splashes or stains on the inside surfaces or on the roller ring with a soapy cloth Rinse and dry 3 To lo...

Page 8: ...ds leave the food in the oven Press 30s button one or more times for each extra 30 seconds that you wish to add Then press the Start button If you want to Power Defrost some food 1 Place the frozen food in the oven Press the Power Defrost button 2 Select the food category by pressing the Power Defrost button until the desired food category is selected Refer to 14 page 3 Select the weight by pressi...

Page 9: ... BUTTON 14 CAFETERIA BUTTON 15 VEGGIE BUTTON 16 KID S NUTRITION BUTTON 17 CONVECTION BUTTON 18 GRILL BUTTON 19 FAST PREHEAT BUTTON 20 MICROWAVE CONVECTION COMBI BUTTON 21 START BUTTON 22 30s BUTTON Oven features Oven 1 DOOR HANDLE 2 VENTILATION HOLES 3 GRILL 4 LIGHT 5 DISPLAY 6 DOOR LATCHES 7 DOOR 8 TURNTABLE 9 COUPLER 10 ROLLER RING 11 SAFETY INTERLOCK HOLES 12 CONTROL PANEL 1 2 3 4 5 9 10 11 12 ...

Page 10: ...eased enables food to be cooked or reheated without changing either the form or the colour You can use your microwave oven to Defrost Reheat Cook Cooking Principle 1 The microwaves generated by the magnetron reflected at cavity and are distributed uniformly as the food rotates on the turntable The food is thus cooked evenly 2 The microwaves are absorbed by the food up to a depth of about 1 inch 2 ...

Page 11: ...se set the current time The time can be displayed in either the 24 hour or 12 hour notation You must set the clock When you first install your microwave oven After a power failure Do not forget to reset the clock when you switch to and from summer and winter time Auto energy saving function Only for applicable models If you do not select any function when appliance is in the middle of setting or o...

Page 12: ... it has finished The oven will beep and flash 0 four times The end reminder signal will beep 3 times once every minute Adjusting the cooking time You can increase the cooking time by pressing the 30 s button once for each 30 seconds to be added 1 Press the 30 s button once for each 30 seconds to be added 2 Press the Start button Power levels You can choose among the power levels and temperature be...

Page 13: ...al will beep 3 times once every minute Using the keep warm settings The following table presents 4 items It contains food drink bread and pastries and dishes crockery The convection heater operates only and it will cycle on and off to keep food warm Use oven gloves while taking out Item Example Recommendations Food Roast meat chicken gratin pizza potatoes and plated meal Drink Water milk and coffe...

Page 14: ...t food manually To do so select the microwave cooking reheating function with a power level of 180 W Refer to the section entitled Cooking Reheating on page 12 for further details Using the curd feature Place the Curd in the centre of the turntable and close the door 1 Press the Curd button 2 Press the Start Result When curd time has finished the oven will beep and flash 0 four times The end remin...

Page 15: ...gramme is suitable for whole fishes as well as for fish fillets Code Food Serving size Standing time Recommendations 4 Bread Cake 125 625 g 10 60 min Put bread horizontally on a piece of kitchen paper and turn over as soon as the oven beeps Place cake on a ceramic plate and if possible turn over as soon as the oven beeps Oven keeps operating and is stopped when you open the door This programme is ...

Page 16: ...erving Size 200 300 gm Tomato 4 Onion Chopped 1 Paneer Cup Coriander Cumin Powder Salt Sugar As per your test Butter 1 tbsp Recommendations Cut tomatoes and scoop out the pulp to have plain tomato cups Grate paneer then mix coriander cumin powder and the stuff the mixture with tomatoes In Microwave safe Glass bowl add butter and chopped onions and press the start When beeps add tomatoes and cover ...

Page 17: ...ll other ingredients and cook Food Ingredients 8 Kheema Masala Serving Size 400 500 gm Kheema chicken 200 gm Chopped Onion 1 Chopped Tomato 1 Ginger Garlic Paste 1 tsp Turmeric Salt Red Chili Cumin Powder Garam Masala As per taste Oil and Water As required Dhaniya For Garnishing Recommendations In microwave safe glass bowl take kheema with water After that put the microwave safe bowl in microwave ...

Page 18: ...ton When beeps put this cake tin in microwave and cook Food Ingredients 2 Garlic Bread Serving Size 300 400 gm Bread French 3 slices Butter 3 tbsp Garlic 2 tbsp Grated Cheese 3 tbsp Salt Pepper Oregano Chili Flakes As per taste Recommendations Mix butter garlic salt pepper oregano and make a paste Apply this paste on both sides of the bread and sprinkle grated cheese and chilli flakes Keep these b...

Page 19: ...microwave bowl add butter garlic spinach and press the start When beeps remove and add grated paneer basil cheese mozzarella cheese mix it well Spread the mixer on the toast In a low rack take spread bread slice at low rack and cook Food Ingredients 8 Cheese Straw Serving Size 200 250 gm Plain Flour 100 gm Grated Cheese 25 gm Butter 50 gm Baking Powder 1 8 tsp Pepper Powder tsp Chili Powder tsp Sa...

Page 20: ...a 1 tbsp Ginger Garlic Paste 1 tbsp Eatable Orange A Pinch Oil 2 tbsp Salt Lemon Juice As per your taste Cream 2 tbsp Recommendations Mix all the ingredients together and keep in the refrigerator for 1 hour After marinating add chicken pieces in a greased metal tray Sprinkle some oil on it and cook on the high rack When beeps turn pieces of side down and cook Serve hot with green Chutney 3 Paneer ...

Page 21: ...ic Garam Masala Chat Masala Oil As per your taste Marinate Hung Curd 1 cup Ginger Garlic Paste 2 tsp Recommendations In microwave safe glass bowl take all the ingredients Marinate in refrigerator for 1 hr In metal tray arrange the pieces sprinkle oil and cook at the high rack When beeps turn the pieces and cook again Food Ingredients 9 Pepper Chicken Serving Size 400 500 gm Boneless chicken 500 gm...

Page 22: ...wl in microwave and then press start When beeps add water sugar and salt to taste lemon juice mix well and keep inside And then put the bowl in microwave and cook again Garnish with coriander and bhujiya Food Ingredients 4 Daliya Serving Size 300 400 gm Daliya 100 gm Sugar 75 gm Milk Water equal 200 ml Ghee 1 tbsp Cardamom Powder Kishmish and Cashew Nuts As per your taste Recommendations Soaked da...

Page 23: ...l and all other ingredients along with water and cook again Using the kid s nutrition feature The Auto Kid s Nutrition feature has 10 pre programmed cooking time You do not need to set either the cooking times or the power level First place the food in the centre of the turntable and close the door Open the door Place the food in the centre of the turntable Close the door 1 Select the type of food...

Page 24: ...ons In microwave safe glass bowl take suji ghee and cook When beeps add water sugar dry fruit cardamom powder mix well and cook again Food Ingredients 5 Chicken Pizza Serving Size 200 250 gm Pizza Base 100 gm Pizza Toping 3 tbsp Boiled Chicken Shredded cup Grated Cheese cup Flakes Oregano As per your taste Recommendations Preheat the 200 C Convection using the fast preheat button When beeps add pi...

Page 25: ... start cooking Using the veggie feature The Auto Veggie feature has 10 pre programmed cooking time You do not need to set either the cooking times or the power level First place the food in the centre of the turntable and close the door Open the door Place the food in the centre of the turntable Close the door 1 Select the type of food that you are cooking by pressing the Veggie button once or mor...

Page 26: ...ing Size 150 200 gm Aloo Boiled 2 nos Methi 1 bunch Green Chilies 2 to 3 nos Oil 2 tbsp Salt Turmeric Musters Seeds Cumin As required Recommendations In microwave safe bowl take oil muster cumin green chilies After that put the microwave safe bowl in microwave and start to cook When beeps add methi leaves turmeric and salt mix well and after that put the bowl in microwave and cook again After the ...

Page 27: ...ill and cumin with little water and keep aside In microwave safe bowl take all the vegetables with some water and start to cook When beeps in another microwave safe bowl take coconut oils curry leaves turmeric and boiled vegetables mix well and cook again After cooking add curd and paste of coconut and mix well Fast preheating the oven For convection cooking it is recommended that you preheat the ...

Page 28: ...operating 4 Press the Start button Result Cooking starts The display times are 8 seconds for the preset cooking time and 2 seconds for the preset temperature in sequence Ex 30 minutes of cooking time at 200 C displayed for 8 seconds displayed for 2 seconds When cooking has finished the oven will beep and flash 0 four times The end reminder signal will beep 3 times once every minute If you would li...

Page 29: ...Grilling starts When cooking has finished the oven will beep and flash 0 four times The end reminder signal will beep 3 times once every minute Combining microwaves and the grill You can also combine microwave cooking with the grill to cook quickly and brown at the same time ALWAYS use microwave safe and oven proof cookware Glass or ceramic dishes are ideal as they allow the microwaves to penetrat...

Page 30: ...5 Set the appropriate power level by pressing the Microwave CONV button until the corresponding output power is displayed 600 450 300 180 100 W 6 Press the Start button Result Combination cooking starts The oven is heated to the required temperature and then microwave cooking continues until the cooking time is over The display times are 8 seconds for the preset cooking time and 2 seconds for the ...

Page 31: ...ill for 10 minutes Defrosting must be the first stage Combination and Grill can only be used once during the remaining two stages However microwave can be used twice at two different power levels 1 Press the Power Defrost button 2 Select the type of food that you are cooking by pressing the Power Defrost button Refer to 14 page 3 Set the weight by pressing the and buttons the appropriate number of...

Page 32: ...d Overheating may cause the polystyrene to melt Paper bags or newspaperr May catch fire Recycled paper or metal trims May cause arcing Cookware Microwave Safe Comments Glassware Oven to table ware Can be used unless decorated with a metal trim Fine glassware Can be used to warm foods or liquids Delicate glass may break or crack if heated suddenly Glass jars Must remove the lid Suitable for warming...

Page 33: ...s techniques and hints Covering during cooking To cover the food during cooking is very important as the evaporated water rises as steam and contributes to cooking process Food can be covered in different ways e g with a ceramic plate plastic cover or microwave suitable cling film Standing times After cooking is over food the standing time is important to allow the temperature to even out within t...

Page 34: ... 250 g 1 2 3 3 3 Prepare small whole or sliced mushrooms Do not add any water Sprinkle with lemon juice Spice with salt and pepper Drain before serving Food Portion Time min Standing time min Instructions Onions 250 g 5 6 3 Cut onions into slices or halves Add only 15 ml 1 tbsp water Pepper 250 g 4 5 3 Cut pepper into small slices Potatoes 250 g 500 g 4 5 7 8 3 Weigh the peeled potatoes and cut th...

Page 35: ...ng time after reheating is 2 4 minutes unless another time is recommended in the chart Take particular care when heating liquids and baby food See also the chapter with the safety precautions Reheating liquids Always allow a standing time of at least 20 seconds after the oven has been switched off to allow the temperature to even out Stir during heating if necessary and ALWAYS stir after heating T...

Page 36: ...k the temperature carefully Baby milk 100 ml 300 W 30 40 sec 2 3 200 ml 1 min to 1 min 10 sec Instructions Stir or shake well and pour into a sterilized glass bottle Place into the centre of turn table Cook uncovered Shake well and stand for at least 3 minutes Before serving shake well and check the temperature carefully MANUAL DEFROSTING Microwaves are an excellent way of defrosting frozen food M...

Page 37: ...ls in a circle or bread horizontally on kitchen paper in the middle of turntable Turn over after half of defrosting time GRILL The grill heating element is located underneath the ceiling of the cavity It operates while the door is closed and the turntable is rotating The turntable s rotation makes the food brown more evenly Preheating the grill for 3 5 minutes will make the food brown more quickly...

Page 38: ... a flat glass pyrex dish Place it on the high rack Stand for 2 3 minutes Tomato Cheese Toast 4 pcs 300 g 300 W Grill 6 7 Instructions Toast the bread slices first Put the toast with topping on the high rack Stand for 2 3 minutes Toast Hawaii ham pineapple cheese slices 4 pcs 500 g 300 W Grill 5 6 Instructions Toast the bread slices first Put the toast with topping on the high rack Stand for 2 3 mi...

Page 39: ... cakes pies and crumbles roast vegetables scones and breads Convection Guide for fresh and frozen food Preheat the convection with the auto pre heat function to the desired temperature Use the power levels and times in this table as guide lines for convection cooking Use oven gloves when taking out Fresh food Portion Power Time PIZZA Frozen Pizza Ready Baked 300 400 g 450 W 200 C 11 14 Instruction...

Page 40: ...once or twice during melting Use oven gloves while taking out MELTING CRYSTALLIZED HONEY Put 20 g crystallized honey into a small deep glass dish Heat for 20 30 seconds using 300 W until honey is melted MELTING GELATINE Lay dry gelatine sheets 10 g for 5 minutes into cold water Put drained gelatine into a small glass pyrex bowl Heat for 1 minute using 300 W Stir after melting COOKING GLAZE ICING F...

Page 41: ...too slowly Make sure the oven is on its own 12 A amp circuit line Operating another appliance on the same circuit can cause a voltage drop If necessary move the oven to its own circuit Problem Solution Has sparks or arcing Remove any metallic utensils cookware or metal ties If using foil use only narrow strips and allow at least one inch between the foil and interior oven walls The turntable makes...

Page 42: ...reconnect it Reset the time If the above guidelines do not enable you to solve the problem contact your local dealer or SAMSUNG after sales service Information code Code Problem Solution SE Key pad is pressed for 10 seconds Press Stop button and unplug out of wall socket And re connect after 5 seconds E 24 The E 24 message is automatically activated prior to the microwave oven overheating Should t...

Page 43: ...ENGLISH memo memo CE74JD CR_XTL_DE68 04168A 01_EN indd 43 2014 05 16 9 09 34 ...

Page 44: ... 02 4222111 Other landline SINGAPORE 1800 SAMSUNG 726 7864 THAILAND 0 2689 3232 1800 29 3232 TAIWAN 0800 32 9999 VIETNAM 1800 588 889 www samsung com hk support Chinese www samsung com hk_en support English www samsung com vn support www samsung com tw support www samsung com jp support www samsung com sg support www samsung com in support www samsung com id support www samsung com my support www ...

Reviews: