


GEBRUIK EN ONDERHOUD
1-4
D
E
DE
E
N
EN
E
S
ES
F
R
FR
IT
IT
N
L
NL
P
L
PL
P
T
PT
R
U
RU
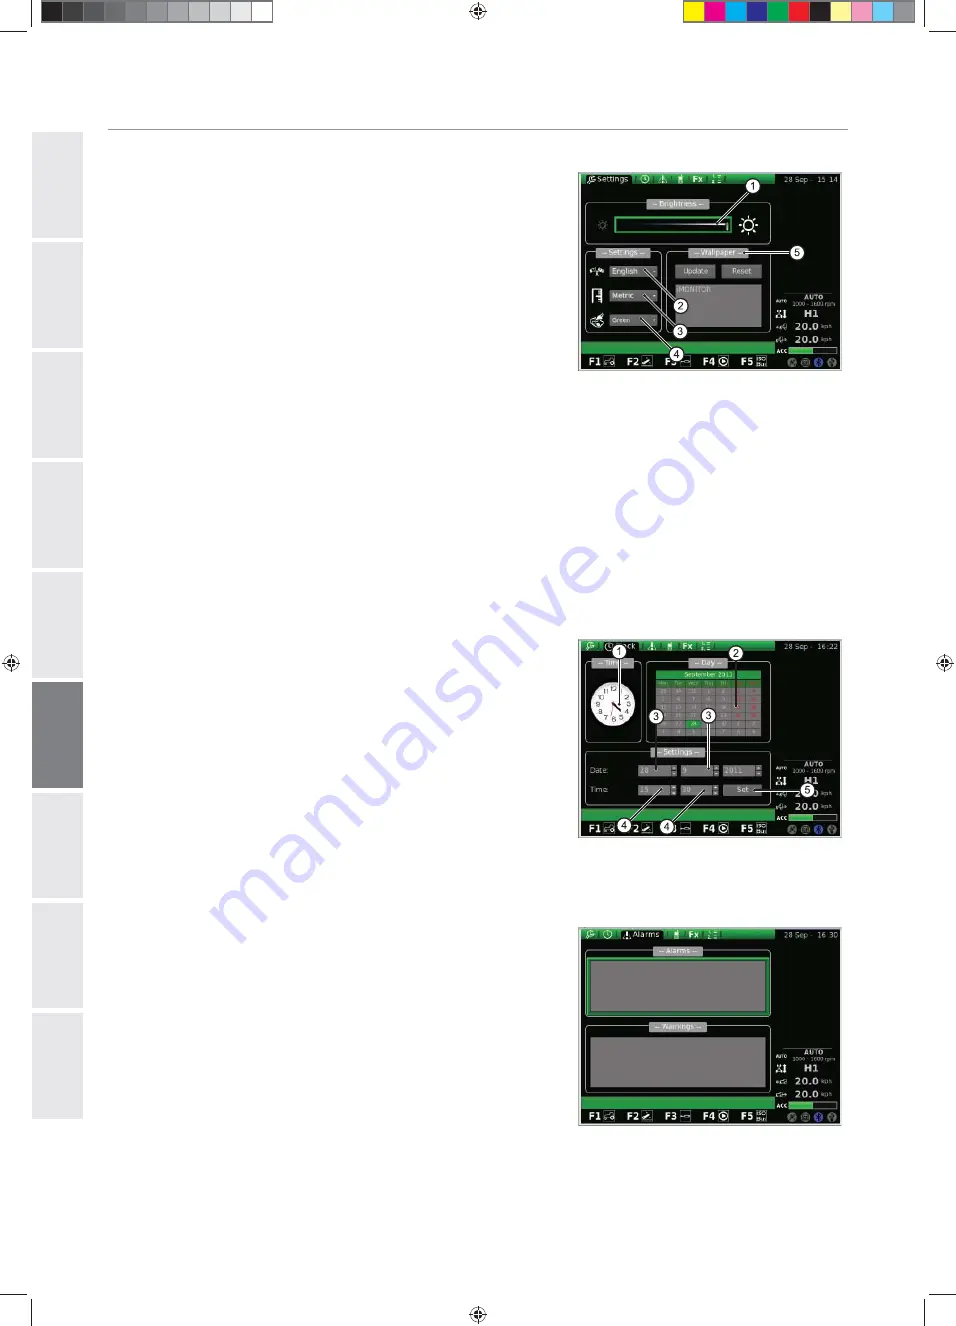
INSTELLINGEN
Op dit scherm kunnen de volgende elementen worden gewijzigd:
1.
Helderheid van het scherm
2.
Taalkeuze
3.
Eenheid
4.
Selectie kleurencombinatie
5.
Instelling welkomstscherm
Om de helderheid te regelen:
draai de draaiknop om het element te selecteren;
druk op de draaiknop om toegang te krijgen tot de wijzigingen;
om de helderheid van het display te verhogen: draai de knop met de klok
mee;
om de helderheid van het display te verlagen: draai de knop tegen de klok
in;
druk op de knop om de instelling te bevestigen.
Voor alle andere elementen (bijv. keuze van de taal, meeteenheid enz.) gaat
u als volgt te werk:
draai de draaiknop om het te wijzigen element te selecteren;
druk op de knop om toegang te kunnen krijgen tot de wijzigingen;
draai de draaiknop om de gewenste waarde te selecteren;
druk op de draaiknop om de geselecteerde waarde te bevestigen.
Afb. 7
DATUM EN TIJD
Op het scherm verschijnen de volgende elementen:
1.
Klok (niet interactief)
2.
Datum (niet interactief)
3.
Instelling van de datum (dag-maand-jaar)
4.
Instelling klok (uren-minuten)
5.
SET (bevestigingscommando)
Op dit scherm kan als volgt de klok worden ingesteld:
draai de draaiknop om het element te zoeken dat gewijzigd moet worden;
druk op de draaiknop om de wijzigingsmodus te activeren;
draai de draaiknop om de waarde te wijzigen;
druk opnieuw op de draaiknop om de gewenste waarde te bevestigen;
selecteer SET en druk op de draaiknop om de wijzigingen te bevestigen.
Afb. 8
ALARMEN
Het scherm toont de gebruiker een lijst van alle verschenen alarm- en foutmeldin-
gen die betrekking hebben op de iMonitor.
Tijdens het normale bedrijf van de boordcomputer wordt er geen enkele melding
weergegeven.
Om de hele lijst te bekijken drukt u de knop in en draait u deze vervolgens.
Om de lijst te verlaten, drukt u op de knop.
Afb. 9
Libretto iMonitor.indb 1-4
Libretto iMonitor.indb 1-4
02/12/2011 9.27.55
02/12/2011 9.27.55