Operating manual
Tractor mounted snow plow
PSV, PSV Up, PSV Up H
- 13-
5.2. Plow control
5.2.1. PSV plow control
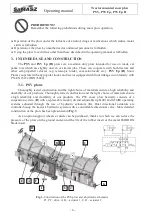
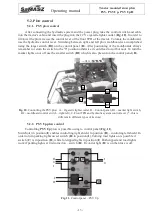
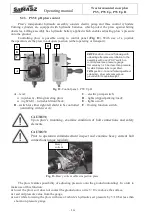
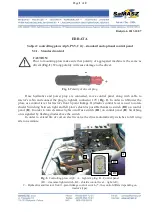
After connecting the hydraulic system and the power plug, take the control switch and cable
into the tractor's cabin and insert the plug into the 12 V cigarette lighter outlet (
Fig. 10
). In order to
lift/lower the plow we use the control lever of the front TPH of the tractor. To rotate the moldboard,
use the hydraulic control lever. Switching between right and left plow moldboard is accomplished
using the larger switch (
B2
) on the control panel (
B
). After positioning of the moldboards always
remember to return the switch to the "0" position otherwise it could lead to coil burnout. To turn the
marker lights on or off use the smaller switch (
B1
) which is also present on the control panel (
B
).
Fig. 10.
Controlling the PSV plow. A – Cigarette lighter outlet, B – Control panel (B1 – marker light switch,
B2 – moldboard control switch – right/left), C–Front TPH and hydraulic system control lever (* - this is
different in different types of tractors)
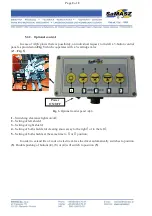
5.2.2. PSV Up plow control
Controlling
PSV Up
plow is possible owing to control panel (
Fig. 11
).
Switch (
A
) in position (
I
) enables controlling right shield, in position (
II
) – controling left shield. In
order to turn parking lights on set switch (
B
) in position (
I
). Turning road lights on is possible if
switch (
C
) is in position (
II
), while for dipped lights in position (
I
). Both dipped and road lights
work if parking lights ar first turned on – switch (
B
). If control light (
D
) is on then fuse is off.
Fig. 11.
Control panel – PSV Up
A
B
C
B1
B2
A
II
0
I
I
0
I
II
C
B
D


