


4
7
UTILISATION DU DVD
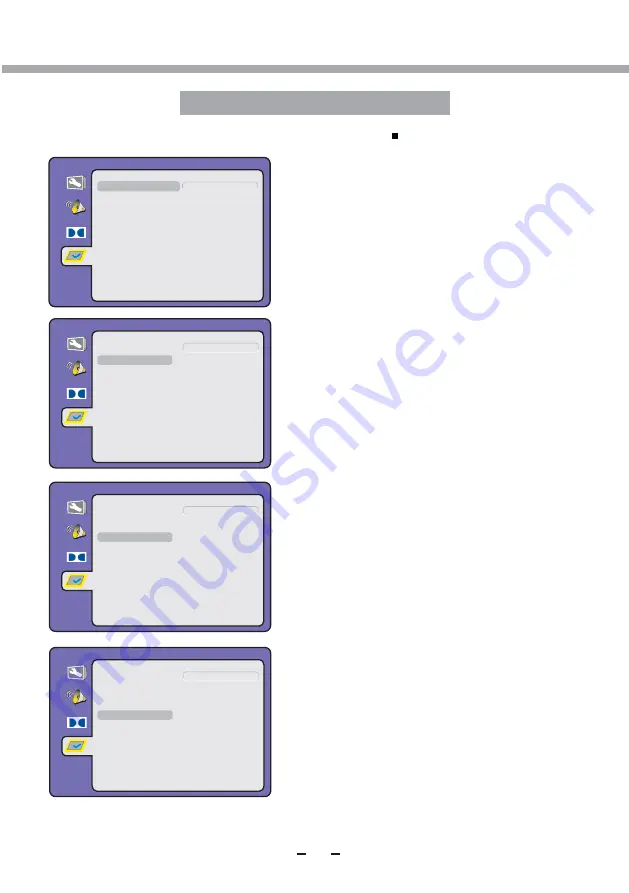
Page Préférences
Dolby
Menu du disque
Sous-titres
PAL
NTSC
Multi
Type de téléviseur
Audio
Dolby
Menu du disque
Sous-titres
Anglais
Allemand
Français
Type de téléviseur
Audio
Espagnol
Italien
Portugais
Hollandais
Mot de passe
Contrôle parental
Défault
Mot de passe
Contrôle parental
Défault
Dolby
Menu du disque
Sous-titres
Anglais
Allemand
Français
Type de téléviseur
Audio
Espagnol
Italien
Portugais
Hollandais
Mot de passe
Contrôle parental
Défault
Désactivé
Cette opération est seulement réalisable après avoir appuyé sur la touche (Arrêt) et ouvert le menu Configuration.
- - Page Préférences - -
- -
Page Préférences
- -
- -
Page Préférences
- -
Cette option vous permet de sélectionner le format d’affichage
du téléviseur/DVD.
PAL
- Ce format est utilisé au Europe, il s’agit également de
l’option par défaut.
Multi
- DVD-joueur régler le système TV en fonction du disque.
NTSC
- Ce format est utilisé par certains pays, ex. Etats-Unis.
T
ype de téléviseur
Sous-titres
Audio
Utilisez les touches directionnelles pour sélectionner l’icône
Sous-titres
puis appuyez sur la touche [
OK
] pour confirmer.
Quelques langues sont disponibles, utilisez les touches
[▲/▼] pour sélectionner une langue. Appuyez sur la touche
[
OK
] pour confirmer.
REMARQUE
: Si la langue choisie n'est pas sur le disque DVD,
la langue par défaut sera utilisée automatiquement. L'Anglais
est la langue par défaut.
Utilisez les touches directionnelles pour sélectionner l’icône
Audio
puis appuyez sur la touche [
OK
] pour confirmer.
Quelques langues sont disponibles, utilisez les touches
[▲/▼] pour sélectionner une langue. Appuyez sur la touche
[
OK
] pour confirmer.
REMARQUE
: Si la langue choisie n'est pas sur le disque DVD,
la langue par défaut sera utilisée automatiquement. L'Anglais
est la langue par défaut.
Dolby
Menu du disque
Sous-titres
Anglais
Allemand
Français
Type de téléviseur
Audio
Espagnol
Italien
Portug
ais
Hollandais
Mot de passe
Contrôle parental
Défault
Menu du disque
Utilisez les touches directionnelles pour sélectionner l’icône
Menu du disque
puis appuyez sur la touche [
OK
] pour confirmer.
Quelques langues sont disponibles, utilisez les touches
[▲/▼] pour sélectionner une langue. Appuyez sur la touche
[
OK
] pour confirmer.
REMARQUE
: Si la langue choisie n'est pas sur le disque DVD,
la langue par défaut sera utilisée automatiquement. L'Anglais
est la langue par défaut.
- - Page Préférences - -
Summary of Contents for MSD306 Series
Page 1: ...LED KLEUREN TV GEBRUIKERSHANDLEIDING NL LEES DIT ZORGVULDIG DOOR VOOR GEBRUIK...
Page 54: ...49 PROBLEEMOPLOSSING...
Page 59: ......
Page 60: ...8T10001153 72...
Page 61: ...LED COLOUR TV...
Page 68: ...3 CONNECTING DIAGRAM EXTERNAL EQUIPMENT...
Page 174: ...49 D PANNAGE...
Page 179: ......
Page 180: ...8T10001154 52...
Page 181: ...LED FARBFERNSEHER BEDIENUNGSANLEITUNG DE VOR GEBRAUCH BITTE AUFMERKSAM LESEN 23 5...


