background image


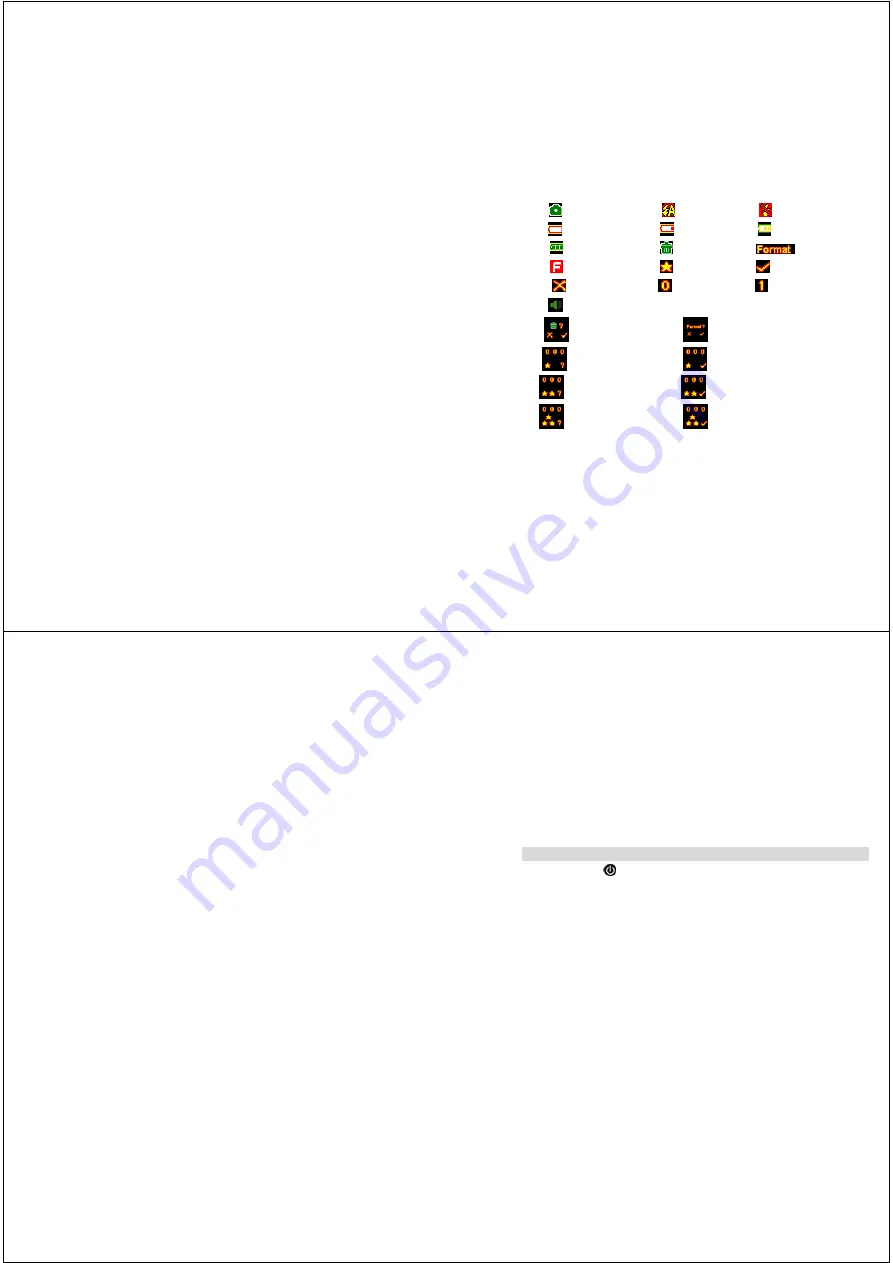
The LCD Display 

 take photo mode              

 Auto  flash                 

  flash off 

 no battery                         

 low battery                 

 Medium         


  full battery                      

 delete                         

  format 


 memory full                     

 Resolution                 

 Yes 


 No                                   

 Text-0                         

 Text-1 

 Key tone 


delete single photo


Format memory


640X480 pixels(VGA) Resolution  set


640X480 pixels(VGA) Resolution


OK


1280X1024(1.3MP) Resolution set 


  1280X1024(1.3MP)  

Resolu


1600X1280(2.1MP) Resolution set 


1600X1280(2.1MP)


Resolution OK 


Starting Your Camera 

Press the 

POWER


 button to start the camera. The camera will sound a 

musical tone to confirm that it is ready for use.  

Taking Photos 

1. 

Compose your shot using the viewfinder. (The optimal distance between the camera 

and the subject is approximately 5 feet.) 

2. 

Hold the camera steady and press the 

SHUTTER

 button to take a photo. 

3. 

Once the photo is taken, the number of photos remaining in the camera memory will 

be displayed on the screen. Each consecutive photo taken will reduce this number by 

one. 

If the photo number fails to reduce, or if “000" appears on the screen, this is an 

indication that the memory is full. No further photos can be taken until the existing 

photos have been downloaded or cleared from the camera memory. 


Summary of Contents for 25010

Page 1: ... System Requirements for Windows Vista 3 Computer System Requirements for Mac 4 A Quick Look at Your Camera 5 Preparing Your Camera for Use 6 Starting Your Camera 9 The Camera Modes 10 Playback Mode 11 Installing Click n Create Photo Editing Software 12 Everything You Need to Get the Most from Your Photos 14 Camera Maintenance 15 Technical Support 15 Warranty Information 16 Appendix A Technical Sp...

Page 2: ...00 XP To download photos to your computer you will need the following minimum configuration Windows 2000 XP Pentium based PC or equivalent 200 MB hard disk free space and 128 MB or more RAM Available USB Interface CD ROM Drive Color display 16 bit or higher recommended Screen resolution 1024 X 768 Computer System Requirements for Windows Vista To download photos to your computer you will need the ...

Page 3: ...oad photos to your MAC you will need the following minimum configuration Mac OSX 10 2 6 GS 500 MHz Processor or Higher 128 MB Ram 256 recommended Note Plug Play operation software not required for use for Macs Compatible with all Macs with Intel Processor 5 A Quick Look at Your Camera ...

Page 4: ...w You will need to replace the camera s batteries before taking photos Download your photos as often as possible Photos may be lost when the batteries run low WARNING Please download any photos you have on the camera before opening the battery compartment Opening the battery compartment and or removing the batteries will erase the photos currently stored in the camera Note 1 If you do not intend t...

Page 5: ...ill sound a musical tone to confirm that it is ready for use Taking Photos 1 Compose your shot using the viewfinder The optimal distance between the camera and the subject is approximately 5 feet 2 Hold the camera steady and press the SHUTTER button to take a photo 3 Once the photo is taken the number of photos remaining in the camera memory will be displayed on the screen Each consecutive photo t...

Page 6: ...want to change the resolution wait 3 seconds without hitting any buttons 1280x1024 1600x1200 Key tone setting In the taking photos Mode Press the button to selection key tone setting Press the or button will give you an option to change key tone 11 Press or button to select ON or OFF Press Shutter button to confirm Flash This camera comes equipped with a built in flash it will automatically turn o...

Page 7: ...your installation to fail Do not connect the cable to the computer until the entire installation process has been completed We suggest you follow the step by step 13 instructions that will appear on your screen during the installation process Software Camera Driver Installation Windows 1 Insert the program CD ROM into your CD ROM drive 2 The Windows Autoplay feature will start the program 3 Instal...

Page 8: ...o share your photos via email choose a photo and click the Save As button To print your photos choose a photo and click the Print button 4 Projects Games Click Projects Games then choose an activity 15 Camera Maintenance Your digital camera has been rubberized for durability but it is not a toy please handle it with care For best results clean camera lens with a damp cloth before using Remove batt...

Page 9: ...parties tampering modification or accident What To Do When Service Is Required When returning your defective product postage pre paid for service your package should include 1 Copy of original bill of sale 2 A detailed written description of the problem 3 Your return address and telephone number Daytime 17 MAIL TO ADDRESS BELOW Sakar Internation Inc Attention Service Department 195 Carter Drive Ed...

Page 10: ...rog Enterprises Inc used under license 2009 LeapFrog Enterprises Inc All rights reserved 19 FCC Statement This device complies with the part 15 of the FCC rules Operation is subject to the following two conditions 1 This device may not cause harmful interference and 2 This device must accept any interference received including interference that may cause undesired operation Caution Changes or modi...

Reviews: