background image

ー 1 ー

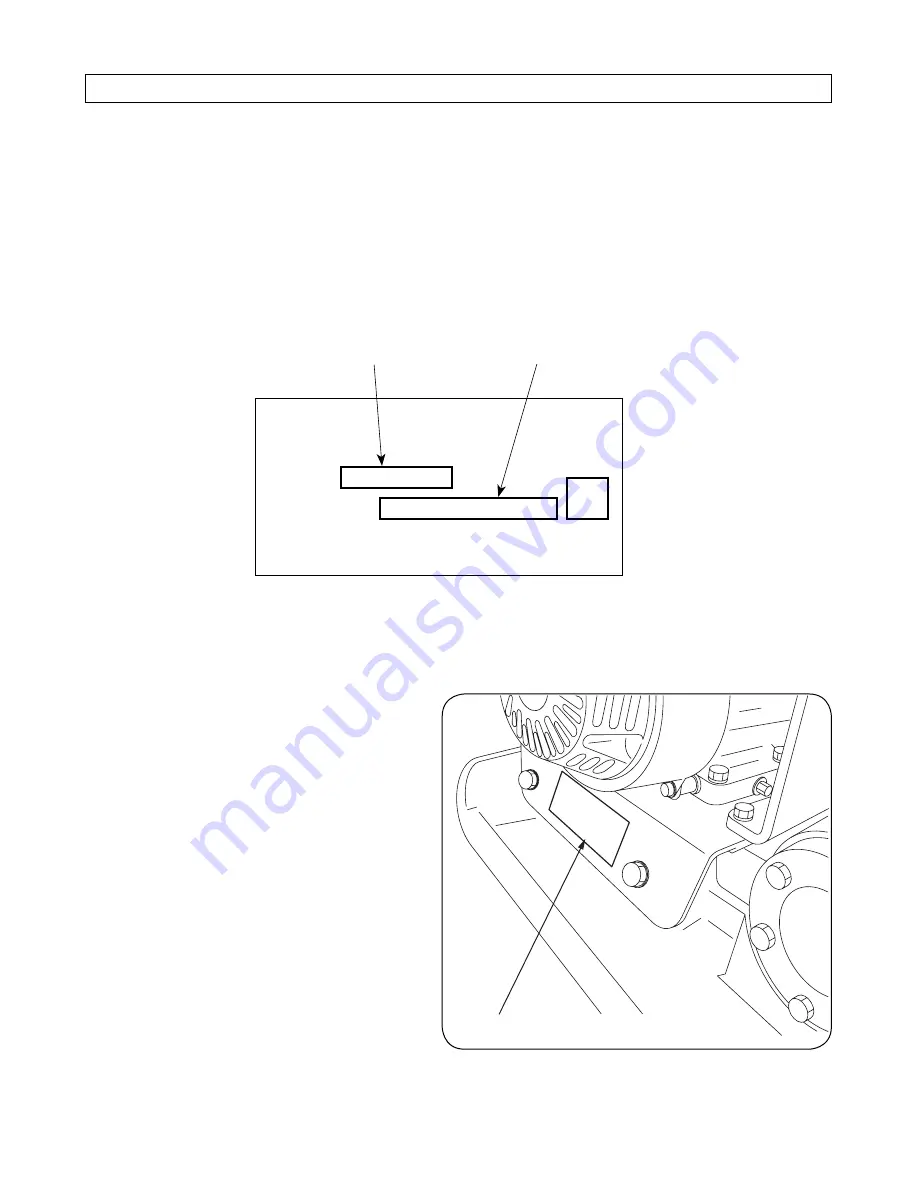
When you order parts or get instructions for trouble correction

When you order parts or get instructions for trouble cor    rection

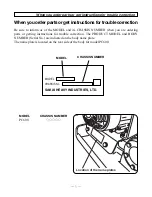
Be sure to inform us of the MODEL and its CHASSIS NUMBER when you are ordering 
parts or getting instructions for trouble correction. The PRODUCT MODEL and BODY 
NUMBER (Serial No.) are indicated on the body name plate. 
The name plate is located on the rear side of the body for model PC600.

 MODEL 

CHASSIS 

NUMBER


PC600


〇〇〇〇〇

Location of the name plates

MODEL

CHASSIS NUMBER

MODEL

CHASSIS No.

SAKAI HEAVY INDUSTRIES, LTD.

Summary of Contents for PC600

Page 1: ...No 3498 35860 0 No 50101 OPERATING MAINTENANCE INSTRUCTIONS PLATE COMPACTOR Be sure to operate inspect and maintain the products after you have read this manual carefully to understand the contents ...

Page 2: ......

Page 3: ...nual at a suitable place for your easy access Refer to a separate Engine Operation Manual for operation and maintenance of the engine If you lend or let other person to operate the machine thoroughly explain how to operate it and guide him to read this manual in advance before operation In addition if you trans fer the product to someone provide him with the Engine Operation Manual as well as this...

Page 4: ...precautions 2 1 Basic safety precautions 4 2 Sticking position of warning notice Label 6 3 Inspection before operation 8 4 Starting up 10 5 Operation 13 6 Shutting down 16 7 Inspection and Maintenance 17 8 Fuel and Lubricant 21 9 For a long term storage 21 10 Overall View 22 Contents ...

Page 5: ... its CHASSIS NUMBER when you are ordering parts or getting instructions for trouble correction The PRODUCT MODEL and BODY NUMBER Serial No are indicated on the body name plate The name plate is located on the rear side of the body for model PC600 MODEL CHASSIS NUMBER PC600 〇〇〇〇〇 Location of the name plates MODEL CHASSIS NUMBER MODEL CHASSIS No SAKAI HEAVY INDUSTRIES LTD ...

Page 6: ... in injury or death are marked as DANGER or WANING Precautions if they are failed to be observed which may lead to injury or to serious damage to the machine are marked as CAUTION and for precautions which may result in damage to the machine or shortening its service life are marked as IMPORTANT In addition labels indicating precautions in carrying out safety operation and maintenance service are ...

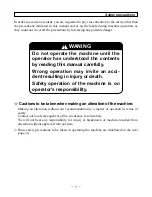
Page 7: ...matter of question in terms of safety Contact our local sales agent or office in advance for alteration We will not bear any responsibility for injury or breakdown of machine resulted from alteration without approval from our side Basic safety precautions to be taken in operating the machine are illustrated on the next page on In order to avoid an accident you are requested to pay close attention ...

Page 8: ...caught in a projection of the machine and or an ornament Also do not wear a clothe stained with oil as it may catch fire easily Never forget to wear protective goggles and a mask when required in the work Handle with care when hot members are at high temperature Take care not to be burned as the engine as a whole is very hot during operation or immediately after it has been stopped Do not allow yo...

Page 9: ...easures to start operating the machine Check the machine for unusual noise unnatural vibration heat and smell If it is found something wrong stop the machine at a safe place immediately and check and locate the cause to repair it Be careful not to be caught in the machine Do not stand close to the machine while operating the machine because your hand body or clothe is likely to be caught in the ro...

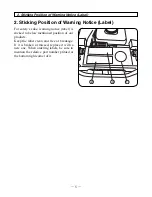
Page 10: ...s sticked to below mentioned position of our products Keep the label clean and free of breakage If it is broken or missed replace it with a new one When ordering labels be sure to mention the relative part number printed at the bottom right corner of it 2 Sticking Position of Warning Notice Label ...

Page 11: ...lue Equivalent continuous A weighted sound pressure level 81 dB A Vibration a Operating conditions and measuring method Place the machine on the soil and raise its rpm up to full throttle 3 800 rpm and measure the vertical vibration acceleration at the hand grip portion of the handle b Measured value Root mean square value 32 0 m sec2 Read the operator s manual thoroughly before operating the mach...

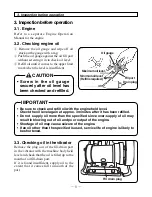
Page 12: ...heck the oil level again at approx 3 minutes after it has been refilled Do not supply oil more than the specified since over supply of oil may result in blowing out of oil and poor output of the engine Shortage of oil may cause seizure of the engine If an oil other than the specified is used service life of engine is likely to be shortened IMPORTANT Screw in the oil gauge securely after oil level ...

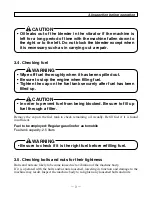
Page 13: ...sure to fill up fuel through a filter CAUTION Be sure to check if it is the right fuel before refilling fuel WARNING 3 5 Checking bolts and nuts for their tightness Bolts and nuts are likely to become loose due to vibration of the machine body If it is operated with the bolts and or nuts loosened lowering in function and damage to the machine may result Inspect the machine body to re tighten any l...

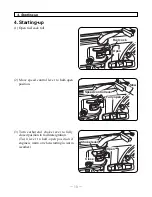
Page 14: ...control lever to half open position 3 Turn carburetor choke lever to fully closed position to facilitate ignition Turn lever to haft open position if engine is warm or when starting in warm weather Fuel cock Open Speed control lever Fully open Slow Close Choke lever Open ...

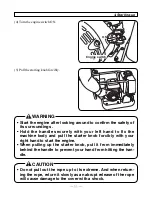
Page 15: ...x the machine body and pull the starter knob forcibly with your right hand to start the engine When pulling up the starter knob pull it from immediately behind the handle to prevent your hand from hitting the han dle WARNING ON Engine switch Do not pull out the rope up to its extreme And when return ing the rope return it slowly as an abrupt release of the rope will cause damage to the cover with ...

Page 16: ...t an idling speed for 1 to 3 minutes after the engine has been started If the engine fails to start check the spark plug and the fuel system for blockage CAUTION 6 Shift the choke lever to Fully open posi tion after the engine has been started ...

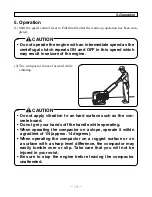
Page 17: ...zure of the engine CAUTION Do not apply vibration to an hard surface such as the con crete board Do not get your hands off the handle while operating When operating the compactor on a slope operate it within a gradient of 1 4 approx 14 degrees When operating the compactor on a rugged surface or on a surface with a sharp level difference the compactor may easily tumble over or slip Take care that y...

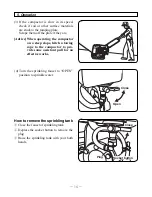
Page 18: ...actor on a steep slope hitch a towing rope to the compactor to pro vide some assistant pull for an effective works 5 Operation 4 Turn the sprinkling faucet to OPEN position to sprinkle water Close Open How to remove the sprinkling tank Close the faucet of sprinkling tank Depress the socket button to remove the plug Raise the sprinkling tank with your both hands Socket button Close Plug ...

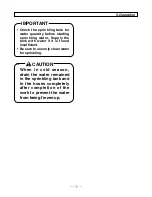
Page 19: ... the tank with water if it is found insufficient Be sure to use only clean water for sprinkling IMPORTANT When in cold season drain the water remained in the sprinkling tank and in the hoses completely after completion of the work to prevent the water from being frozen up CAUTION 5 Operation ...

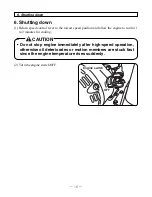
Page 20: ...ntrol lever to the lowest speed position and allow the engine to run for 1 to 2 minutes for cooling Do not stop engine immediately after high speed operation otherwise oil deteriorates or motion members are stuck fast since the engine temperature rises suddenly CAUTION OFF Engine switch ...

Page 21: ...tion Manual for the engine 7 2 Compactor body Wipe off dust dirt and oil stuck on the body and inspect it for anything unusual Also check bolts and nuts for tightness 7 3 Spark plug Remove the spark plug to clean off carbon deposit on the plug Adjust electrode gap to between 0 7 mm and 0 8 mm Plug BPR6ES NGK ...

Page 22: ...he paper air filter ele ment at the scheduled interval Clean the air filter elements if they are to be reused Paper air filter element Tap the filter ele ment several times on a hard surface to remove dirt or blow compressed air not exceeding 30 psi 207 kPa 2 1kg cm2 through the filter element from the inside Never try to brush off dirt brushing will force dirt into the fibers Foam air filter elem...

Page 23: ...ecuring the cover to remove the cover Check the bolt tension of it deflects 10 mm to 15 mm by pushing it with your thumb at a center point between both shafts adjust the tension as necessary 7 Inspection and Maintenance Bolt securing the bracket Adjustment Loosen the bolt securing the bracket and 4 bolts mounting the engine to some extent Shift mounting positions of the engine backward so that bel...

Page 24: ...g engine belt cover rubber damper and control handle 7 7 Vibrator How to change oil Remove the Fill drain plug and tilt the com pactor body to drain the oil then fill the new oil Wipe off oil stuck on the outside of compactor after oil change Change oil at an interval of either one l month or 200 operating hours which comes first Quantity specified 140cc When in replacement Fill drain plug ...

Page 25: ...ll the starter knob slowly until resistance is felt and leave it in this condition 3 Check the engine for oil leakage 4 Wipe off oil stains if any on the rubber dampers 5 Check bolts and nuts for tightness and re tighten them as necessary 6 Put the cover over the compactor and store it in a dust free dry area Season Ambient temperature Viscosity rating Summer Spring Autumn Winter All year round 25...

Page 26: ... Width 350 mm Total Height 910 mm Size of Tamping Plate 520 0mm L 350 mm w Performance Vibration Frequency 100 Hz 6000 vpm Traveling Speed 25 30 m min Vibratory Force 11 8 kN 2645 lbs 1203 kgf Engine Manufacturer s Model HONDA model GX120K1 Maximum Output 2 8 kW 3600 min 1 3 8 ps 3600 rpm Fuel Gasoline Starting System Recoil starter ...

Page 27: ...2008 4 100 C D SAKAI HEAVY INDUSTRIES LED Head office 1 4 8 Shiba Daimon Minato ku Tokyo Japan Cable address SKWSAKAI TOKYO Telex 242 3525 SKWMONJ Telphone Tokyo 03 3431 9971 April 2008 MODEL PC600 ...

Page 28: ...O P ...
Reviews: