background image

     34

35

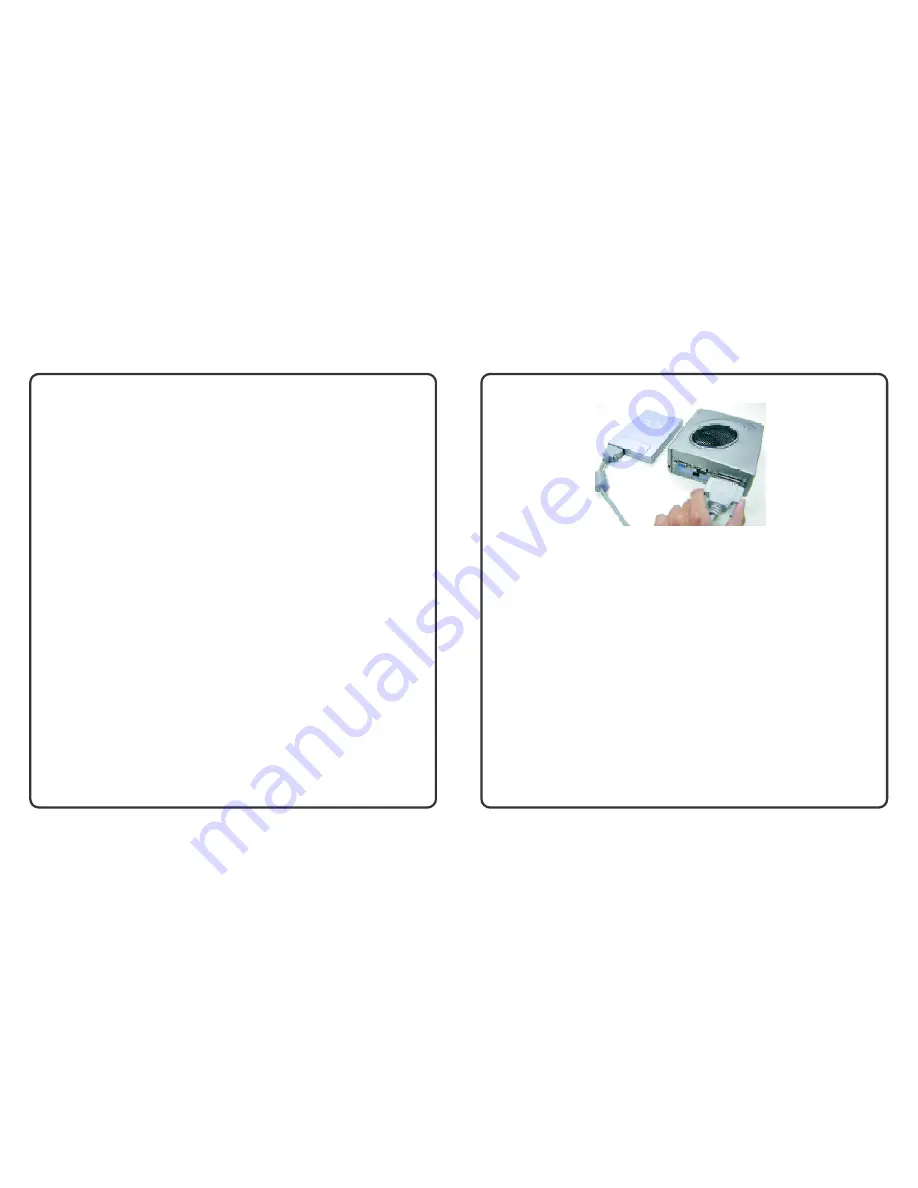
                  Figure 3-2   Connecting the External FDD via the Parallel Port

3.3

Working with the Built-in Hard Disk

Your computer is equipped with a large capacity 2.5 inch IDE hard disk drive where you store or

install the operating system and all  application  software programs. Like floppy diskette, you

also need to format the hard disk before using. Your dealer should already have done all this for

you. You can refer to Chapter 5 on how to run the BIOS SETUP program.

3.4

How to Access the CD-ROM Drive

You would normally use the CD-ROM drive for installing operating system and software appli-

cation programs. Unlike the two disk drives, you can only read from the CD-ROM drive.

The CD-ROM drive is found in front of the computer. To insert and remove a disc on the drive:

 1.

Make sure the computer is turned on. Press the eject button found on the door cover of

the  CD-ROM drive. The CD tray mechanism will pop-out slightly and slowly pull the

whole  length of the tray out.

3.1

Starting Your Operating System

The operating system is a must ingredient in using your computer. Without an operating system,

it is like playing chess without the chessboard. It is the platform for all your software application

programs to run on. The most popular operating system today is Microsoft Windows. You should

have one installed by your dealer unless you are an expert computer user and would need a more

powerful operating system. If you have an operating system already installed in your computer,

then  you would be up and running after you power  on your computer and boot  up the system.

Check your operating system manual on how to run it.

3.2

Using the External Floppy Disk Drive

The external floppy disk drive is probably one of the most used legacy devices on a computer.

The  other  disk drives on your computer are the hard disk drive and  the CD-ROM drive. Disk

drives are designated with drive letters with the floppy drive usually assigned as Drive A: and the

hard drive and CD-ROM drive as Drive C: and Drive D: respectively.

The  external floppy disk  drive (FDD) of your computer  is attached into the  parallel port. You

must use the correct cable to attach the external FDD.

Insert the  diskette with the arrow and label facing up  and the shutter cover towards the drive.

Slide the diskette into the drive until it is totally inserted and the eject button pops out. Remember

to format new diskettes first using your operating system before you can use it. To eject or

remove the diskette, make sure that the system is not accessing the diskette drive.

Summary of Contents for TX-3

Page 1: ...1 User s Guide Mini Book PC For Intel Windows Compatible Operating Systems...

Page 2: ...n if not installed and used properly This has been tested and found to comply with the limits of a Class B computing device in accordance with the specifications in Part 15 of FCC Rules These specific...

Page 3: ...is Manual Covers This manual covers the following information Chapter 1 Gives introduction on the features and parts of your computer Chapter 2 Provides instructions on how to prepare your computer fo...

Page 4: ...un things with your computer Along with your computer comes several items which you need to check inside the box See photo below and compare Figure 0 1 Standard Out of the Box Computer Items Where to...

Page 5: ...ng the Peripheral Setup 55 Using the Auto Detect Hard Disks 56 Using the System Password 56 Auto Configuration with Optimal Settings 57 How to Exit the Setup Program 57 How to Upgrade the BIOS 57 Cont...

Page 6: ...the Computer 12 Overall View of the Computer 14 Front and Top of the ComPuter 15 Left Side of the Computer 16 Right Side of the Computer 16 Rear View of the Computer 17 Underside of the Computer 18 A...

Page 7: ...mputer is a full featured Mini Book PC that is small lightweight and compact This PC runs on a whole wide range of general business and personal productivity applications making it ideal for use in th...

Page 8: ...rDA Infrared Data Association n IrDA compliant transceivers 115Kb s IrDA devices provide walk up point to point methods of data transfer that is adaptable to a broad range of computing and communicati...

Page 9: ...ort RJ11 n Built in internal modem for connecting to the Internet or sending fax USB Port n Built in four external USB ports for connecting USB devices like mouse printer keyboard camera FDD and file...

Page 10: ...ce Drivers 24 Turning Off Your Computer 32 1 8 Underside of the Computer The underside of the computer has the following functions Internal Modem Compartment n This compartment houses the Built in int...

Page 11: ...omputer first 2 4 Connecting the Monitor Your computer has a 15 pin VGA port for connecting any external VGA color monitor with maxi 2 1 Devices You Need to Get Started Before you can actually use you...

Page 12: ...ect an external monitor to see the output display of your computer The external monitor should have its own external powersource To connect an external monitor 1 Make sure that the computer is turned...

Page 13: ...n Self Test or POST to check if all system components are running properly Any errors found during the test will be displayed on the screen and may generate short beeping sound as well During the test...

Page 14: ...r for your device Recommended click Next 3 Select the Specify a location check box and Browse to the SoundDrv driver subdirectory of the OS or enter E 815 Win98 Soundrv driver wdm 4 Windows will detec...

Page 15: ...the Specify the location of the driver Advanced and clickNext 7 Select the Specify a location and Browse to the LAN driver subdirectory of the OS or enter E 815 WinME LANDrv click Next When you instal...

Page 16: ...t the Intel PRO 100 VE Network Connection 9 Click Next and follow succeeding prompt instructions to finish driver installation Click Finish Windows 2000 1 Place the Driver CD into the CD ROM driver 2...

Page 17: ...xciting features Contents Starting Your Operating System 34 Using the External Floppy Disk Drive 34 Working with the Built in Hard Drive 35 How to Access the CD ROM Drive 35 Using the Built in Modem 3...

Page 18: ...or all your software application programs to run on The most popular operating system today is Microsoft Windows You should have one installed by your dealer unless you are an expert computer user and...

Page 19: ...se the internal modem you need first to install the device driver Ask your dealer first if the internal modem driver is already setup properly If not you can follow the steps below for installing the...

Page 20: ...he other end into your Network Hub connector 3 Setup your Network Contact your network manager for how to setup your network account network info IP address Subnet Gateway DNS etc Figure 3 6 Connectin...

Page 21: ...ld always connect to this whenever you are going to print out to a parallel printer To connect to a printer 1 Connect the printer to the parallel port using the 25 pin male connector cable of the prin...

Page 22: ...run simultaneously on a computer 3 Check the printer by doing a self test operation 4 Set the printer type of your software to recognize the connected printer 5 If your printer is not listed in the so...

Page 23: ...dard defines transmission method media and protocol The 1394 standard also provide new services such as real time I O and live connect disconnect capability for external devices including disk drives...

Page 24: ...assword Change Supervisor Password Auto Configuration with Optimal Settings Save Settings and Exit Exit Without Saving Standard CMOS Setup for changing time date hard disk type etc ESC Exit Sel F2 F3...

Page 25: ...ate month day year of the computer Allows you to set the system time clock of your computer This item enables or disables the External floppy disk drive This item should always be set to Disabled This...

Page 26: ...tate sets your system back to the state it is before the power interruption The default is Power off This item allows you to set the third boot device if the preceding boot device fails Choose from th...

Page 27: ...nel 5 PnP DMA Channel 6 PnP DMA Channel 7 PnP IRQ3 PCI PnP IRQ4 PCI PnP IRQ5 PCI PnP IRQ7 PCI PnP IRQ9 PCI PnP IRQ10 PCI PnP IRQ11 PCI PnP IRQ14 PCI PnP IRQ15 PCI PnP Available Options No Yes ESC Exit...

Page 28: ...l PortB Auto Serial PortB Mode IRDA 3 16 Baud OnBoard Parallel Port Auto Parallel Port Mode ECP EPP Version N A Parallel Port IRQ Auto Parallel Port DMA Channel Auto OnBoard Game Port Disabled Availab...

Page 29: ...LPT1 port The default is Auto This item is only used when you set the parallel Port Mode to ECP The default is Auto This item allows you to set the Game Port address The default is Disabled 5 7 Using...

Page 30: ...c System Troubleshooting 62 Preparing for Computer Service 64 To upgrade the BIOS 1 Boot your computer to MS DOS mode If you have Windows 98SE simply press the F5 key during system boot up to go to DO...

Page 31: ...Safety Guidelines Portable computers take the most beating from end users You can maintain its condition and performance by following a few simple guidelines n Follow all safety instructions and warn...

Page 32: ...ct with the audio drivers Consult technical support 6 4 Troubleshooting For Starters If you encounter a problem with your computer or any software application problem go through the following list fir...

Page 33: ...e diskette is formatted n Remove the diskette and insert again to realign diskette to drive 6 6 Preparing For Computer Service Before calling your dealer for computer service please do the following t...

Reviews: