background image

Step 2: Connect the Sahara NetSlate to an External Power Source

Locate the AC adapter and the power cord. Plug the power cord securely into the AC adapter. 
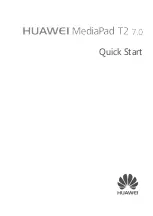
Plug the AC adapter’s connection cable into the “DC In” port on the top side of the Sahara Net-
Slate. Once the adapter plug is securely in place, plug the power cord into an external power 
socket.

IMPORTANT:

 You should allow the battery pack(s) to charge fully before disconnecting the Sahara NetSlate 

from the AC adapter and running it on battery power for the first time.

NOTE:

 When you first connect the Sahara NetSlate into an external power source, the battery charge 

indicator(s) will begin to glow orange. When the battery is fully charged the indicator(s) will turn green. 
See the section later in this guide and in the User’s Guide entitled 

Battery Care

 for tips on maximizing 

battery life and performance.

Step 3: Connect Any Applicable Peripherals and Networking Cables

If you would like to use any external peripherals with the tablet (i.e. USB mouse, USB keyboard, 
etc.), or are planning to connect to the Internet and/or a corporate LAN using a wired Ethernet 
connection (RJ45), connect them now.

Step 4: Power on the Sahara NetSlate

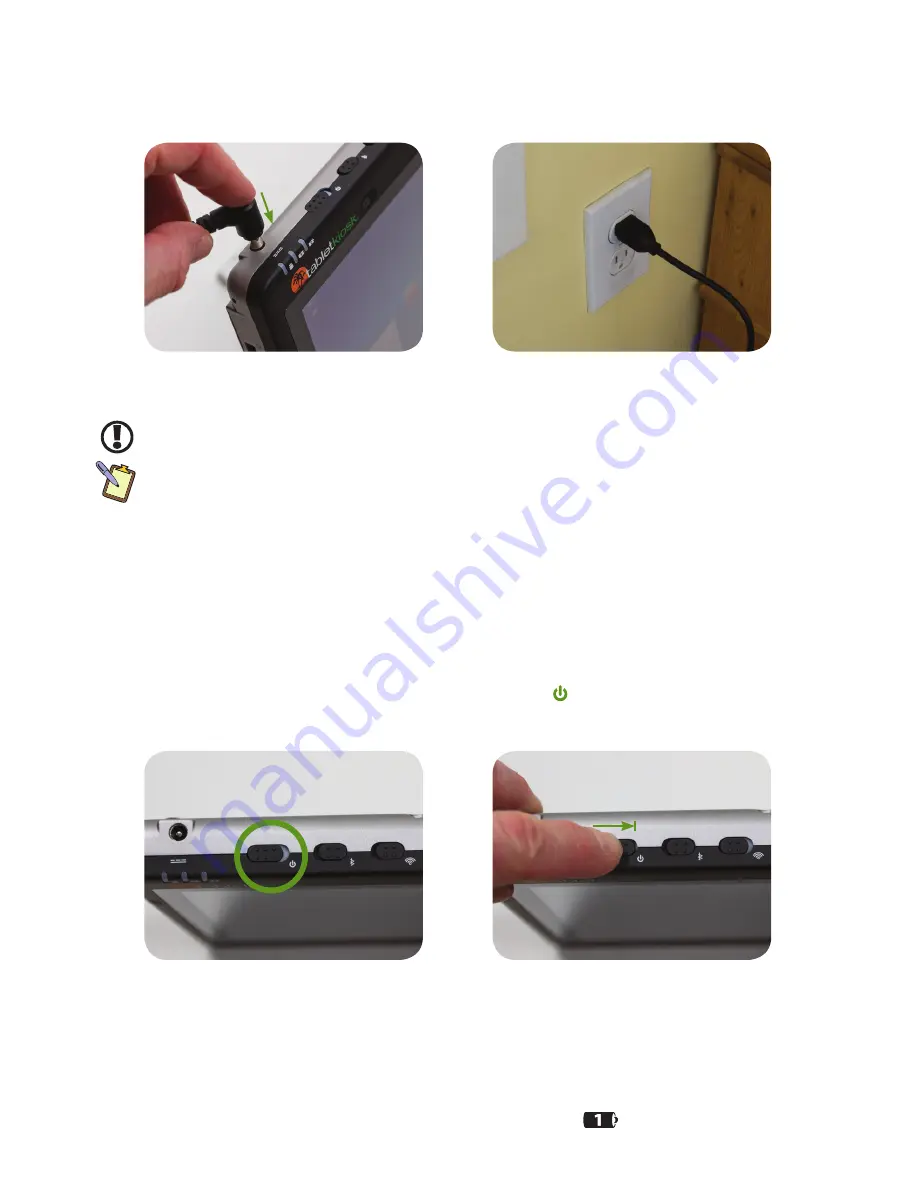
Locate the three power switches on the top of the tablet. The   switch is the tablet’s main 
power toggle. Slide and hold it until it emits a blue glow (about 3 seconds) and then release it. 
The Sahara NetSlate will now boot up.

Step 5: Complete the Operating System Installation

When your system powers on for the first time, you 

may

 be prompted to enter a Windows 

product key to complete set-up. The key can be found on the Windows C.O.A. sticker located on 
the back of the tablet underneath the battery pack in battery bay 

. You will then be asked to 

agree to Microsoft’s licensing terms.

Plug the power cord into the DC In port on the 
top of the tablet.

Plug the power cord into the AC adapter brick 
and then into a wall outlet.

Locate the system Power switch on the top of 
the tablet.

Slide and hold it for about three (3) seconds 
until it glows blue and the system powers up. 

Summary of Contents for a525

Page 1: ...ns user programmable Top Side 13 DC In Power In 14 HDD Access LED 15 Battery Status LEDs 16 Power Switch 17 Bluetooth Switch 18 WiFi Switch 19 Webcam 20 Modular Expansion Port with Cover Front 21 Audio Speaker 22 Fingerprint Reader option 23 Microphone Array Right Side 1 Carry Strap Attachment 24 Kensington Lock Port 25 Battery One 1 26 Touch Screen ON OFF Button 27 Wireless Mode Button 28 29 Prog...

Page 2: ...e These steps might change slightly over time with newer revisions of the installed operating system or when your tablet is purchased from a systems integrator or solutions provider Step 1 Insert the Battery Pack s Turn the tablet over and place it face down on a smooth clean surface so the back of the system is facing toward you CAUTION When turning over the Sahara NetSlate be careful not to plac...

Page 3: ...es If you would like to use any external peripherals with the tablet i e USB mouse USB keyboard etc or are planning to connect to the Internet and or a corporate LAN using a wired Ethernet connection RJ45 connect them now Step 4 Power on the Sahara NetSlate Locate the three power switches on the top of the tablet The switch is the tablet s main power toggle Slide and hold it until it emits a blue ...

Page 4: ...e this will not affect the behavior of the pointer Like a touch screen when you want to select or interact with an object simply tap on it Keep the stylus tip on the screen while moving it around in order to perform a drag operation TIP When trying to select or activate something on the screen with the stylus pen pay attention to the position of the pointer icon on the screen instead of the tip of...

Page 5: ...t choose to cancel and then rerun the calibration routine NOTE If you find that after you calibrate for the first time the screen accuracy is no better or perhaps worse choose to calibrate again After the first calibration for each screen the routine steps down to only using 4 target points for calibration Sometimes the 4 point calibration can produce better feeling calibration data for some users...

Page 6: ...reless network you are attempting to connect to is security enabled you will see a dia log box requesting a network key or password The key password your network administrator should be able to supply this to you must be entered correctly or you will not be able to successfully connect to the network If you entered the network key correctly you should now be connected to the wireless network If it...

Page 7: ...allows for the easy integration of expansion modules that enhance the capabilities of your Tablet PC Based upon the Universal Serial Bus USB the modules are hot swappable meaning you do not have to power down your system in order to install remove exchange a module and require no additional drivers beyond those that may be required by the device being added to the system 3G WWAN module etc To add ...

Page 8: ...on icon displays the hardware s current state Pressing the actual tablet button will toggle the state When programming a button to be a keyboard short cut a dialogue box will open asking for a key or key combination and then a name for the short cut to appear on the button If a custom name isn t entered the keyboard short cut itself will be the name by default Special keyboard function keys are co...

Page 9: ... the No button After you have finished restoring Windows your system will reboot and Set up will configure Windows for first use When you have returned to the Windows desktop go to Windows Update and install any Critical updates until your system is current Finally reinstall your applications and any documents you backed up before you reinstalled Using the Batteries for the First Time Before runni...

Page 10: ... and running A can of compressed air can be used to remove dust and other particulate matter from crevices vents and I O ports Compressed air is also good for cleaning dust from the non slip surface of the Sahara NetSlates top case Cleaning the Touch Screen Gently wipe the surface using a clean dry microfiber cloth Use as little pressure as possible Using your breath in conjunction with the microf...

Page 11: ...r cord so it will not be stepped on or walked on Do not place objects over or on the power cord Use the Sahara NetSlate in a clean dry temperature controlled environment Do not use the tablet in areas of high humidity around water for example near a bathtub washbowl kitchen sink or laundry tub in a wet basement or near a swimming pool or outdoors while it is raining Never open or disassemble the S...

Page 12: ...and Dune Ventures Inc d b a TabletKiosk All Rights Reserved Sahara NetSlate and TabletKiosk are registered trademarks of Sand Dune Ventures Inc in the United States and other countries Windows the Windows logo and Windows 7 are registered trademarks or trademarks of Microsoft Corporation in the United States and other countries rev a525 07 24 13 ...

Reviews: