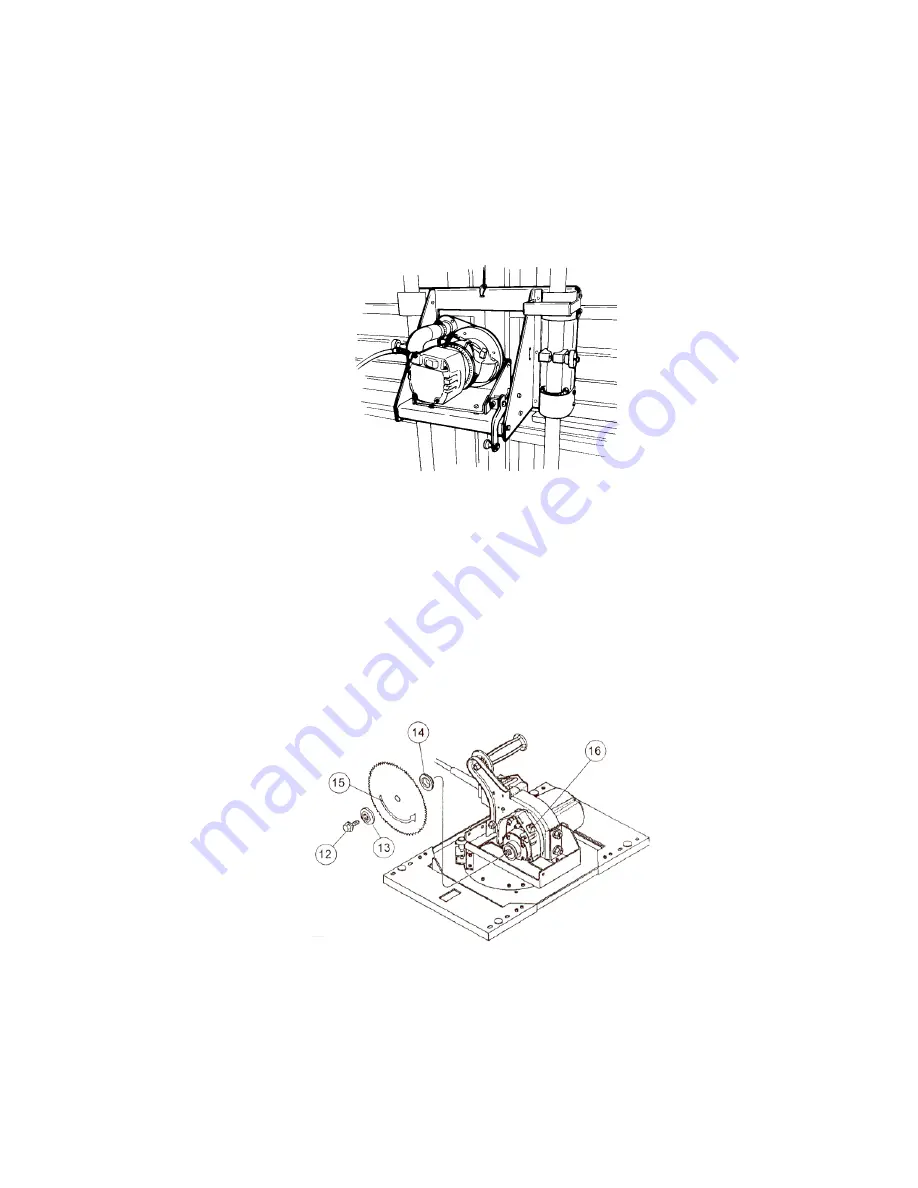
Mounting the Router Platform and Saw Platform on the Carriage (Combination Machines)
Models SR-5 and SR-5U
1. Set the bottom of the router or saw platform behind the two clips at the bottom of the carriage.
2. Pivot the top of the platform into the carriage so its hole slips over the locating pin.
3. Attach the top of the platform to the carriage with two red thumbscrews.
Models 3400 and TR-2
Remove the router motor from the box and screw it into the factory mounted router base on the lifting platform.
Figure 6: Mounting the Router and Platform (Model 3400 shown)
Installing a Blade (Saws)
1. Select the correct blade for your needs. Refer to “Selecting a Blade”.
IMPORTANT:
Because the saw blade must be carefully matched to the materials being cut, Safety Speed Cut
does
not
supply a blade as standard equipment on the saw. Improper blade selection can result in reduced
tool life, inaccurate and poor quality cuts, and safety risks. Consult with your machinery dealer, or with our
customer service department (800-772-2327) to determine the best blade for your cutting needs.
2. Tighten your rip lock on your carriage. While holding the in the spindle lock (16)(located on the bottom side of
your motor)
remove the blade bolt
(12)(Figure 7) from the saw motor spindle by turning it
counterclockwise
. Remove the outer blade flange (13), but leave the inner blade flange (14) on the spindle.
Figure 7: Installing a Saw Blade (H Series Shown)
3. Install the blade with the arrow pointing counterclockwise as shown (15).
4. Reinstall the outer blade flange (13) and hand-tighten the arbor bolt (12). To keep the spindle from turning
while you tighten the bolt hold in the spindle lock button (16).
Use the special set of wrenches provided with the tool to
securely tighten the bolt clockwise
.
5. Loosen the carriage lock and allow the saw carriage to return to the top of the guides.
12


