background image


12 


Operation and Adjustment 


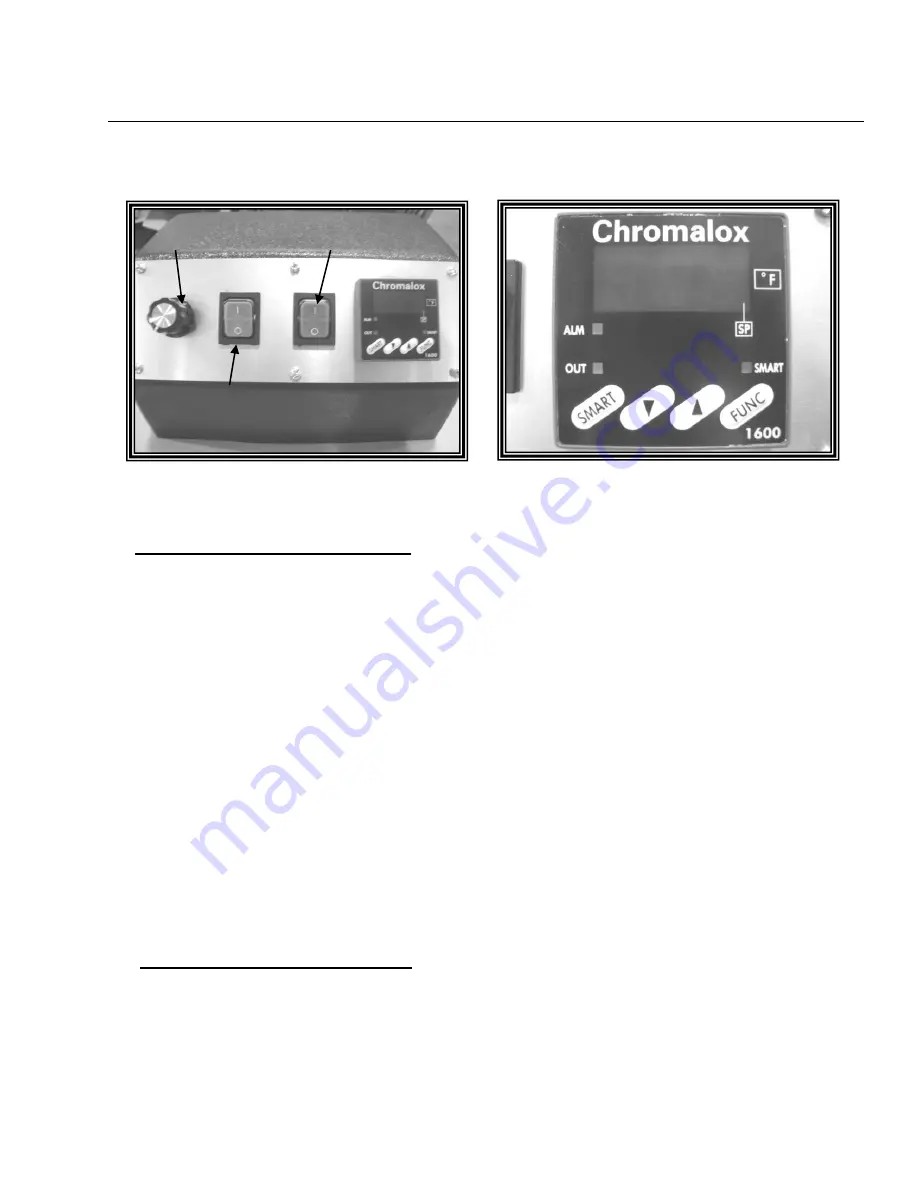
CONTROL PANEL                                            TEMPERATURE CONTROL    


FIGURE 15                                                   

      FIGURE 16 


10. Operating Temperature (Figure 15) 

 
The 60HA has a factory setting of 650

o

F, but is adjustable from 200 – 750

o

F. 

 
There is no ideal or correct operating temperature for all applications.  Tape composition 
(wood, PVC, Melamine), width, thickness and manufacturer are all factors that affect how the 
tape will apply.  One tape manufacturer may apply glue to their tape, which will have a 
different activation (melting) temperature than another, thicker tape will absorb more heat than 
a thin one, and composition will also have an effect. 
 
The 60HA utilizes a Variable Speed Power Feeder to reduce set up time.  Feed speed and 
temperature operate in unison to achieve an optimum application.  A commonly used method 
of set up is to choose a base temperature setting of 600 - 750

o

F.  Once the temperature has 

stabilized, run a scrap piece of panel at full speed.  Check the adhesion.  If it is not adequate, 
reduce the feed speed slightly and try again on another edge.  Repeat this procedure 2 or 3 
times until satisfactory adhesion is achieved.  If you have had to slow the feed too much then 
the temperature should be raised.  If at full speed, the glue is too hot or the tape is telegraphing  
badly, the temperature should be lowered.  If you commonly use several different tapes, keep a 
log of the settings for each tape to simplify the process. 


11.  Adjusting Temperature (Figure 16) 

 
A.  To change temperature setting, press the “FUNCTION” button once.  “SP” will be 

displayed.  This is the set point.  Use the up or down arrow to attain the desired setting 
then press “FUNCTION” again.  The new setting will be accepted after five (5) seconds 
and the temperature will begin to change. 
 

Variable Speed Control 

Power Feed Switch 

Main Switch 

Summary of Contents for 60HA

Page 1: ...Manual Model 60HA Safety Speed Manufacturing 13943 Lincoln Street NE Ham Lake MN 55304 Tel 763 755 1600 Fax 763 755 6080 w w w s a f e t y s p e e d c o m sales safetyspeed com Copyright 2011 Safety S...

Page 2: ...nt 9 Power Feeder Height Adjustment 9 Opening End Access Doors 10 Power Feeder Leveling 10 Top and Bottom Edge Trim Fine Adjustment 11 Front Tape Length Adjustment 11 Rear Tape Length Adjustment 11 Co...

Page 3: ...t that is determined to be defective Such repair or replacement is limited to providing satisfactory replacement parts from the factory SSC assumes no responsibility for making repairs on site Any par...

Page 4: ...with current safety standards Wear hearing protection during extended use and a dust mask for dusty operations Hard hats face shields safety shoes etc should be used when specified or necessary Keep...

Page 5: ...ts sharp and clean Follow instructions for lubricating and changing accessories Periodically inspect tool cords for damage Have damaged parts repaired or replaced MAINTAIN LABELS AND NAMEPLATES These...

Page 6: ...adjustment Level the disc parallel to the machine top before tightening the x fastening screws NOTE You may remove protective covering from table disc surfaces FIGURE 1 FIGURE 2 3 Connect power supply...

Page 7: ...llen bolt provided Figure 6 6 Raise Power Feeder and remove Power Feeder Support Board by rotating locking levers shown in Figures 5 6 below counter clockwise and turning the crank handle counter cloc...

Page 8: ...ring donut height with approximately 1 16 clearance using the plastic thumb knob to lock into place 2 Adjusting Tape Guide FIGURE 8 A With power switch turned off advance tape until it passes all the...

Page 9: ...t FIGURE 10 A Take a sample of panel to be banded and lay it on the tabletop slides parallel to the front of the power feeder B Lower the feeder until the top of the panel is approximately 2MM 3 32 hi...

Page 10: ...ng or lowering feeder without loosening infeed locking handle it can be re levelled by the following procedure A Loosen feeder mount cross bolt just slightly with a 9 16 wrench FIGURE 12 just enough s...

Page 11: ...gainst the panel TIP To get the best results be sure knife components are free of debris 9 Rear Tape Length Adjustment Figure 14 A Periodic adjustment may have to be made due to many factors Panel squ...

Page 12: ...t up is to choose a base temperature setting of 600 750o F Once the temperature has stabilized run a scrap piece of panel at full speed Check the adhesion If it is not adequate reduce the feed speed s...

Page 13: ...on display reach operating temperature 650 degrees factory setting in approximately one minute NOTE Temperature reading may rise past the set point for a short time before settling back to set point T...

Page 14: ...hat may affect belt traction and feed consistency WARNING Use caution when doing this and keep hands away from trim bits and end cutters that may be inadvertently turned on A safe way to avoid acciden...

Page 15: ...ng tape movement Tape advance rubber rollers excessively dusty Wipe clean with damp cloth Tape roll support disc not rotating With large PVC rolls loosen disc mounting nut so disc rotates freely Tape...

Page 16: ...16 E Electrical Supply Diagram 4 Wire 1 Hot Black 3 Neutral White 5 Hot Red Green Ground Black White Red Green...

Reviews: