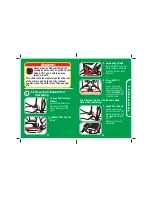
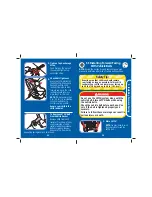
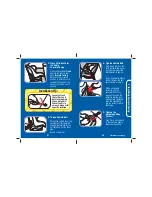


You may need to place a
large rolled towel(s)
(A)
or foam pool noodle(s)
under the front of the child
restraint to allow the level
line on the side of the
plastic shell that matches
your child’s weight to be
level with the ground.
Check often to be sure padding is still in place and the
vehicle belt is tight.
A
61
62
continued on next page.
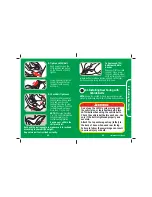
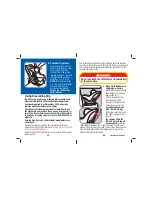
PUSH
1
2
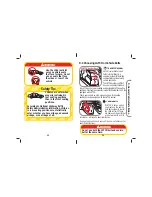
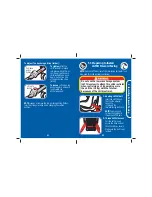
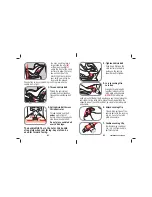
Pull Vehicle Belt Across
Child Restraint
Thread vehicle seat belt
under
pad in front of
buckle strap to the opposite
side. Buckle vehicle belt.
Do not place vehicle belt
over child’s legs.
3.
The buckle MUST be in the 1st or 2nd buckle
strap slots when rear facing. Any slot can be
used for forward facing.
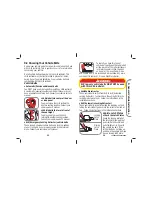
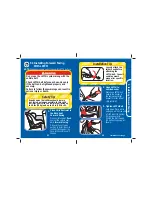
Thread Vehicle Belt
Thread the vehicle lap/
shoulder belt combination
through the rear-facing belt
slot.
2.
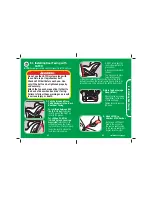
Locate Locking Clip
Location
Grasp both vehicle belts
together just behind the
latch plate and unbuckle.
NOTE:
If the latch plate
ends up just at the belt path opening so you cannot grasp the
vehicle belt at the latch plate, grasp the vehicle belts on the
opposite side of the child restraint, as close to the latch plate
as possible.
Attach Locking Clip
Thread both portions of the
vehicle belt onto the locking
clip, as close to the latch
plate as possible.
6.
Position Locking Clip
Position locking clip about
1 in. (2.5 cm) from vehicle
belt’s latch plate.
7.
Tighten Vehicle Belt
Push down firmly on the
child restraint and while
pulling on the vehicle
shoulder belt to tighten.
4.
5.