© Rear View Safety | All rights reserved
p. 15
Calibrating the inView 360 HD
When you have successfully loaded the calibration files, then you can proceed with the calibration. The calibration process
involves entering measurements and defining areas for the calibration pads. Carefully follow the order for entering the
calibration pad points�
After successfully calibrating, you will then save the calibration file and then finally load it into the ECU.
The Calibration Process
Carefully follow the specific order of the calibration process. The process comprises 5 steps:
1. Mark the 8 points for each of the four calibration pads (left, right, front, back). See below.
2. Click
Calibrate
to process the assigned calibration points and create the calibration file. See
Calibration Points and Creating the Calibration File" on page
�
3. Export the calibration file. See
"Exporting the Calibration File" on page 21
4. Import the calibration file into the ECU. See
"Importing the Calibration Files" on page 22
5. Verify the calibration in the ECU. See
"Verifying that Calibration was Successful" on page 24
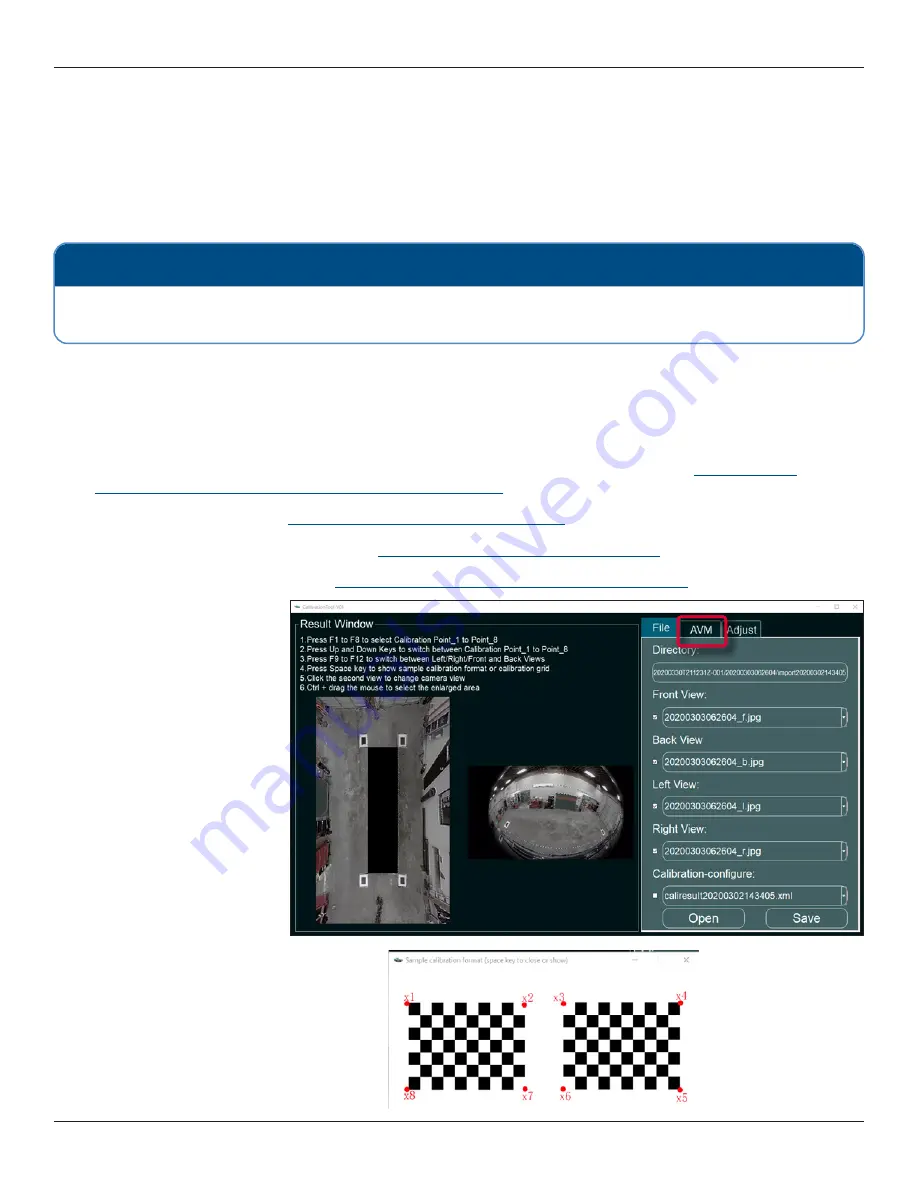
Marking the Calibration Points
1. Click to select the
AVM
tab in the
Calibration Tool
window�
A
Sample calibration format
popup appears� It indicates the
order in which you should enter
the points�
2.
Press the
Space bar
or click the
X
to
hide this popup�
NOTE: Using the Keyboard
From this point, you will be using your PC for the calibration procedures. So any reference to “the keyboard” means the
keyboard on your PC, not the virtual keyboard within the ECU.


