background image

2: WARNINGS

BEFORE  STARTING  TO  USE  THE  APPLIANCE,  PLEASE  TAKE  ALL  ESSENTIAL 
SAFETY MEASURES AND THROUGHLY READ THE USER  MANUAL

This


appliance has been designed for domestic use as built-in furniture only.

After removing the packaging, check if there is any damage to the appliance. If there is any 
damage, never attempt to use the appliance and immediately contact your engineer. All 
packaging materials need to be collected immediately and put out of reach.

The appliance must be installed and put in operation by an authorised technician under the 
conditions provided by the manufacturer in this manual. The manufacturer cannot be held 
responsible for any damage that might occur due to faulty installation.

Before  connecting  your  appliance  to  the  mains  at  home,  make  sure  you  check  the 
conformity  of  voltage  and  gas  settings,  which  are  specified  on  the  information  sticker 
attached to the appliance and/or packaking, with the usage conditions available.

Do not operate the oven before it is fully installed.

Be sure that all of its buttons are turned off when the appliance is not in use.

Be sure that the supply cable is not wedged during the installation of the appliance.

If the gas supply cord   is damaged, it must be replaced by the manufacturer, its service 
agent or similarly qualified persons in order to avoid a hazard.

Before replacing the oven illuminating light, turn off the power to the appliance.

Switch off the appliance before cleaning, maintenance work etc.

Some parts of the appliance may preserve their heat for a long time; please wait untill  the 
parts primarily exposed to heat cool off before touching them.

Do not keep flammable items/substances near the appliance while it is in use.

When operating other electrical devices near the appliance, pay attention that their cables 
do not come into contact with heated parts.

When the appliance is not in use, make sure that the buttons are in “ 0 “ (off) position.

Your appliance needs sufficient air circulation while it is operating. Carefully read the part  
of this manual, where installation procedures are explained, and make sure the relevant 
conditions are satisfied.

This  operating  manual  has  been  prepared  jointly  for  multiple  models.  Some  of  the 
specifications  explained  in  the  manual,  may  not  be  included,  in  your  appliance.  Pay 
attention to the explanations with illustrations while reading the manual.

For Customer Services, Spare parts & Warranty Information please call 0845 683 8717

-5-

Summary of Contents for RHBMFEO1

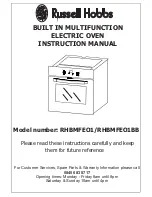
Page 1: ...del number RHBMFEO1 RHBMFEO1BB Please read these instructions carefully and keep them for future reference For Customer Services Spare Parts Warranty Information please call 0845 683 8717 Opening times Monday Friday 8am until 8pm Saturday Sunday 10am until 4pm ...

Page 2: ...r declines all responsibility in the event of damage caused by improper or incorrect use of the appliance CE Declaration of conformity This cooking appliance has been designed to be used only for cooking Any other use such as heating a room is improper and dangerous This cooking hob has been designed constructed and marketed incompliance with Safety requirements of the LVD Directive 2006 95 EC Saf...

Page 3: ...troduction of product 3 Warnings 4 Preparation for installation and use 5 Using the oven 6 Cleaning and maintenance of your product 7 Service and Transport 2 For Customer Services Spare parts Warranty Information please call 0845 683 8717 2 ...

Page 4: ...ill Thermostatic W 2000 Double Grill Thermostatic W 3200 Fan W 23 35 Oven Functions Up to 9 Thermostat Operation Indicator Light Yes Oven Operation Indicator Light Yes Digital Minute Minder Yes Roasting Tray Deep Tray 1 Chromed Grid with Stoper 2 Broil Pan with Handle Set 1 Total Power Depends on Model Maximum kW 3 2 Tangential Cooling Fan W 11 5 Voltage V 230 Energy consumption according to the E...

Page 5: ... 5 Tray 6 Lower Heating Element behind the plate 7 Upper Heating Element behind the plate 8 Wire Grill 9 Racks 10 Oven Light 11 Turbo Heating Element behind the plate 12 Fan behind the plate 13 Air Outlet Shutters For Customer Services Spare parts Warranty Information please call 0845 683 8717 4 ...

Page 6: ... wedged during the installation of the appliance If the gas supply cord is damaged it must be replaced by the manufacturer its service agent or similarly qualified persons in order to avoid a hazard Before replacing the oven illuminating light turn off the power to the appliance Switch off the appliance before cleaning maintenance work etc Some parts of the appliance may preserve their heat for a ...

Page 7: ... in the event any damage occurs to the power cord For the models with timers make sure to adjust the time at first run or in case of a power failure Heat and moisture will form in your cooking environment Throughly ventilate your kitchen When you first run your oven a certain smell will be emanated arising from the insulation materials and the heater elements For this reason before using your oven...

Page 8: ...ok in your oven the oven function and temperature setting butttons need to be adjusted and the oven timer if avaible needs to be programmed Otherwise the oven will not operate While the oven door is open do not place anything on it You may disturb the balance of the appliance or break the door Unplug your appliance when it is not in use Protect your appliance from atmospheric effects Do not leave ...

Page 9: ...tructions should be read by a qualified technician to ensure that the appliance is installed regulated and technically serviced correctly in compliance with current regulations Important disconnect the cooker from the electricity when making any adjustement maintenance operation etc Electric oven and hobs must be connected to an electrical cooker powerpoint consult a qualified electrician Products...

Page 10: ...0mm 600mm 1 555mm 575mm 560mm A DETAIL 20mm Minimum 40mm The wooden part can be extended up to cut out depth Product sizes C 555mm 555mm 570mm Mounting screws 57 0m m 59 0m m 595mm B DETAIL Countertop Built in oven Min 25mm Control panel Distance between countertop and control panel Min 50mm Built in hob Distance between countertop snd top panel of built in oven 3 2 INSTALLATION OF BUILT_IN OVEN F...

Page 11: ...w with the earthing mark Supply cable connection must be as shown in Figure 6 If there is no earthed outlet conforming to regulations in the installation environment call theAuthorized Service immediately The earthed outlet must be in close vicinity of the appliance Never use an extension cord The supply cable should not contact the product s hot surface In case of any damage to the supply cable m...

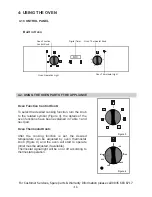
Page 12: ... to the related symbol Figure 3 the details of the oven functions have been explained in Table 1 and next part Oven Thermostat Knob After the cooking function is set the desired temperature can be adjusted by oven thermostat knob Figure 4 and the oven will start to operate timer must be adjusted if available Thermostat signal light will be on or off according to thermostat operation 0 50 100 200 2...

Page 13: ...at warning lights the lower heating element will be switched on the fan The oven s thermostat warning lights the lower and upper heating elements will be switched on The oven light will be turned on Availability of the functions explained below vary depending on the product model Defrost Function Figure 5 You can start the defrost operation by putting the frozen food into the oven and bringing the...

Page 14: ... preheating of 10 minutes place the foods into the oven which need to be put into suitable containers This function is suitable for cooking multiple dishes If you are going to cook using two trays at the same time while adjusting the cooking temperature select the temperature that is the lowest among the levels suitable for your foods as shown on the table Cooking with two trays requires additiona...

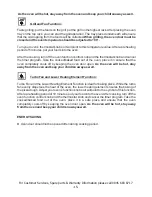
Page 15: ...ill be hot stay away from the oven and keep your children away as well Upper Heating Element and Grill Function This function is used for faster grilling For grilling put the foods on the grill put the grill on the highest rack After placing the oven tray on the Rack underneath you can start the grill operation The tray placed on the underneath will ensure that the oil dropping from the foods will...

Page 16: ...ff by keeping the oven door open As the oven will be hot stay away from the oven and keep your children away as well Turbo Fan and Lower Heating Element Function Turbo Fan and the Lower Heating Element Function is ideal for baking pizza While the turbo fan evenly disperses the heat of the oven the lower heating element ensures the baking of the pizza dough Adjust your oven s function knob so it wi...

Page 17: ...ntinues working In order to turn the oven off you must take the switch and thermostat of the oven to closed position 4 5 DIGITAL TIMER SOUND ADJUSTMENT While the timer shows the time of day if the button on the left minus button is kept pressed for 1 2 sec timer will give an audible signal beep After that each time the button is pressed timer will give three different types of signal beep Do not p...

Page 18: ...min min min min 4 3 4 4 1 2 1 2 1 2 3 1 2 3 1 2 3 2 1 4 1 4 1 2 1 2 2 1 2 1 2 3 1 2 3 2 1 2 For Customer Services Spare parts Warranty Information please call 0845 683 8717 17 Cooking guide ...

Page 19: ...peratures forming during the cooking frying operation This is normal physical state may change during the heat transfer Do not leave a glass tray or container in a cold environment immediately after cooking in them Do not place them on cold and wet surfaces Ensure that they slowly cool off placing them on a dry piece of cloth Otherwise the glass tray or container might break If you are going to pe...

Page 20: ... in the cavity put it to any rack and push it up to the end Wire grid x 2 The accessories of your oven may be different due to the model of your product Grill pan set is used to grill bread bacon sausages steaks etc WARNING The grill pan has a detachable handle Ensure when using the grill pan handle that it is centralised and securedas seen in the picture Do not leave the handle in position when g...

Page 21: ...esults if you clean the oven interior while the oven is slightly warm Wipe your oven with a soft piece of cloth dampened with soap water after each use Then wipe it again this time with a wet cloth and wipe it dry For products with catalytic enamel frames the rear and side walls of the inner frame do not require cleaning However depending on usage it is recommended that you replace them after a ce...

Page 22: ...ually Control the shelf locations cooking period and heat values according to the manual Except these if you still have any problem with your product please call the number below 6 2 INFORMATION RELATED TO TRANSPORT If you need any transport Keep the original packaging of the product and carry it with it when moving Follow the transport signs on case Place paper between the upper cover and cooking...

Page 23: ...duct batteries it means that the product batteries should not be disposed of with your general household waste Only discard electrical electronic battery items in separate collection schemes which cater for the recovery and recycling of materials contained within Your co operation is vital to make sure the success of these schemes and for the protection of the environment For your nearest disposal...

Reviews: