5
x
Control unit operation
37
FA ROTEX Solaris RPS3 25M - 03/2010
5.3.4 Password protection
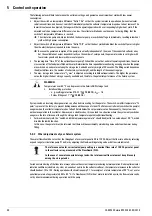
The Specialist level of the setup menu is protected by a password, which must be entered at the beginning of the setup menu.
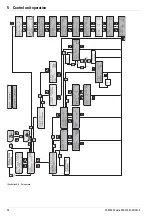
Also the User level can be protected. The User and Specialist levels are identified by different colours in Image 5-5.
Alternative fast access to the setup menu:
After switching on the controller, during the start display, with a long press on the "up" arrow key (+).
As long as the system is being operated manually, no further password entry is required. Passwords remain valid for about
10 minutes after the last key has been pressed. After entering the password for the required level, the following display appears
for about 2 seconds:
– "User OK",
– "Specialist OK" or
– "Incorrect password".
User password
When delivered, this password is not activated in the Solaris R3 control unit. By entering a 4-digit number code, all the parameters
adjustable in User level are protected against unauthorised access (child protection or caretaker function). The parameters in the
user level can only be changed with a deactivated or valid user password.
The activation and changing or creation of the User password are performed in the menu path: "Choice 1/2" -> "Functions" -
> "Change code" (see Image 5-5):
•
Enter the old password in the field "present 0000”, and the new password in the field "new 0000”. Hereby, every digit must
be confirmed with the OK key.
•
When assigning a new password, it must be entered in the field "present 0000” as well as in the field "new 0000”.
If the User password is enabled, the menu item "Choice 1/2" only shows "Password 0000". The User password is enabled only
after 10 minutes or after a restart of the Solaris R3 control unit.
Specialist password
The Expert password is entered in the menu item "Choice 1/2" under "Password 0000". It provides access to all the important
system parameters required by the specialist in the setup menu (see Image 5-5).
5.3.5 Language selection
During initial commissioning or after an overall reset, the display (Image 5-3) is stopped during the start-up, and a language
selection is requested.
•
Use the arrow keys to select your language, and confirm it with the OK key.
Another language can be selected retrospectively in the set-up menu in the menu path: "Choice 1/2" -> "Functions" -> "Change
language" (Image 5-5).
Alternative fast access to the language selection:
Simultaneously press the OK button and the "up" arrow button (+).
5.3.6 Adjusting and resetting parameters
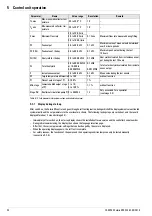
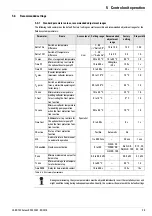
Parameters are set as in Image 5-5. All adjustable parameters are shown with access level, adjustment range and factory setting
in Table 5-5. The menu item: "Choice 1/2" -> "Parameter choice" -> "Reset" allows the maximum values and calculated values
(see Table 5-5) to be reset. Hereby, the selected max. value is set to zero immediately with the OK key. The arrow key “Down”
cancels this operation, and the cursor goes back to the left. The OK key confirms the choice. Repeated pressing of the key
“Down” takes you to the field "Choice 2/2". Confirming "Back" returns you to the operating display.
The overall reset function can be initiated via the menu path: "Choice 2/2" -> "System" -> "Reset". The system will then be
restarted (see also Section .5.2.8)
An overall reset causes all individual settings to be lost and the incidence memory to be cleared. All calculated
quantities (info parameters) are set to zero.
When the overall reset function is initiated via the menu path, the total heat yield is preserved. Using
the rapid access via the key combination, even this value is deleted.

