


1-2
1.2 Hardware Installation Overview
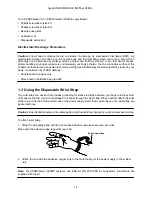
Shutting Down the System
Caution: To avoid damaging internal circuits, do not disconnect or plug in any cable while power is applied
to the system.
Important: Record NVRAM configuration parameters (especially those that are non-standard) before
installing the new boot PROMs, as the new boot PROM(s) will reset values to the default setting.
To obtain a list of NVRAM parameters, type
eeprom
at the shell prompt.
Resetting NVRAM parameters to their defaults includes turning on diagnostic mode and setting the default
diagnostic boot device to network. If you do not want your system to boot from the network, change the
diagnostic switch to false.
Use the following command to turn off the diagnostic switch:
setenv diag–switch? false
Before you turn off the system power, you must halt the operating system or loss of data can occur. To shut
down the system and give users a shutdown warning:
1. Back up the system files and data to tape, if necessary.
2. Notify users that the system is going down.
3. Halt the system using the appropriate commands.
4. Wait for the system-halted message and the boot monitor prompt.
5. Turn off the system power in this order:
a. External drives (if connected)
b. System unit
c. Monitor
If you require more specific information about turning off the system power, refer to the hardware service
manual for your system.
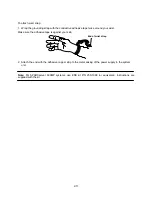
Caution: Turn off the power at the main AC breaker before you insert or remove boards and disk drives. Do
not disconnect the AC power cord from its receptacle.
Tools Required for Module Installation
To remove or install the MBus or hyperSPARC module, you will need:
For a SPARCserver 600MP System Board
Phillips screwdriver (size #2)
Flat blade screwdriver
Allen wrench (2.5 mm)
ESD kit P/N 250-1088
Summary of Contents for hyperSPARC
Page 2: ...hyperSPARC Module Installation Guide TM...
Page 9: ...1 4...
Page 21: ...2 12...
Page 55: ...5 10...