


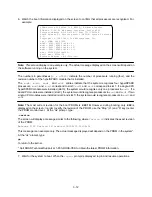


3-11
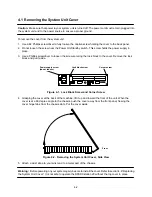
Captive screw
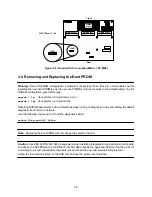
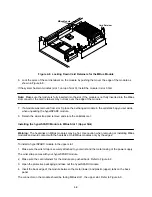
Figure 3-15. Location of Captive Screw on the Rear Panel
5
.
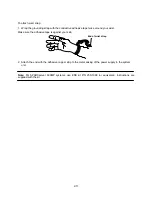
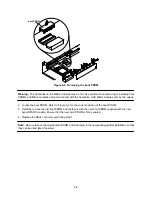
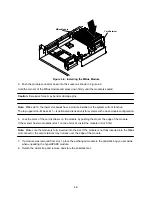
Push down on the unit top along the right and left edges so that the top cover seals properly to the
system chassis.
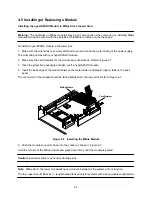
3.7 Starting Up the System and Verifying Installation
Warning: Before powering on your system again, be sure to install the cover. It is not safe to operate the
SPARCstation 10 without the top cover in place.
Warning: This device is equipped with a 3-wire grounded power cord. To reduce the risk of electrical shock,
always plug the power cord into a properly grounded power outlet.
Caution: Always allow 10 seconds between turning off the power and turning the power back on. This pause
prevents possible damage to power supply components in your system unit.
Turn the power switches on in this order:
a. Monitor
b. External drives
c. System Unit
To power-up the system and verify installation set the power switch on the chassis to the ON position.
Important: The power-on self test (POST) will run on each CPU. Therefore, the length of time for POST to
complete will depend on the number of CPUs installed in your system. Do not be alarmed if initially you do
not see any display on the monitor. In a configuration with four processors, POST completes in approximately
eight minutes.
Note: Once
power-on self tests
are completed and functional modules are recognized, the operating
system will configure itself automatically to take advantage of all available processors.
Summary of Contents for hyperSPARC
Page 2: ...hyperSPARC Module Installation Guide TM...
Page 9: ...1 4...
Page 21: ...2 12...
Page 55: ...5 10...